 We’ve been working on a path from our house to the back portion of our property since last fall and finally made it all the way up to where we want to build a campsite in the woods. We’ve developed our own little landmarks along the path- such as “Couch” for a huge fallen tree we sometimes stop to sit on, “the twins” for the oak that starts as one tree at the bottom and splits about chest height into two huge, separate trees. Jabberwocky for the tree that looks like it has a knobby, twisted face.
I had originally planned some sort of an Alice in Wonderland theme to mark the path along the way, but then decided I wanted a bit more variation. So instead of one piece of literature, I went with many.
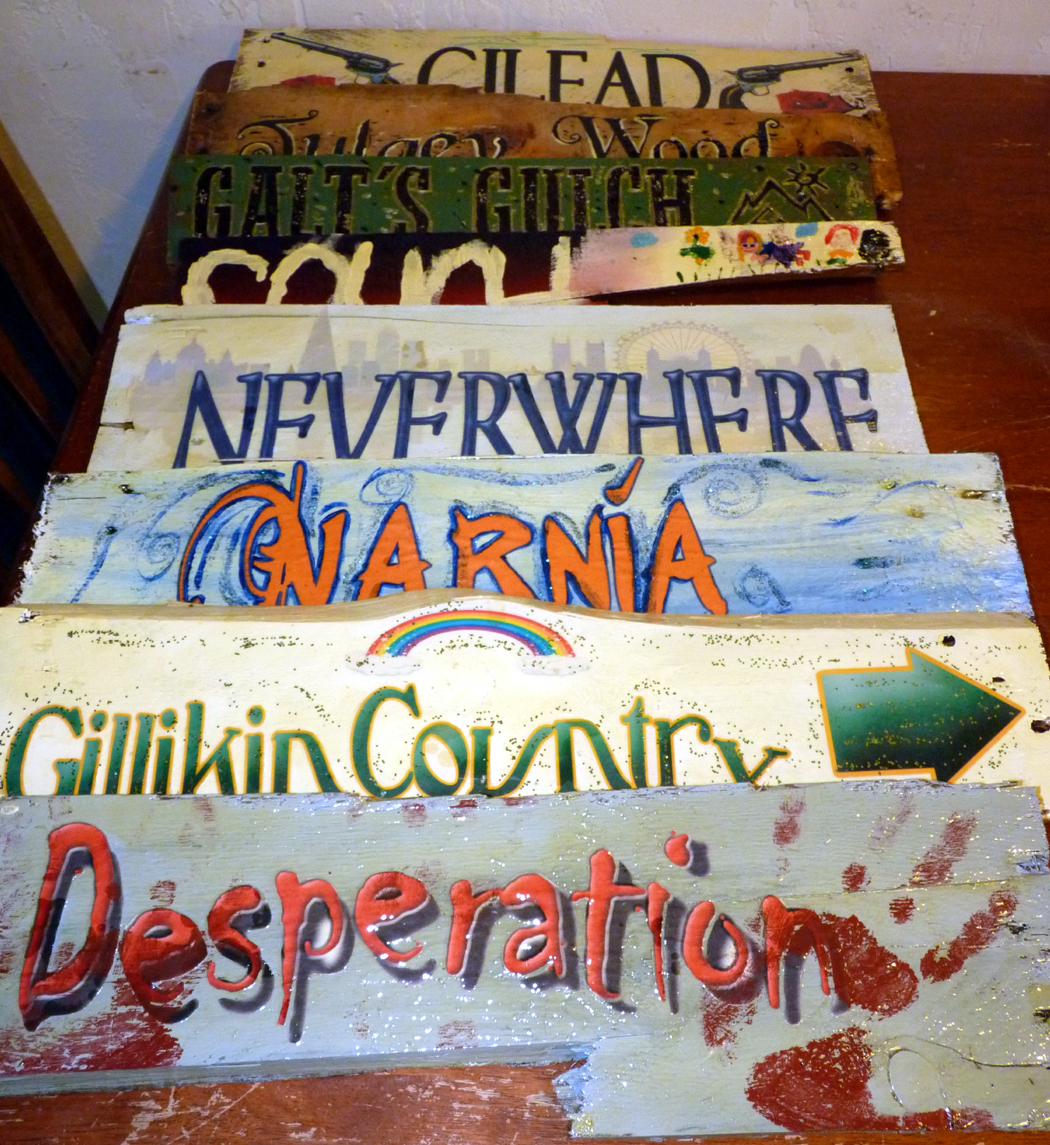
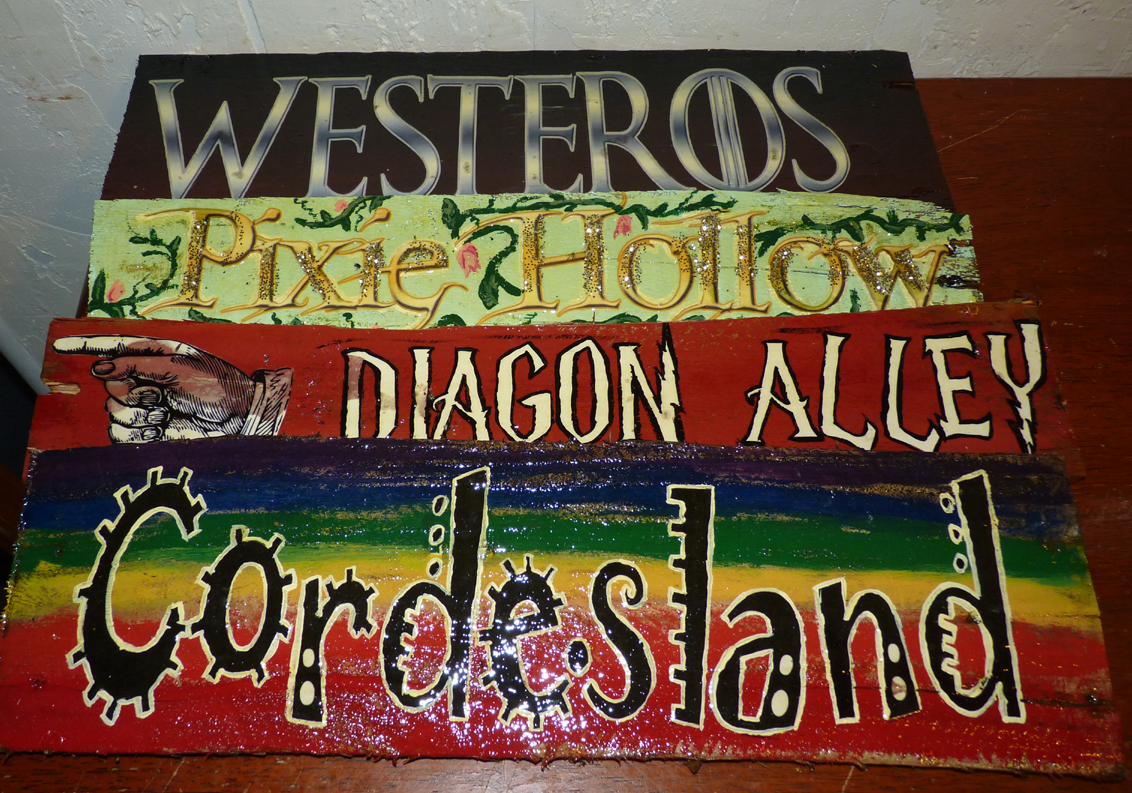
With the help of my 6 y/o daughter, we’ve came up with a list of places from various books that we could put on the signs. I then did some browsing on various font sites online to find original fonts for each design. Each one has hand painted details and is sealed for outdoor use.
 1.I had wanted some boards to make signs, but hadn’t come across anything that suited me- until Tom brought home a pallet from work. He said, “I thought you might want to make something out of this.” I clicked around Pinterest for a while, looking at stuff to make from pallets, when it hit me… this slightly ratty, split wood that breaks unevenly on the edges it PERFECT for the signs I wanted to make. So I pried apart the pallet, Tom cut the boards in half with a chainsaw and I had the perfect wood for my signs.
2. To make the signs look like they’d been there a long time, I needed boards with split or uneven edges, but they were also very dirty. I had to do a bit of cleanup before I could use them. I scrubbed each one with a wire grill brush and dish soap, then let them dry overnight before I started painting on them.
3. Before doing any lettering on boards themselves, I did mock-up designs in Microsoft Word to see how the fonts were going to look. I made little notations to myself under each font, like this:
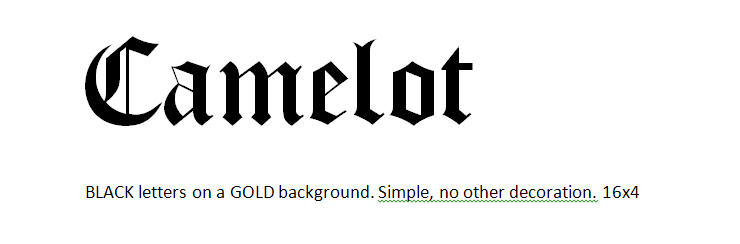 By using digital fonts, you don’t even have to be especially artistic to do this, just good at cutting things out with scissors. I didn’t label the font itself in my notes, since it shows in Word what font you are using when you click on the word itself. The Camelot font is one I downloaded called, “Old London.” I noted basic colors and the size of the board so I could size the letters properly in Photoshop.
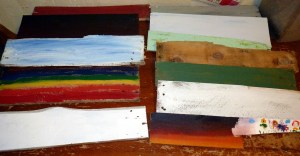
4. We painted the backgrounds of each board according to the notations in my list. For example, I used a black to red ombre background with silver-metal effect lettering for Westeros. Let your kids help! I didn’t want the paint to completely cover the wood, because the idea was to have these look a bit weathered. My daughter had a blast painting the backgrounds for the signs. 🙂
We let everything dry overnight before starting to add letters. Some of the backgrounds, like Gillikin Country and Pixie Hollow I added colored glitters to the backgrounds. We wrote the name of each sign on the back of the boards, along with the board dimensions.


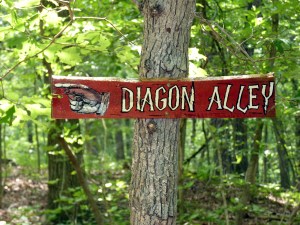
5. In Photoshop, I opened a file the exact same dimensions as my board. This way, I didn’t have to wonder if they would fit when I printed them out. I also used Photoshop to add color to the fonts, shadows, metal effects, etc. Some I had to split up if they wouldn’t fit on an 8×11.5 sheet of paper. To some designs, I also added pictures- like the pointing hand for Diagon Alley, or the Rainbow in Gillikin Country.
 6. I printed my designs out and rough-cut them to double check that they would fit on my board.
 7. This is the REALLY tedious bit. I cut out every detail of each letter until all the white of the paper was gone. For some of them, this was a real challenge. The letters on Tulgey Wood had a lot of little curlicues on the ends and I just couldn’t cut those spirals out without tearing the paper. I wound up just cutting some of them off and painting the curlicues back on after the letters were pasted down. Once you have everything cut out, dry fit the letters again so you can see how they’ll look before you past them down. You might want to lightly draw a pencil line on the board to make sure the letters line up straight.
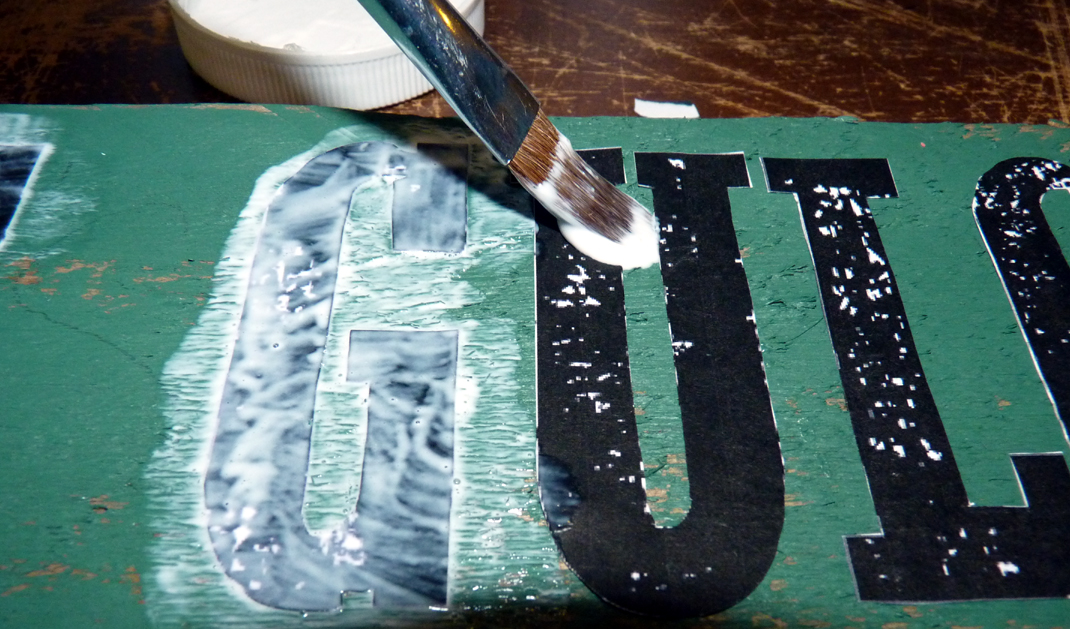
 8. I used an outdoor formula of Modge Podge to glue the letters to the board. I can’t say if other adhesives would work better or worse. I can say that the Modge Podge was very easy to brush on each bit of paper, stuck well and cleaned up with just water. It was also very forgiving of mistakes, since it dries clear. I did all my cutting/gluing while watching TV, since this is a rather long and tedious process.
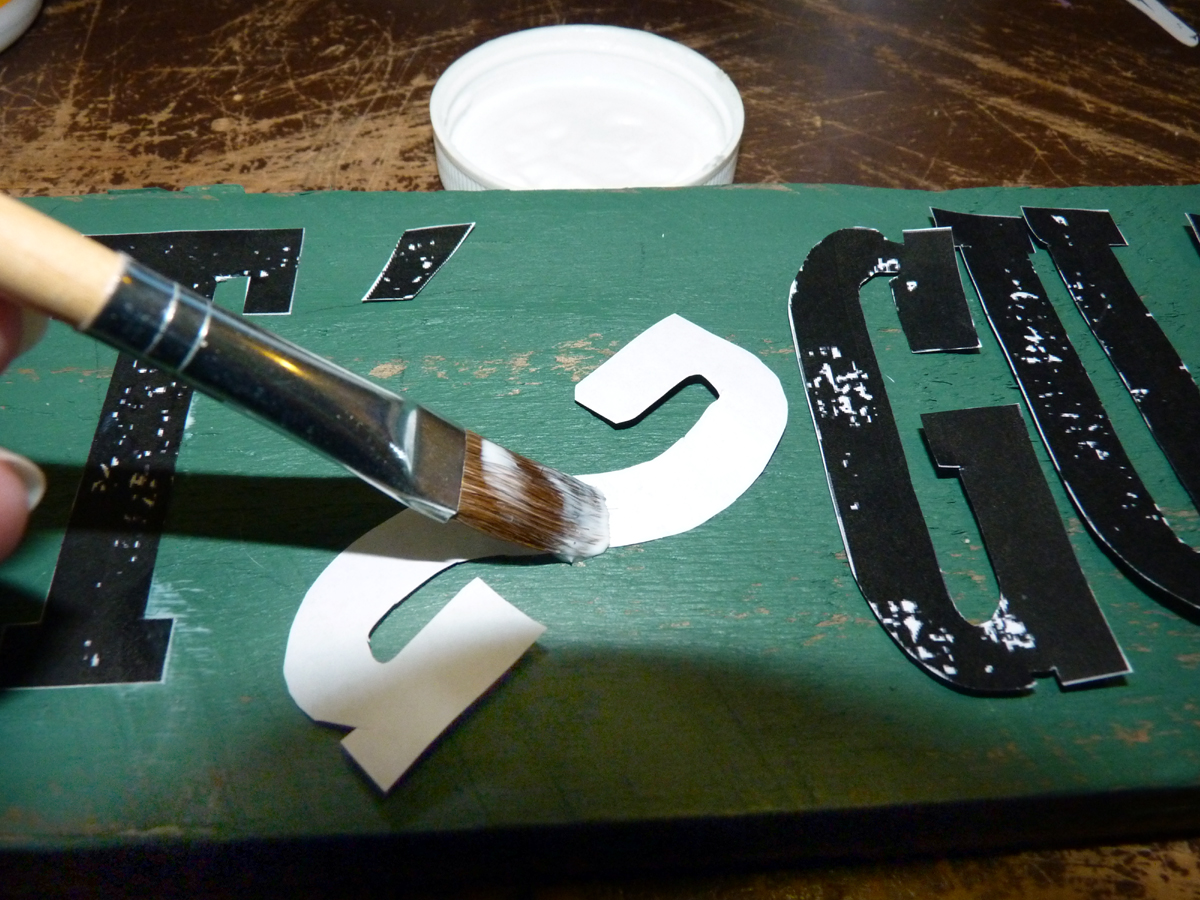 9. After the letters dried for a few minutes, I went back over them with several more coats of Modge Podge. I didn’t realize just how important this step was until I started sealing the boards later. The outdoor sealant will get into every crack and crevice it finds and it can discolor your printed letters if you don’t seal the edges properly. I did at least 3 coats around the edges of each letter, until they felt raised to the touch. I only let it dry for a few minutes between each coat, (it was still slightly tacky to the touch) as I was lazy and didn’t want to have to sand it each time.
 10. I let all the layers of Modge Podge dry overnight. We had several boards in various steps of the process at once, so I could work on others while I waited for dry-time. I hand painted designs, outlines and other embellishments over the sealed letters. This was the really fun part! On Pixie Hollow I added vines and pink bell-shaped flowers. I brushed over the letters with a bit of glue and sprinkled glitter over it, waited for it to dry and brushed it with a dry paintbrush to remove the excess. My daughter loved the sparkles.
 11. This is the Galt’s Gulch sign finished with silver outline detail, a logo and few random splatters.

12. I let everything cure at least 24 hours before sealing. I rushed one of the signs and the paint detail/lettering smeared a bit when I put the lacquer on it. The lacquer is horrible smelling, hardcore stuff. The hardware store did not sell outdoor polyurethane other than in a spray; I didn’t want a spray, because I wanted to make sure the coating was very thick. These boards have a lot of little splits and rough edges- which gives them great character, but also leaves a lot of places for the  weather and insects to damage when left outside. I did do research prior to buying a sealant and read that supposedly poly’s tend to yellow outdoors while lacquer supposedly doesn’t. I must have read the wrong forum, because the lacquer yellowed every bit as bad. I did notice that the outdoor Modge Podge didn’t yellow, not even a little bit. But it also warns that the project may have to be re-treated each year to keep the finish weatherproof. Hoping for lowest possible maintenance, I went ahead and used the lacquer. The yellowing is most obvious on white or light colors. On straight wood or darker colors, it looks just fine. You want to do this step outdoors. It says right on the can that prolonged breathing of the fumes can lead to central nervous system damage. Wear gloves, don’t let the kiddos help with this step and if you have asthma or any other breathing condition, pick up a mask at the hardware store that is made to block fumes.
13. After sealing, the signs had to dry for several days (3 minimum) before they felt smooth, hard and no sticky or tackiness. (For Pete’s sake, sometimes writing about this stuff sounds like I’m writing erotica! LOL) The biggest pain the butt with this stage was that they had to lie flat and couldn’t be stacked or touching anything until they were completely cured. I only had to leave them outside for a couple hours before I could pick them up and bring them in without getting lacquer on my hands though.
14. We pre-drilled holes in each sign to keep the wood from splitting when it was fastened to a tree. This may seem like unnecessary work, but if you don’t drill the holes and you split your entire sign in half with a screw, you’re going to be upset about losing hours’ worth of work. I’m happy to say that because we did pre-drill, none of the signs we’ve hung so far cracked a bit.
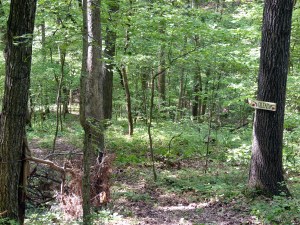
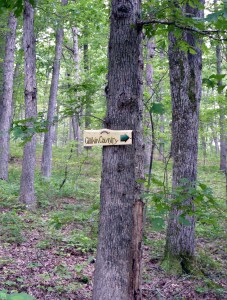
 Here’s what they look like hung in the woods. As of right now, I still have 7 left to seal the backsides of and 3 more that I’m still doing detail work on. I’ll post the rest on Facebook at https://www.facebook.com/BelleOfDirt when they are finished. I also have plans to maybe make a few signs for friends/family. I’m thinking these would make cool “just because” gifts. If you want to see the individual designs, I’ve posted them below in a gallery.
Meanwhile, the garden is finally starting to take off after its late start and I’ll be posting a few updates on how those Hugelkultur mounds are working out. I’ve been doing a lot of reading on sustainable farming/gardening.
Until then,
B


I really enjoyed this. Io won’t ever be this ambitious but have shared it with daughter.
LikeLiked by 1 person
Thanks much Sharon! And thanks also for sharing! 🙂
LikeLike
I would TOTALLY do this if I had a yard in which to put them. I bet you could sell them on Etsy, too!
LikeLiked by 1 person
I thought about doing that. Not sure how careful I’d have to be about what I put on them though. These could clearly violate intellectual property if I were to sell them instead of making them strictly for my personal use.
Thanks!
LikeLike