It’s seedling time!
I spent a good part of today getting seeds started in the table top greenhouse Mister bought me for Christmas. Together with the HUGE greenhouse he gave me for Valentines’ Day, I’m SET for the season. A man who truly knows where my heart lies… in the dirt. LOL
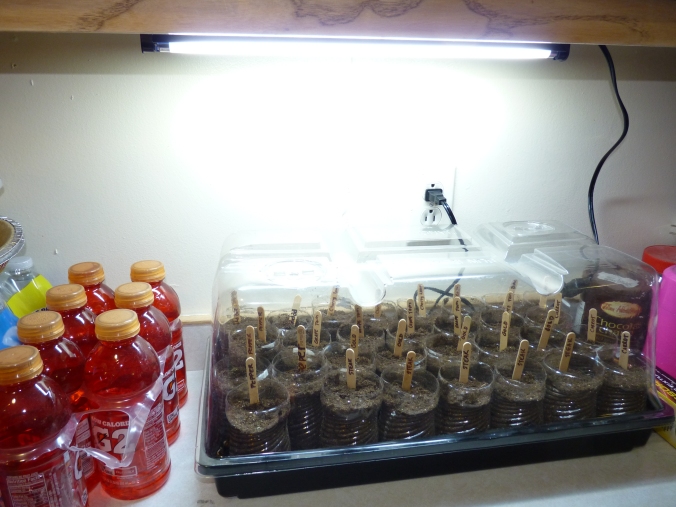
We’ve been saving up our plastic water bottles for a couple of weeks. Had a whole box full under the kitchen sink- they were starting to overflow the box and roll out on the floor. I’d have to punt water bottles at random while doing dishes or making dinner. I cut the tops off about half-way down and use the bottom portion for planting seeds.
If anyone has any brilliant ideas for a use for these cut-off tops, I’d love to hear it. You can only keep so many about for funnels.

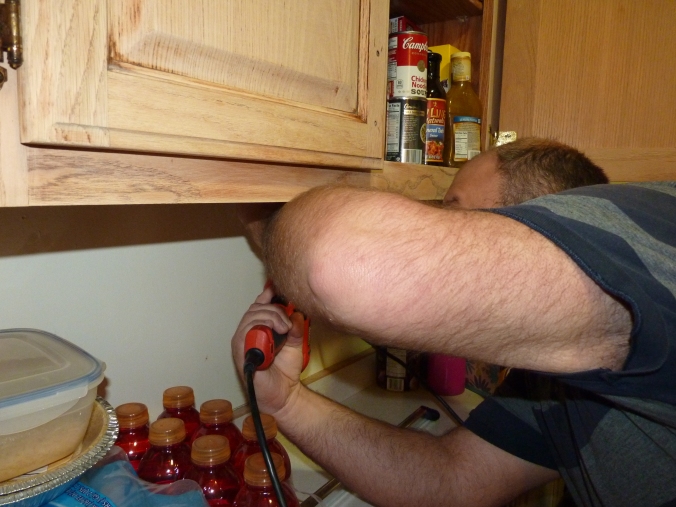
Mister was kind enough to mount a bracket under the cabinet where my table-top greenhouse sits, to hold the grow light in place. It wasn’t a have-to thing with this set up, the photo on the box shows the light sitting directly on top of the greenhouse itself. I feared that it would wind up melting the plastic when left on for a long time or get knocked off and wind up broken. Those grow lights can be expensive! It gives TONS of light, even mounted a couple inches above the box. Much more than the light through the window or the grow bulb I had rigged up the previous year. This was a nice kit- the lid sits up almost a foot high, so the seedlings have plenty of room to grow, there are vents in the top that can be opened and closed. I’m not sure exactly where he got it, but I found one on Amazon that looks very much like this one for around $50, light included: Table Top Seed Starter Kit
There are some really pretty Victorian style ones if you’d rather have something elegant that isn’t plastic. I’m happy with this, it gets the job done, it’s washable and it will do a fabulous job growing strong seedlings. I’ve always had issues with not enough light in the past. Our only window with southern exposure is in our office. It’s tiny, the cats love to knock off the few plants that are in there, it’s not the most optimal place to start seeds. No cats here, it fits on the counter and did I mention… I really love the light. There’s something really inviting about it, like with real sunlight.
I’m doing several different sorts of tomato this year, as I couldn’t decide which I liked best. I have a yellow cherry, a roma, a beefsteak and a roma grape that we’re going to try. I’ve been saving up bell pepper seeds from the peppers we get from the grocery store, they worked fine last year. They aren’t quite true to the original, but actually had a stronger (but still sweet) flavor. Peppers LOVE heat, so I may keep some of those plants in the greenhouse this year and see how they do. We also have a package of carrot seeds that Burpee sent as a free gift. We’ll be starting cucumber and snow peas, but I direct sow those into the garden at planting time instead of starting them in the house. Peas don’t mind a little chill and cucumbers grow extremely fast and produce long before other plants that are direct-sowed.
I use a basic seed starting mix (which is mostly made of peat) to fill the bottles. The reason you use this instead of potting soil is that it’s sterile- meaning there shouldn’t be weed or grass seeds sprouting in it and competing with your plants. Also, it’s very light, fluffy and holds water well, so those frail little starter roots don’t have to fight through heavy dirt to get moving. I filled over thirty bottles with a single bag.
The Popsicle sticks I saved from ice cream bars. I love these things, they are great for stirring paint, apply glue or plaster, scraping sticky things and work great as plant markers. I just write on the ends with a permanent waterproof marker. The last time I started seeds, I used bendy straws. Whatever you have handy is fine, so long as it’s waterproof and you can write on it. I’ve used bits of foam egg carton, plastic bottle, straws, peeled tree branch, you name it.

This is the final set-up, all planted and sunning on my counter. I noticed that the the light spreads quite a bit past the sides of the greenhouse. I think I may add a couple more bottles on one side with a pear and cherry tree seeds I want to play with. If I don’t cut the tops all the way off, they’re like single mini-greenhouses. Might as well take advantage of that light! 🙂
I’ll post more progression pictures as things start to sprout. One note on water- don’t drown your seeds! They only need a bit of a drink to start with, then check them every day to make sure they don’t dry out, but don’t let them just sit in water. It can rot delicate roots very quickly if they get too wet. I don’t have a heat mat under mine, so they don’t get quite very warm and dry out quickly. The clear bottles aren’t organic like peat pots, toilet paper rolls or as convenient maybe as plastic cell flats- but they are really nice for checking on whether the plant needs water at a glance (the peat is darker when it’s wet) and how the roots are coming along. If there are seeds near the side, you can even see them break through the seed coat and sprout. My daughter loves to watch this happen, she thinks it’s amazing.
She helped plant and water all the seeds. She even tagged a couple of the sticks for me. 🙂
She’s a wonderful little garden helper.
I was serious about those water bottle tops. I would love to hear your ideas or suggestions. I hate putting useful stuff in the trash!
-B


You might be able to make a mini self-watering pot. Turn the top upside down, and place it in the bottom so it rests on the base. You would use less potting mix, extra water would be stored in the reservoir, and the plants might pop out easier too. Use the lids to scrape off baked-on food from casseroles and baking sheets. I hate throwing away something that could be reused too!
LikeLike
Thanks Sarah! I love the self watering pot idea. Might even let my daughter decorate some with paints. 🙂
LikeLiked by 1 person