Remember all those gourds I grew over the summer and have been drying?
I wound up with about 40 of them that dried properly, so one of the projects I’m doing with my 4-H crafts group this year is to make birdhouse gourds.
I pre-prepped a little before they go there, bleached them and scraped that thin slime coat off with a flat razor blade and let them dry over night. The girls drilled holes yesterday, cleaned out the insides and saved whole envelopes worth of seeds to take home and hopefully grow their own gourds. I’m posting the instructions I gave them before. (Pictures aren’t mine, they are screenshots from the tutorial I used to figure all this out at https://www.diynetwork.com/how-to/outdoors/structures/how-to-make-a-gourd-bird-house)
HOW TO MAKE A BIRDHOUSE FROM A BOTTLE GOURD
- Grow and dry a gourd.
You can buy birdhouse gourd (bottle gourd) seeds online or at your local nursery. They take 6-8 weeks to grow before the last frost, so you’ll want to start seeds inside and transplant into your garden, or get them in the ground right after last spring frost (around Mother’s Day in this part of Missouri)
To dry your gourds, you need to hang them in a place where they will get air flow on all sides and if inside, warm and dry. Do not hang them in a basement or cool, damp area- they’ll just rot. You can leave them outside, but make sure they are in a sunny area with good airflow on all sides. I trim the stem long- leaving about 6-8 inches- then run a needle through the base of the stem and poke a thin piece of wire through to hang the gourds from a nail or fence.
Your gourds are ready when you tap on them and they sound like a tight drum, or you can shake them and hear the seeds rattling around inside.
- Clean your gourd and drill a hole.
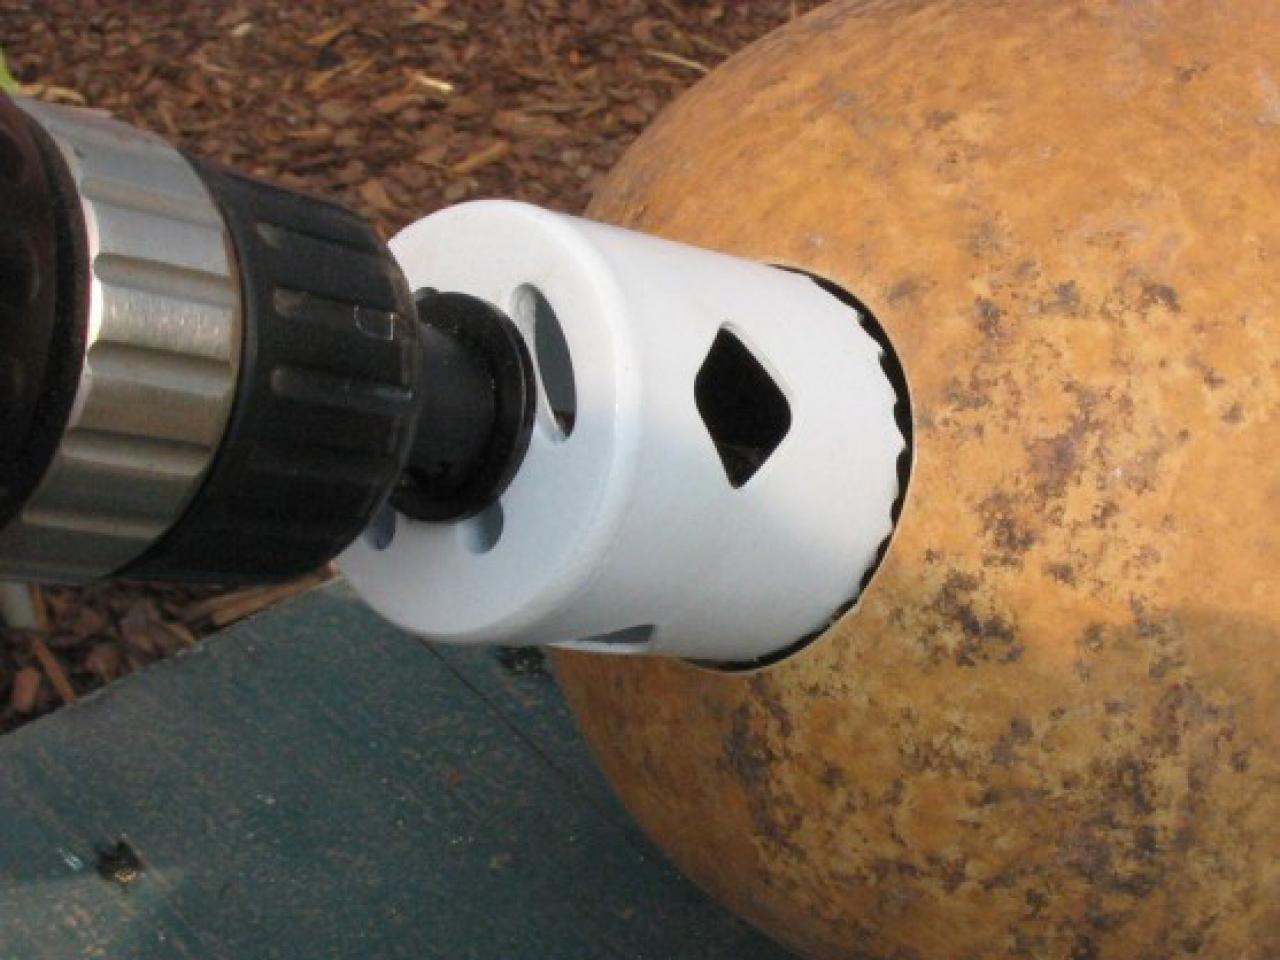
Using a hole saw, drill a 1 ½ inch hole into your gourd. We use 1 ½ in particular, because this will keep bluebirds safe if they nest in your gourd. A larger hole can allow aggressive European Starlings access to the bluebird’s eggs or young and the starlings will destroy them to take the nest.
With a long knife or spoon, clean out the seeds and pulp left inside. It doesn’t have to be spotless, the birds wont mind.
Use fine grit sandpaper to smooth the outside of your gourd, then soak for about an hour in a bleach solution of 1 part bleach to 9 parts water. Wipe clean, then let your gourd dry completely.
- Use an exterior latex paint to seal and prime the outside of the gourd. (Avoid oil based paint- they take WAY too long to dry) If you prefer the natural look of the gourd, you can also seal it with wax.
If using paint, do two coats, let both dry completely, then spray with a clear coat of outdoor polyurethane to protect your paint. If you’re going to decorate your gourd with designs- you’ll want to paint your design before the polyurethane step.

- Drill some small holes in the bottom of the gourd for drainage so it doesn’t hold water if rain gets inside. You can also drill a couple small holes through the neck of the gourd to add a bit of wire or a strip of leather for hanging.
*Painted designs will last longer and stay brighter if you choose a spot out of the sun. The birds will also appreciate a shady location when it starts to heat up outside! 🙂


