Missouri Ozarks mom, mover of earth, photographer, maker and plant enthusiast
PROJECTS
Belle’s DIY project tutorials with everything from home remodeling to sewing valentine boxes for school parties. There may be instruction sheets. There will most likely be Pinterest posts. You may even be able to eventually buy some of this random stuff on Etsy.
Sigh… Ok, I know it’s been months again since I’ve made a post, but I haven’t really had much TO post about. Work, hang out with my husband and kid- wash, rinse, repeat. Plus, as most of you know, I moved last August to Suburbia and left the orchard and garden I’d put seven years into behind with my ex husband. It’s ok. I’m not feeling sorry for myself and I don’t regret that decision AT ALL. Not one miniscule little bit. It was a lot of work, I had little to no help and even though I had all that space, land and time, it wasn’t fun anymore.
Danny bought us a gorgeous house with a massive yard last August. The only caveat is, it’s in the middle of a suburban neighborhood- something I haven’t lived in since I was in my early twenties and didn’t care that my “yard” basically amounted to a square of dirt under the windows of our apartment, which was taken care of by the landlord and surrounded by a half acre of concrete. It was close to the hospital where I worked. I had pizza takeout and a ready access to all the Diet Dr Pepper I wanted. I had house plants. I was good with that.
But we moved here and I missed my garden. The ground here sucks. It reminds me very much of the ‘soil’ at our house at Lake of the Ozarks. Clay with layers of rock, more clay, more rock and it’s either dried out concrete texture or sticky muck that roots drown and suffocate in. So we decided if we’re having a garden here, it will need to be like it was there: raised beds that sit on the hard, crappy ground instead of spending hours upon hours amending the soil IN it.
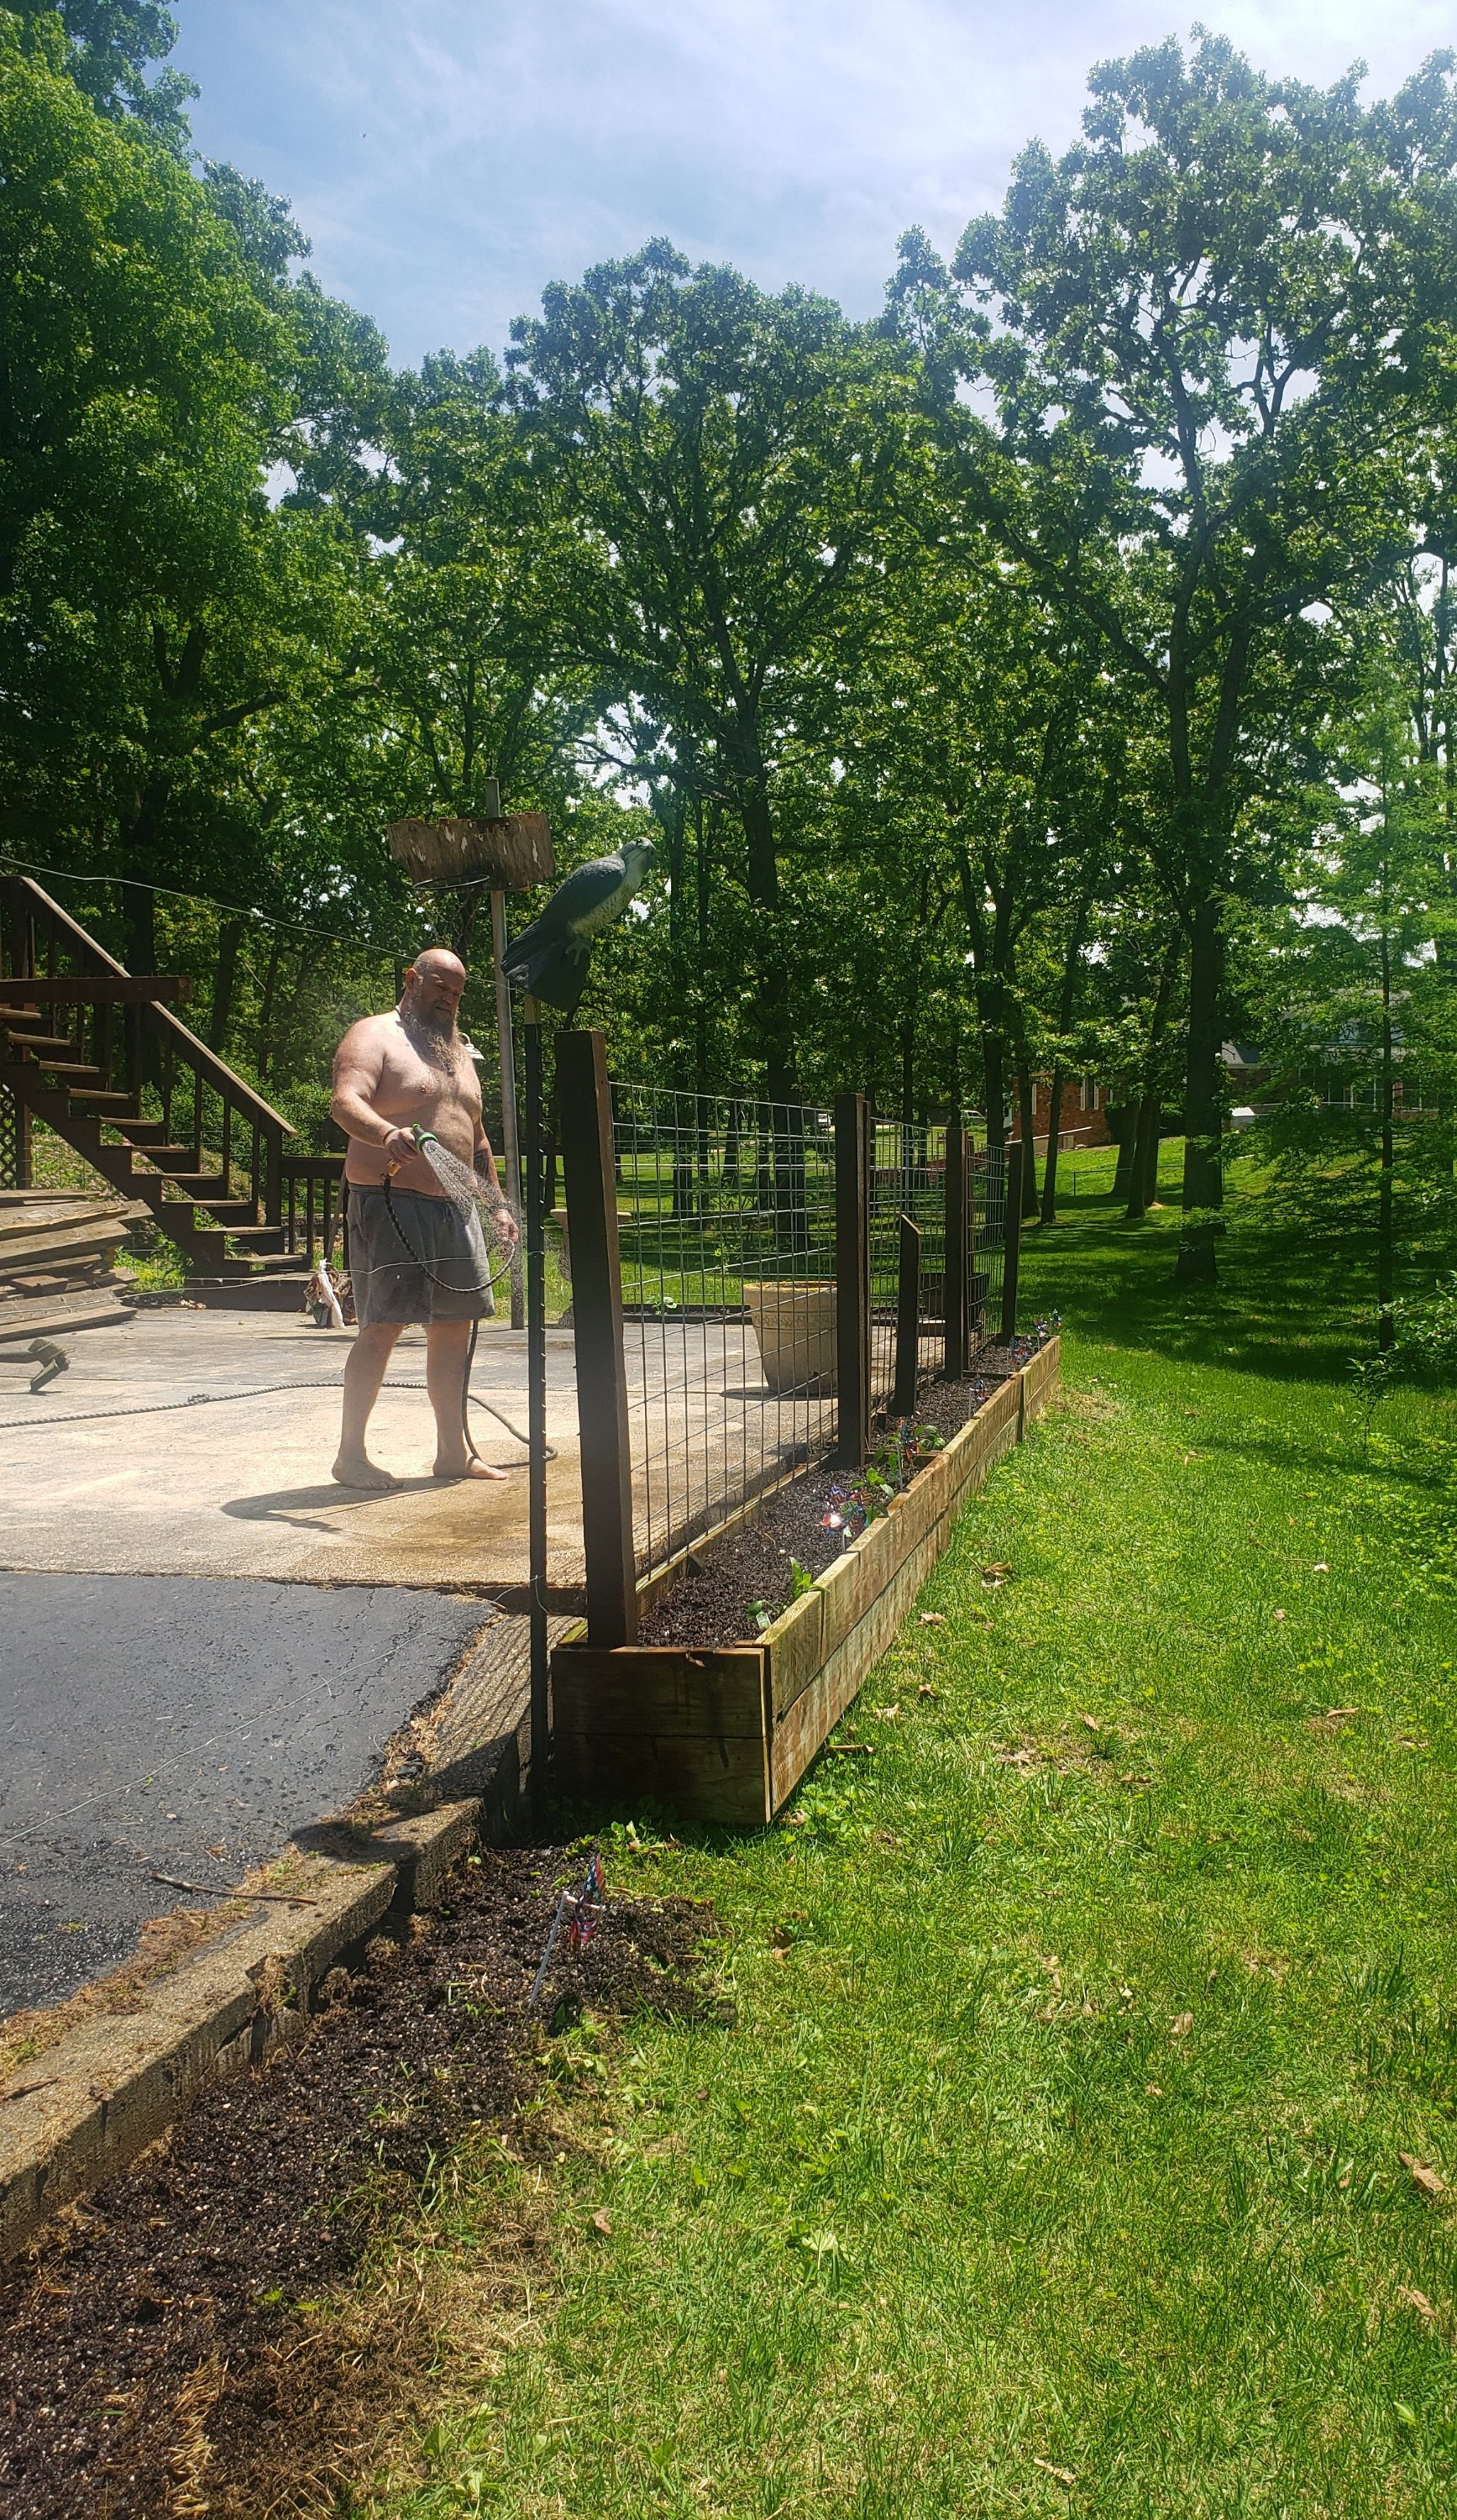
Our deck needed to be replaced and we had a bunch of leftover lumber that needed a purpose, so Danny built me boxes. ALL THE WAY around the patio. And this is a HUGE patio. Each one of these boxes is about 10 feet long, over a foot wide and about two feet deep… and he built four of them! So I now have more garden space than I’m sure I know what to do with. Ok, to be fair we did manage to fill every single box with plants, but that’s beside the point. The point is, I have a massive garden. And my husband is a freaking rock star who goes out of his way to make me happy.
He built all of this over a couple weekend’s time. The bottom of the boxes are lined with cardboard (leftover from our move), topped with brush, sticks, yard clippings and leaves. The other neighbors burn every leaf and cut blade of grass that falls on their lawn. I probably drive them batshit crazy.
He added posts and trellis and took me plant shopping. HE TOOK ME PLANT SHOPPING!!! I made a joke about needing to buy 87 plants and he just shrugged and told me whatever made me happy.
See? I told you. Freaking rock star.
So we planted all of this and then had to go back out and put some of the seeds back in the ground after the neighborhood band of marauding squirrels decided they wanted to play in the dirt and dig up a bunch of the plants. I’m threatening to purchase a slingshot, but haven’t yet, so Danny put electric fence around it. So far, the plants have been left alone for the most part and our dog has only been dumb enough to put her nose on it twice. >.<
I have tomatoes, okra, several kinds of beans, several kinds of cucumber, squash, zucchini, sunflowers. I haven’t the first inkling how to cook squash, zucchini or okra, but Danny assures me that he can and he will show me. I’m just over the moon that I have a big garden to fuss over again. And it’s right out the back door. Talk about convenience! And doubles as a privacy screen from the neighbors. We plan on rebuilding the deck soon, but until we do, I will have a nice little spot to sit behind my plants.
My daughter also got me a wisteria for Mother’s Day. A plant I had at the Lake but was forbidden by my ex to have at the farm. She told Danny she was buying me a wisteria… he said, “Good, she’ll love that.” 🙂 Told you. Spoils me. Not sure how he’s going to feel about modeling for Dirt. We’ll see? Better to ask forgiveness than permission? 😉
I’ll keep you updated on how all this turns out. I’ve never had to garden while paying a water bill before, we had well water both at the lake and the farm. I did at least build layers into these beds, so they should hold water well, especially as they break down over time.
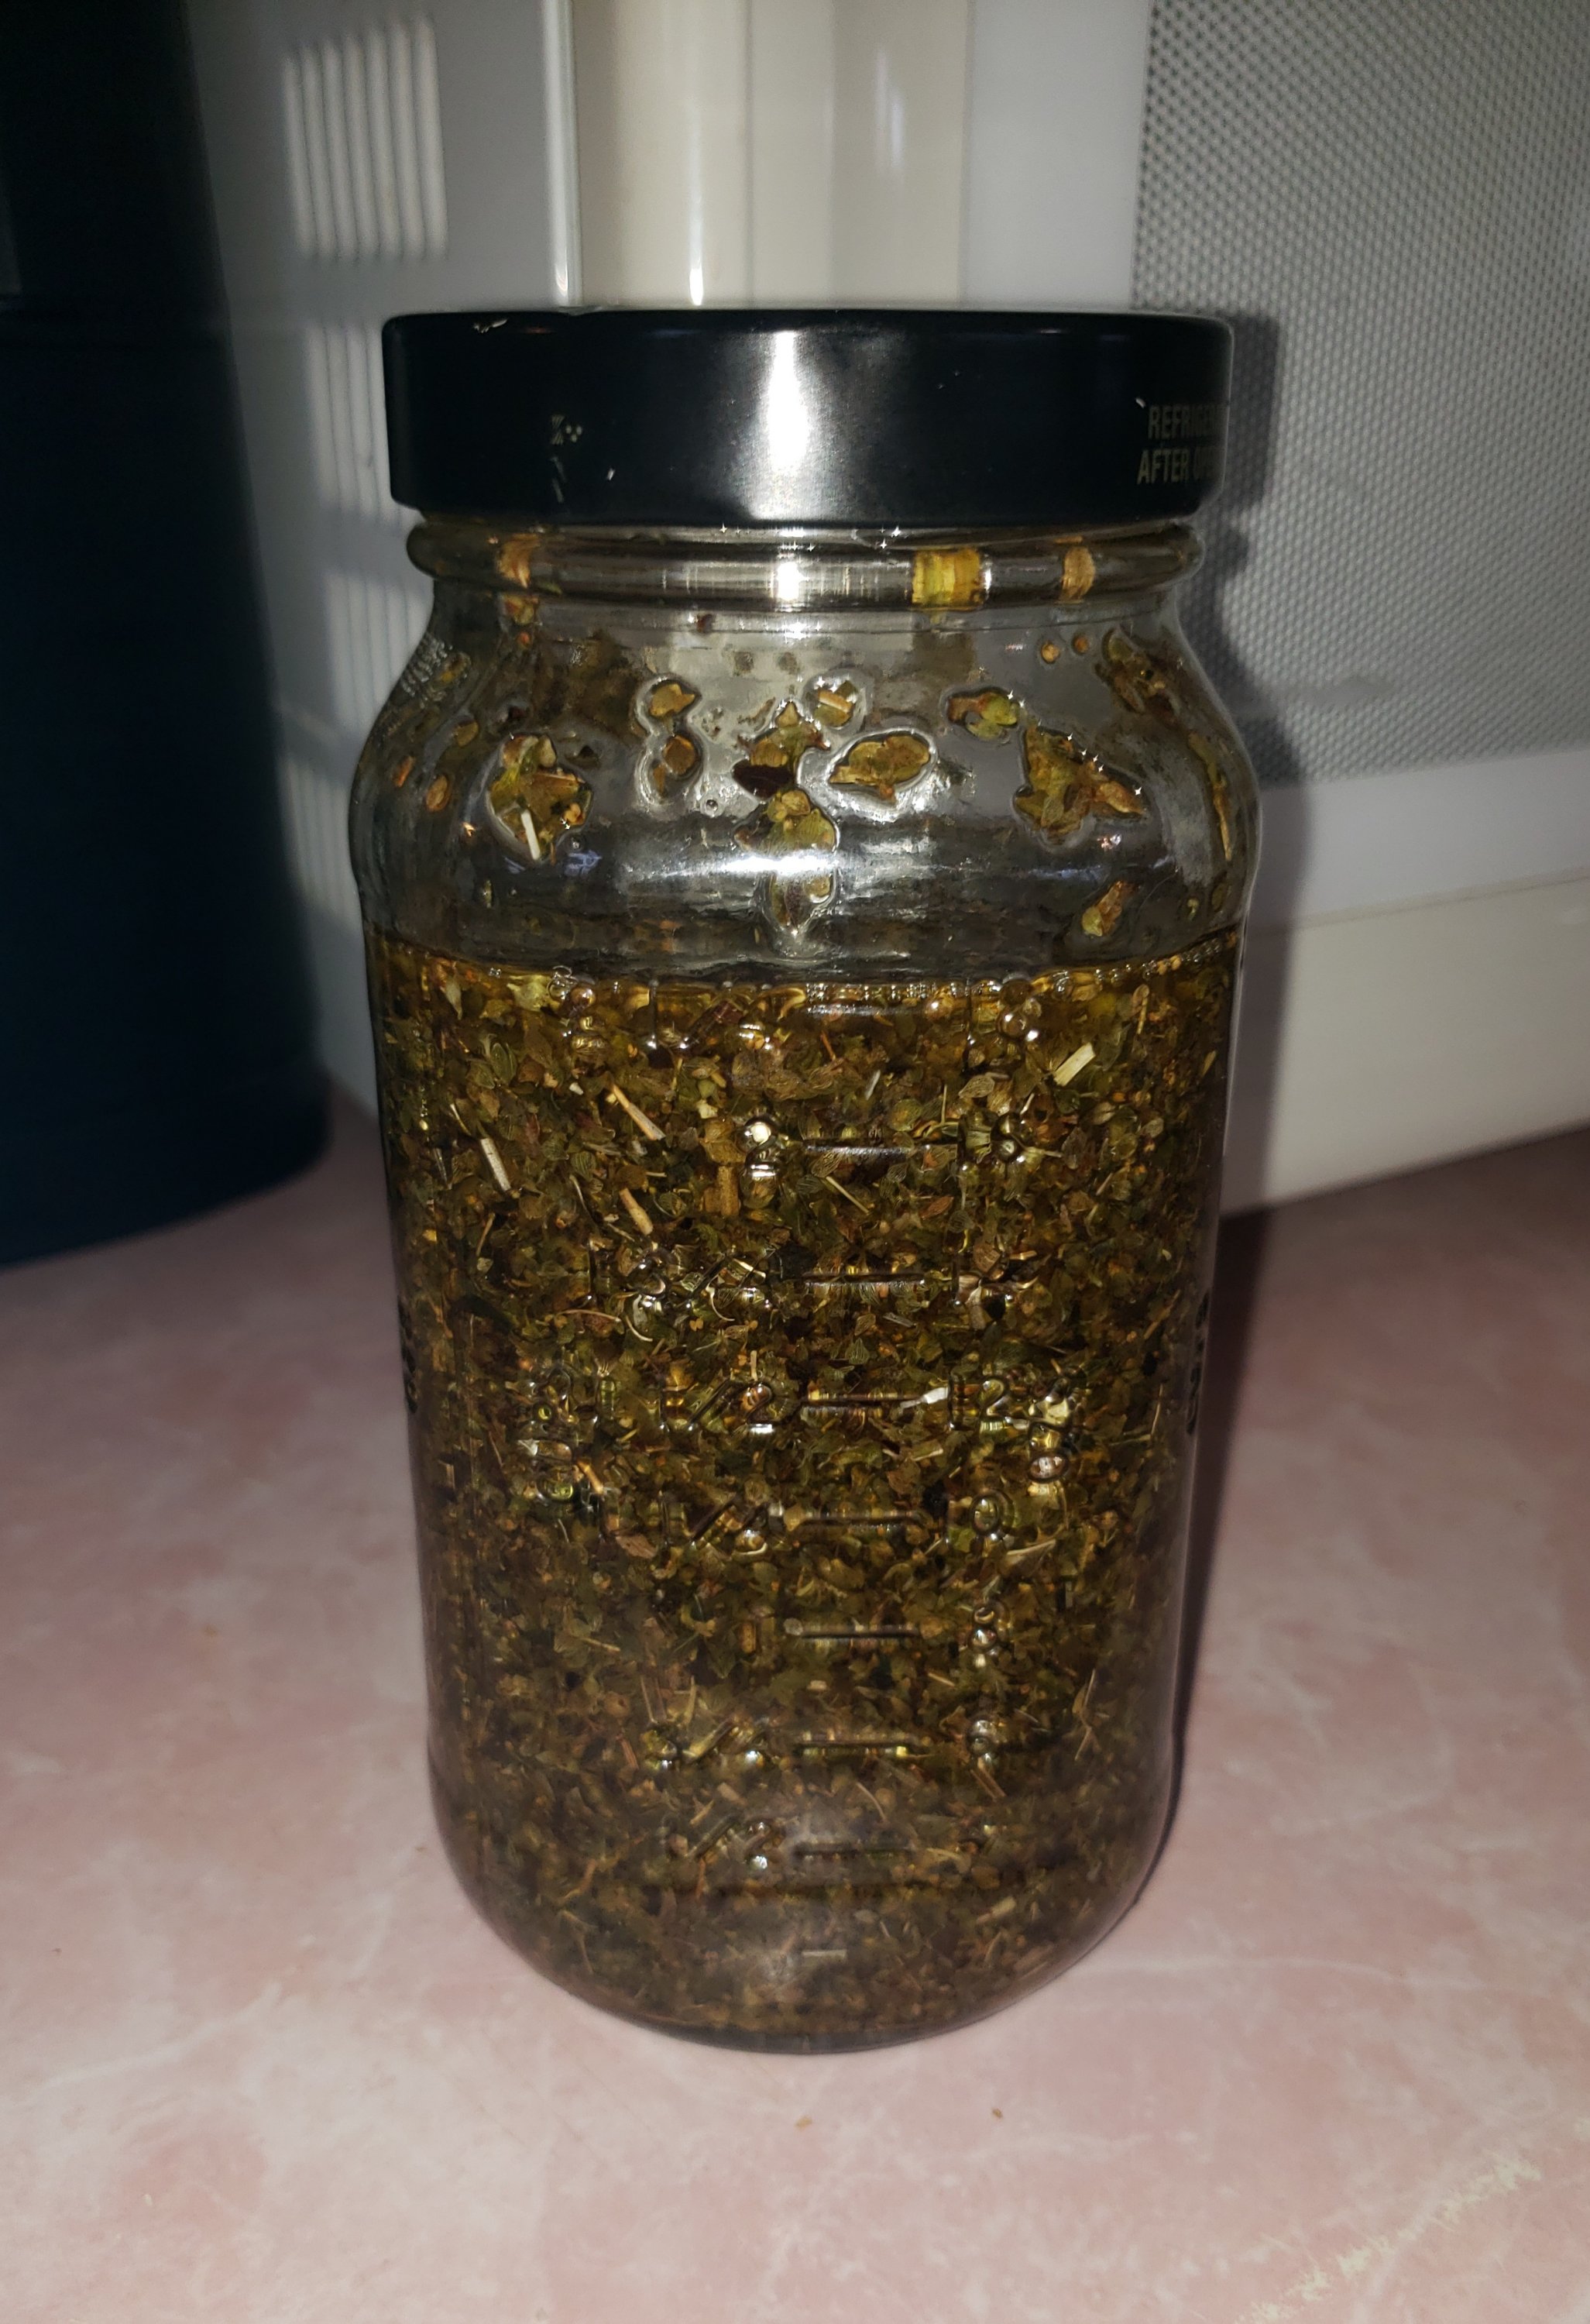
I’ve started infusing some almond oil with oregano. This jar just sits on my kitchen counter for several weeks, I occasionally walk by and shake it up, then let it sit again. Not sure what I’m going to make with it when it’s finished. I just wanted an oregano infusion to play with.
I’ve been taking oregano supplements on and off for years. Like any herbal, I have to throw a word of caution out there- you CAN overdose on oregano, just as you could a medication from your pharmacist. Plant medicine IS medicine, so if you’re going to treat conditions at home with herbals, know what you’re taking, how much and recommended safe doses. More is not necessarily better. Herbals are not miracles either, some of them take time to build up a level in your system to work optimally. What I love about my herbal medicines is that many of them lack the nasty side effects that I often get with prescription meds. If there is a side effect listed on a drug, it seems I will have it. I’m one of those people that will go into a 16 hour coma from taking two Percocet and thanks to having Hashimoto’s, I metabolize drugs VERY slowly, so they often hang in my system much longer than I’d like. That being said, I still work with my doctor to find appropriate treatments and if a prescription is called for, I get a prescription. Modern medicine is around for a reason and it’s not just entirely for profit (although I’ll agree there is plenty of profiting from people’s medical misery). If I need an antibiotic, I get the antibiotic. But I might also supplement that antibiotic with extra zinc, maybe some bone broth and some mullein if my lungs are suffering. A woman in 2013 let her son die because he had strep (which is VERY treatable by modern medicine) and she refused to take him to the doctor- instead opting to keep him in bed for 10 days while she gave him only dandelion tea and oregano oil.
So if you’re going to use herbal remedies, a little common sense goes a long way. You need to know when your condition might benefit from herbals as an adjunct to medication or if it’s treatable by natural methods alone. Do some research, get your herbal remedies from reputable sources, don’t expect them to be a magic bullet and remember that herbal medicine is medicine and comes with it’s dangers and limitations.
I am not making an ingestible oil, otherwise I would have used a different base than sweet almond. I will likely be using this is some type of salve preparation. Oral use, they recommend only 2-3 drops a day which works out to about 50-80 milligrams a dose.
Although- your skin is very good at absorbing chemicals, herbals, medications, etc. that you put on it (this is why I’m careful about what I spray on or put on my skin!) I was having issues with my Vitamin D in winter, even while taking an oral supplement. I started using a skin cream about 6 months ago that had Vitamin D in it- my last lab came back in the normal range for the first time in years. I spend enough time outside in the sun in summer, it’s not usually an issue.
By the way, Vitamin D is fat soluble (as are A, E and K), which means that your body stores it in fat cells instead of the excess being excreted through your kidneys. It’s one of those supplements you need to be careful with, since it can build up to toxic levels in your body. I get a blood test every 6 months to monitor my level. Oregano oil should not be used by people that are on prescription blood thinners like Coumadin, as it can lower your clotting ability over time. You shouldn’t take it several weeks before having surgery either, for the same reason.
Ok, so all the scary warnings are out of the way. Is it weird that I lead with that? I feel like people on social media are a bit too casual with their use of herbal medicine. I wonder if part of that comes from some medical professional’s denial that there is any benefit at all to taking supplements like oregano or certain vitamins/minerals. I’ve had several doctors that absolutely bristled at the mention of my taking herbals and/or supplements. My current doctor is thankfully on board and even recommends them when appropriate. I once had a nurse look at my list of herbals and say, “And what is it you THINK these do?”
All I can tell the naysayers is that plant medicine was around long before you could go to your local pharmacy and pick up a bottle of aspirin. In fact, that bottle of aspirin… which is salicylic acid… is also present in willow bark.
My first use of oral oregano oil was to treat a recurring stomach ulcer. I’d been on prescription medications that helped for a while and then had nasty side effects. I ate Tums like candy, I tried over the counter meds like Zantac and Pepcid. They’d help to abate the symptoms for a bit, but it would always come back. I did some research and found out that often stomach ulcers are caused by the bacteria H Pylori, which can damage the lining of the small intestine and stomach, resulting in an ulcer. Oregano oil will kill H Pylori bacteria. In fact, it was found in recent studies to be potent enough to destroy MRSA (Methicillin resistant staphylococcus) when used topically on wounds. I took Oregano Oil, Slippery Elm Bark and Marshmallow (the herb, not the things you make Smores with) for about 2 weeks. No more ulcer. No more gut pain, no more swollen, gassy stomach. It went away and has stayed away for months. If I start to feel like I’m having a lot of indigestion, I use those herbs again for about a week and it goes away.
Oregano is pretty easy to grow (it’s in the mint family) and to work into your diet, especially if you’re a fan of Spanish, Greek or Italian food. Some of the science backed health benefits include: rich in antioxidants which fight free radicals in your body (those nasty little things that cause things like aging skin and cancer), they are doing studies now regarding it’s potential benefit in fighting certain existing cancers.
It is antiviral, antibacterial and kills fungus. It is an anti-inflammatory. It may help to protect kidneys from calcium oxalate crystal formation. It is rich in magnesium (many people are magnesium deficient). It may help to lower LDL cholesterol, calm irritable bowel syndrome and digestive discomfort because of it’s high levels of carvacrol. It is also being studied for it’s use in heart health to lower blood pressure and keep calcium from forming plaques in the arteries and as a blood sugar regulator.
As a skin treatment it can kill all kinds of yeast, it is highly effective at repelling mosquitos and can kill bacteria as well or better than Neosporin. It’s anti-inflammatory properties might make it useful for localized surface swelling from arthritis (like in hands or feet, knees). It may be especially useful for those with cystic type acne, eczema, psoriasis, ringworm, rosacea and varicose veins. My interest in the topical oil is for rosacea and localized swelling between the knuckle joints on my hands. I’ll likely test it out for a bit first before making it available on the Etsy shop so I can give my personal experience with it.
I haven’t done much since Halloween that I’ve deemed post-worthy- a bit of sewing and learned some really basic macrame knots.
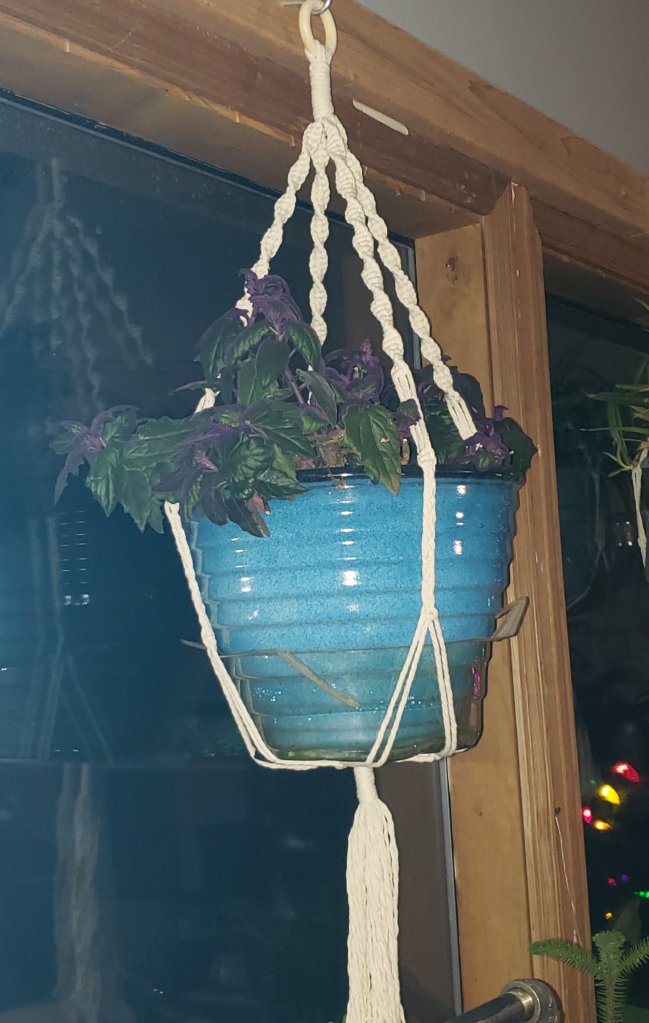
I’m not writing a tutorial on this, there are some very good ones on both YouTube and TikTok if you’re looking. For these I learned to do a spiral square knot and a four strand braid.
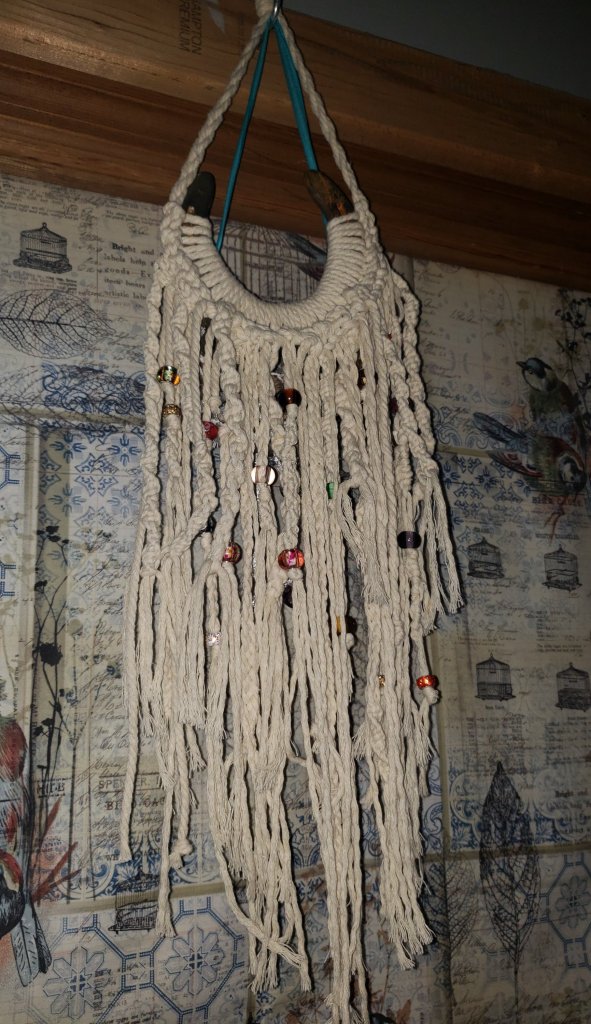
The horse shoe was a gift from my daughter’s riding instructor. I picked up the cotton cord and wood rings on Amazon. The beads I had leftover from 4-H crafts.
Two rolls of cord got me 5 plant hangers, I used the trimmings and leftovers to make the horse shoe.
Not selling these right now, just wanted to share. I’m probably starting a new painting soon.
In my previous post, I talked about the paper maché pumpkins that will be a part of this build. Let me start by saying that the idea for this build came from Pinterest. The site the pin linked to is Grim Hollow Haunt
I’m following most of his instructions with a few exceptions. I didn’t use pre-made pumpkins for my build, I’m did mine entirely from paper maché. I feel like I covered those pretty well in the previous post, so I’ll skip to the steps that make the grim different from the little guys and what’s different from my inspiration.
HEAD:
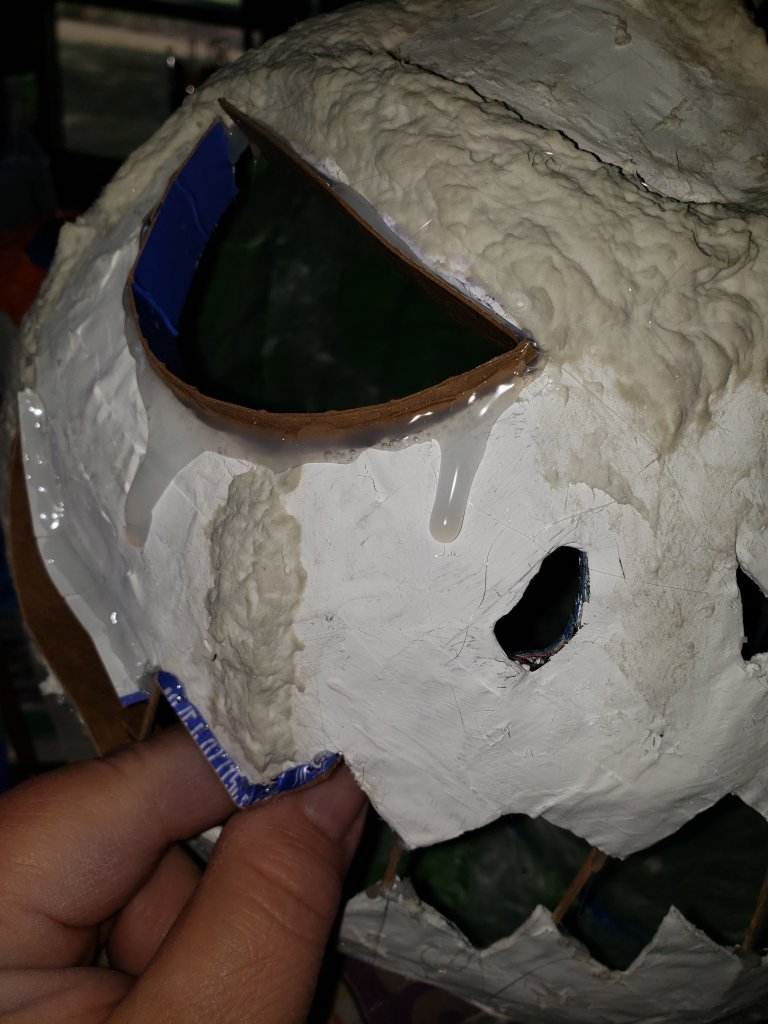
Done entirely of paper maché, homemade paper maché clay and acrylic paint. I built this by wrapping an actual pumpkin from the grocery store. The reinforced eyes and mouth were done with strips of cardboard glued in place and a few toothpicks.
I used paper mache clay to amp up the lines and create the eyebrows/forehead scowl. The waxy drips were just hotglue that I painted over.
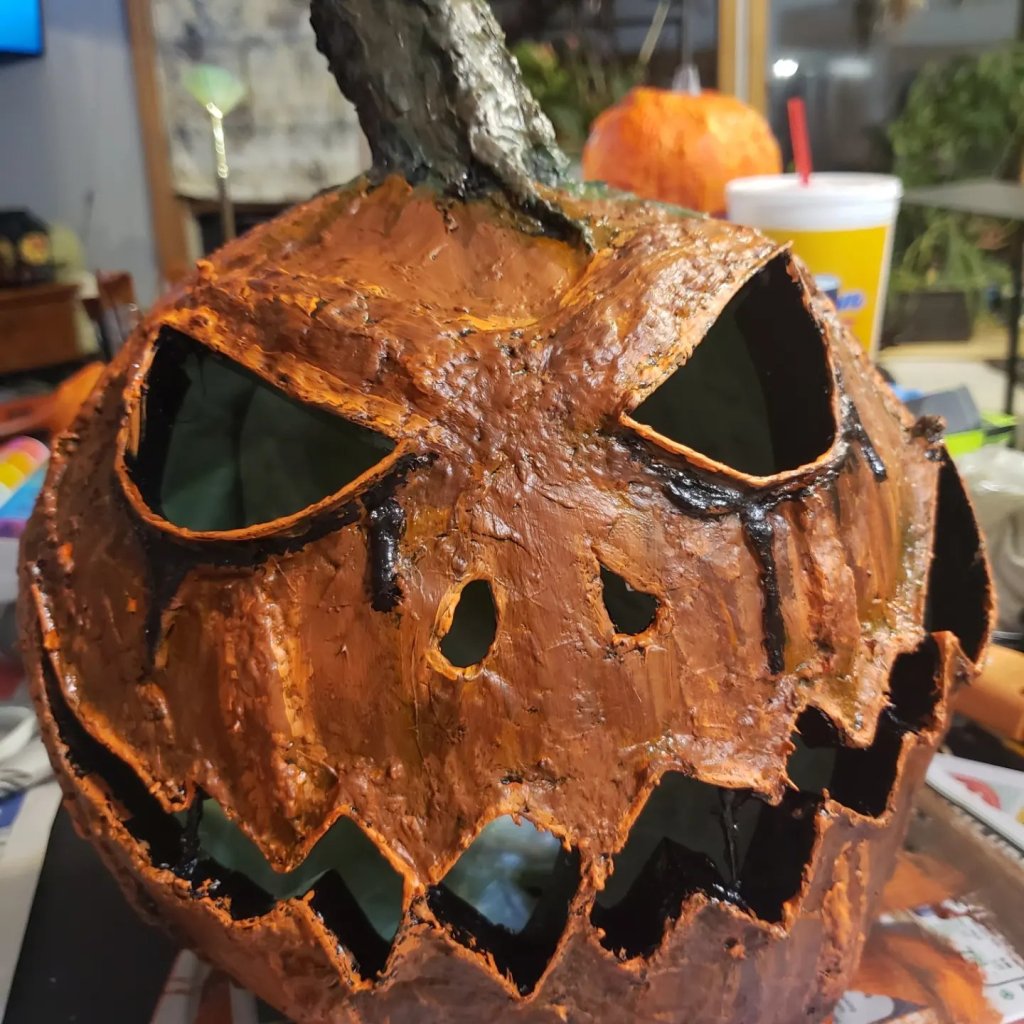
I coated the entire head in gloss black, let that dry (mostly) and then went over it in a couple shades of orange. I wanted the black underpaint to show through, so I used a fairly dry brush and went over the steaks with a completely dry brush. (You can see this in the video below.) After the orange dried, I detailed the stem and drips around the eyes.
Painting Grim’s head
We’ll be working on the framework for the body this weekend. I’ll add to this post when that part is finished.
-B
HAPPY HALLOWEEN friends!
We had our party this weekend and the kids seemed to love the Grim. Not sure they loved him more than the fog machine I had set up in our fake graveyard, but ah well…
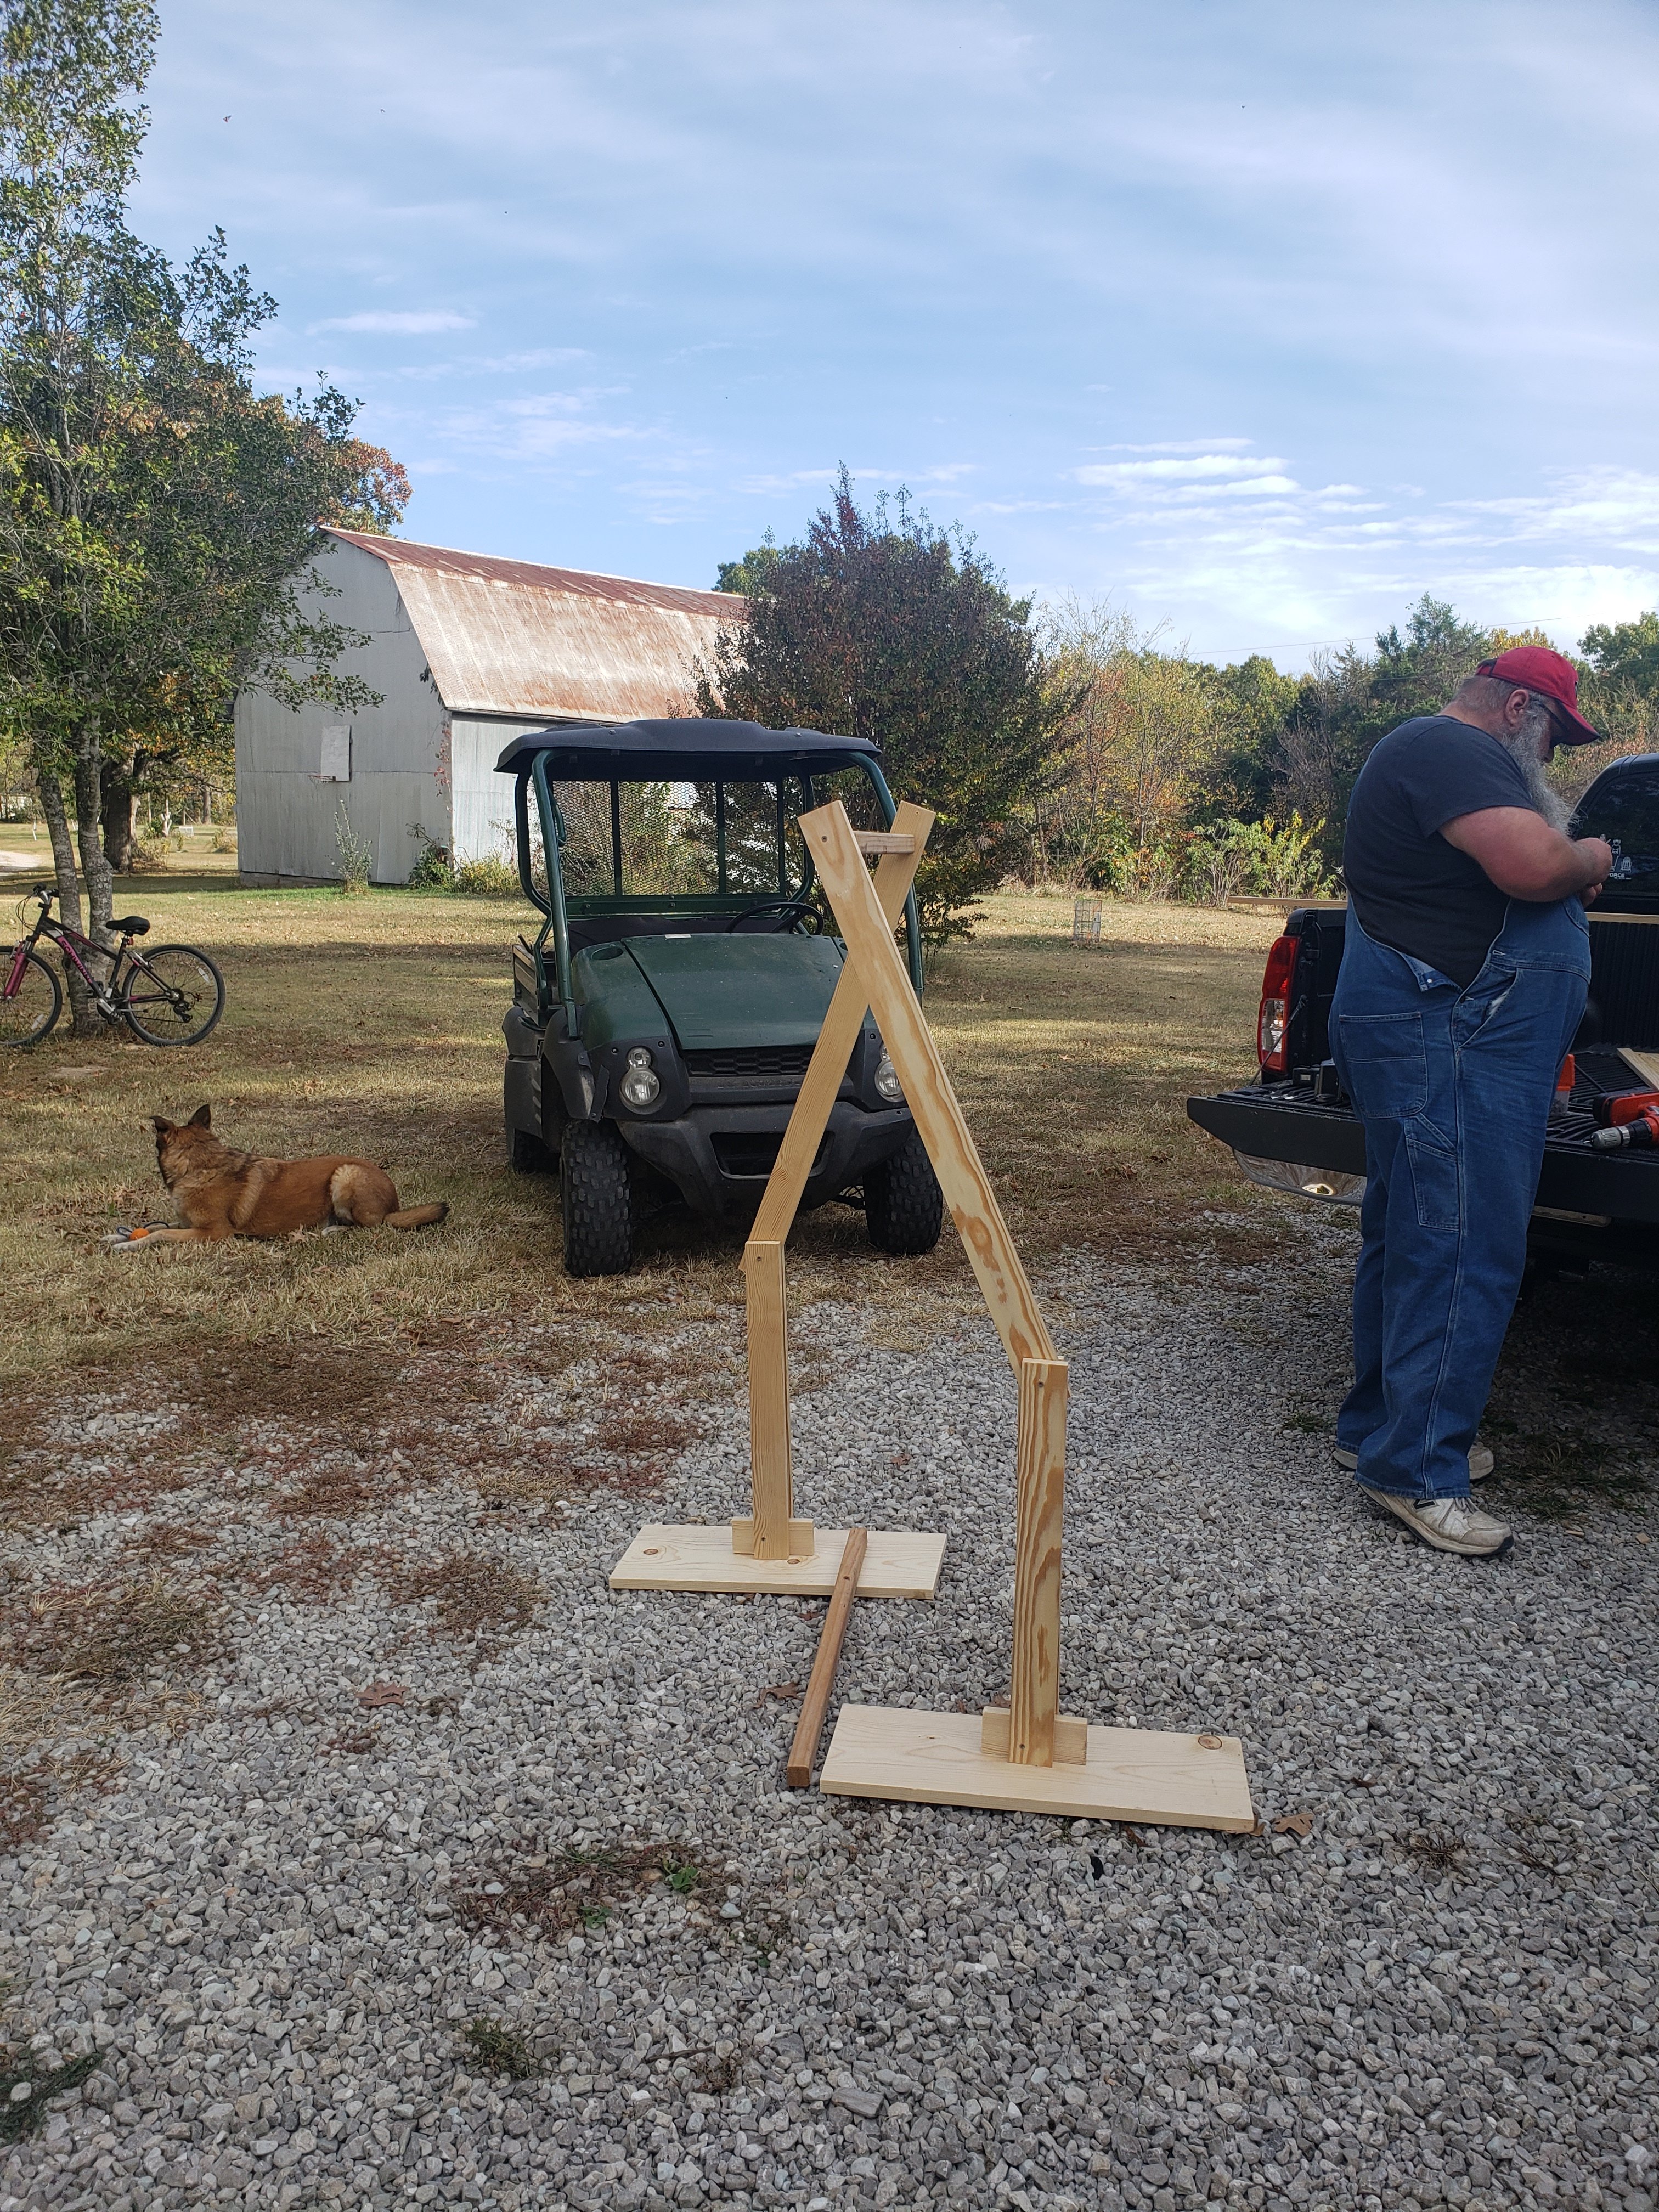
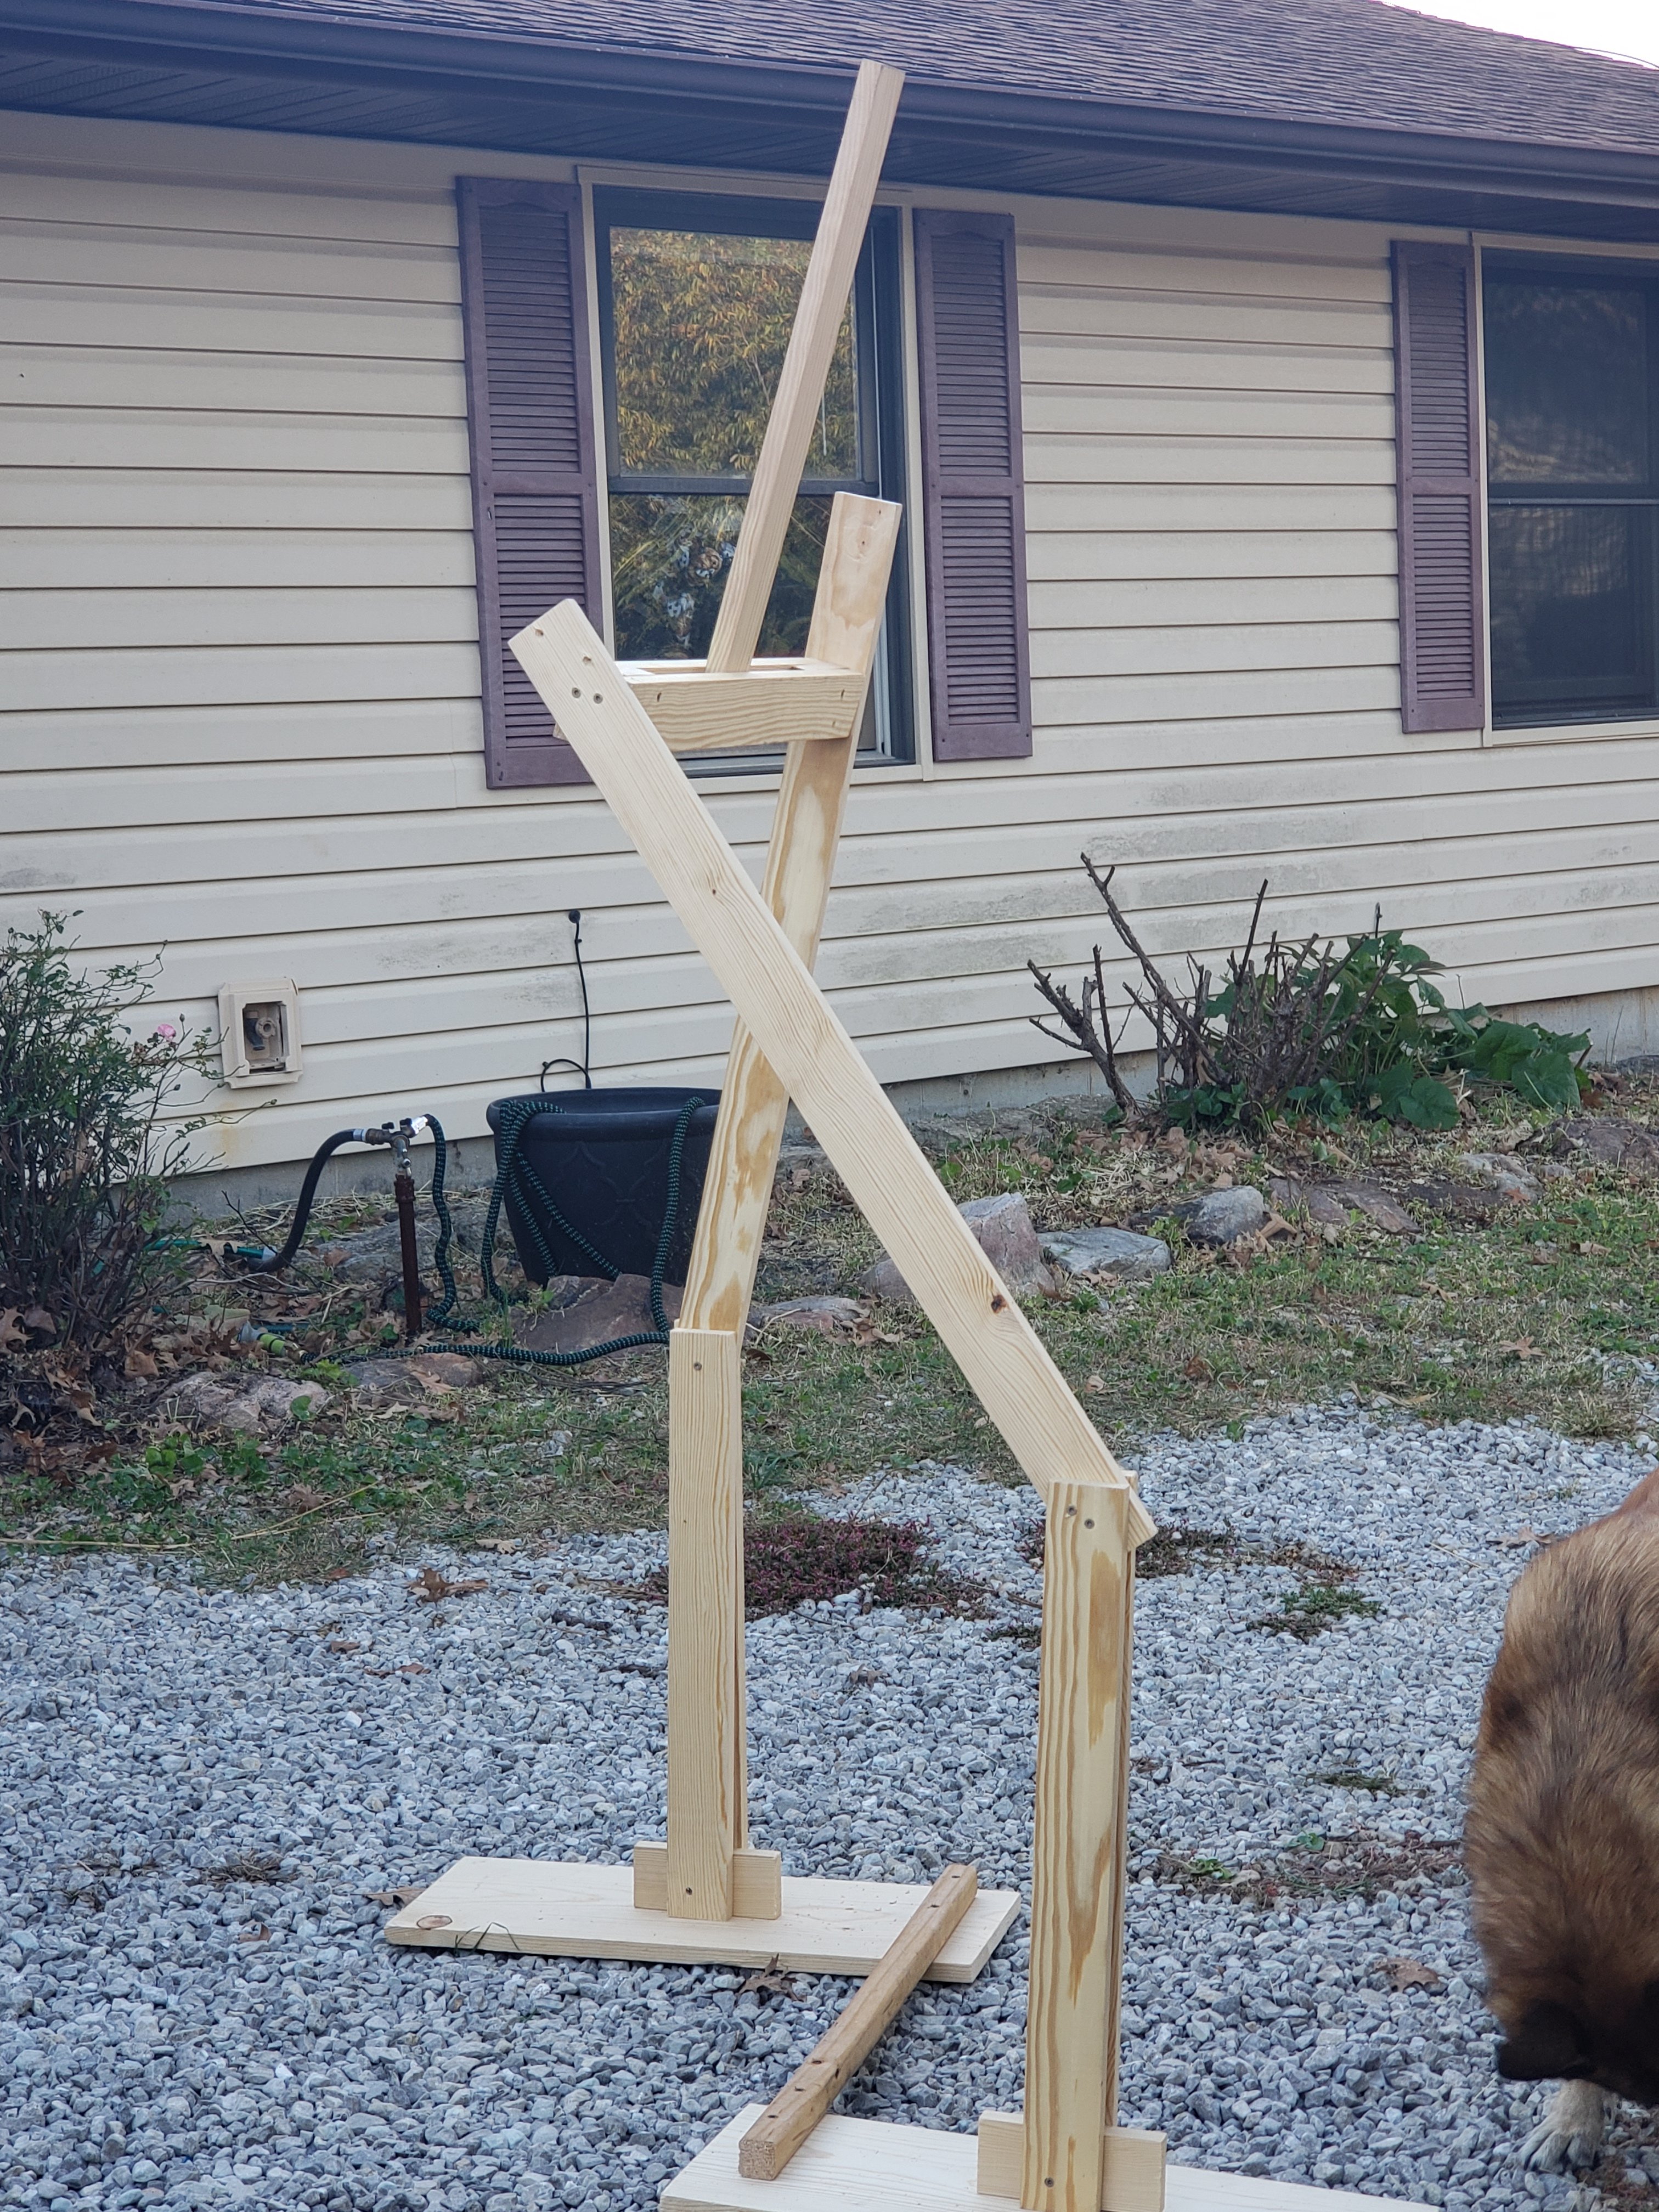
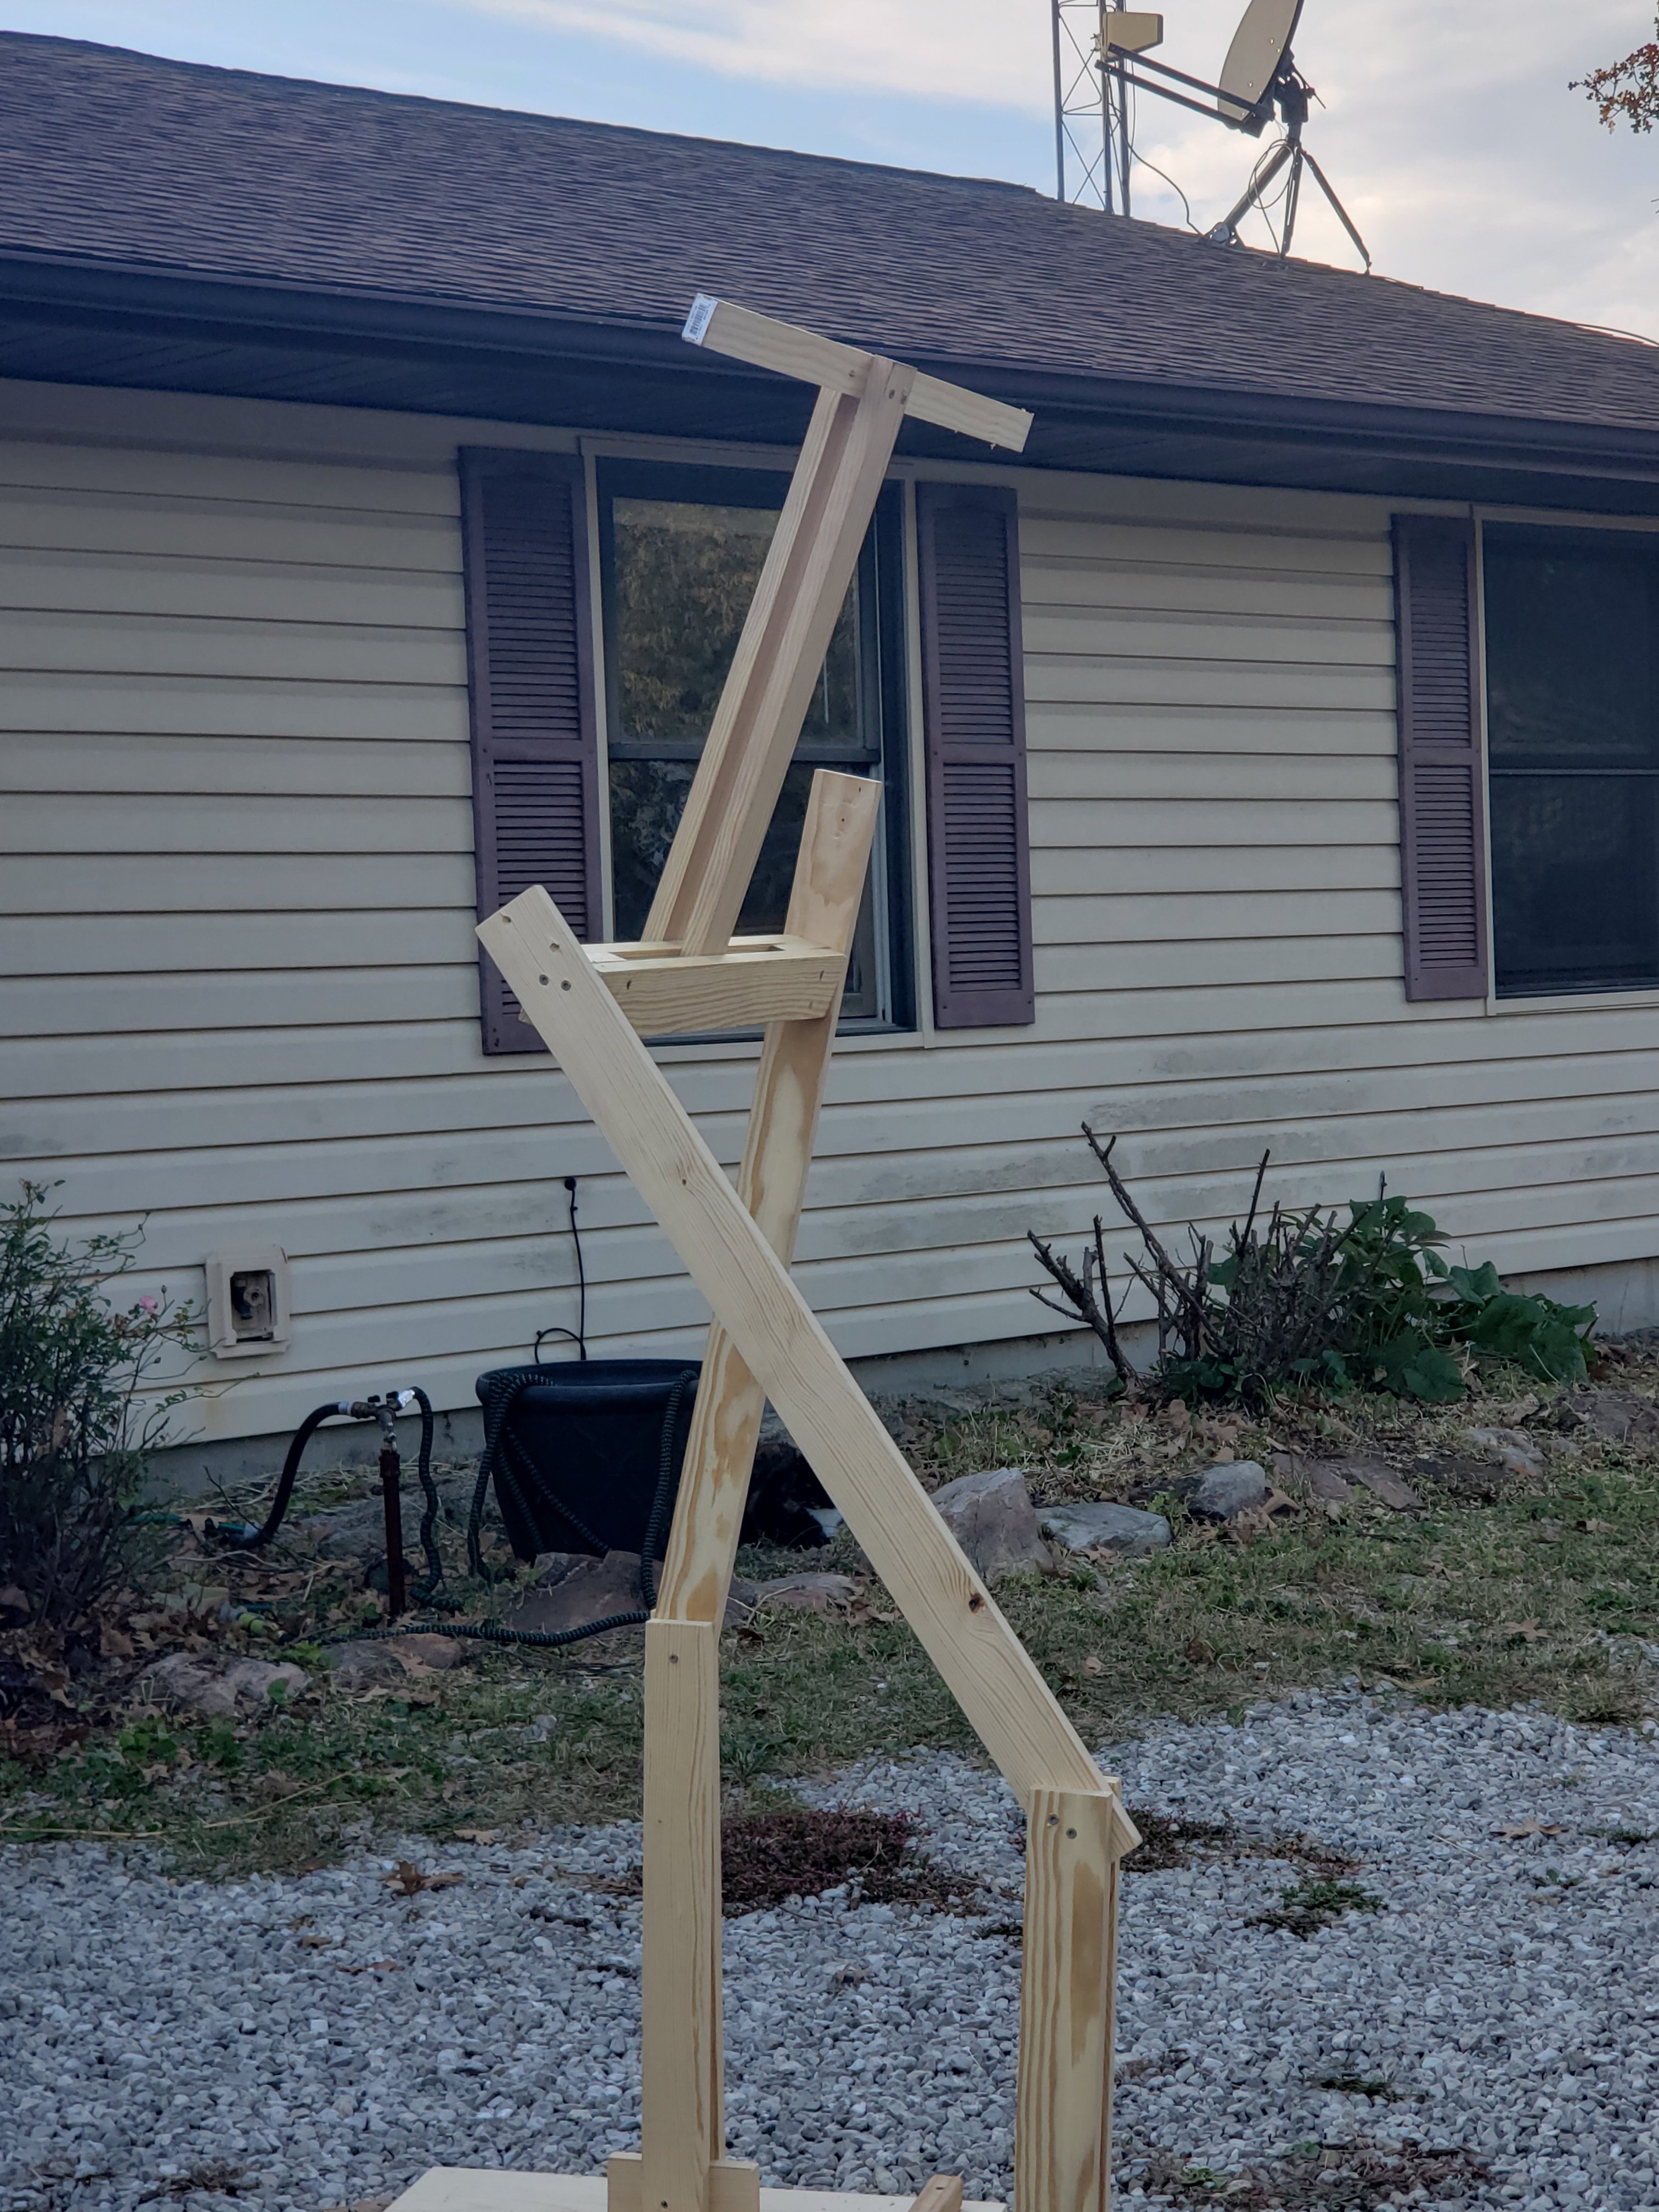
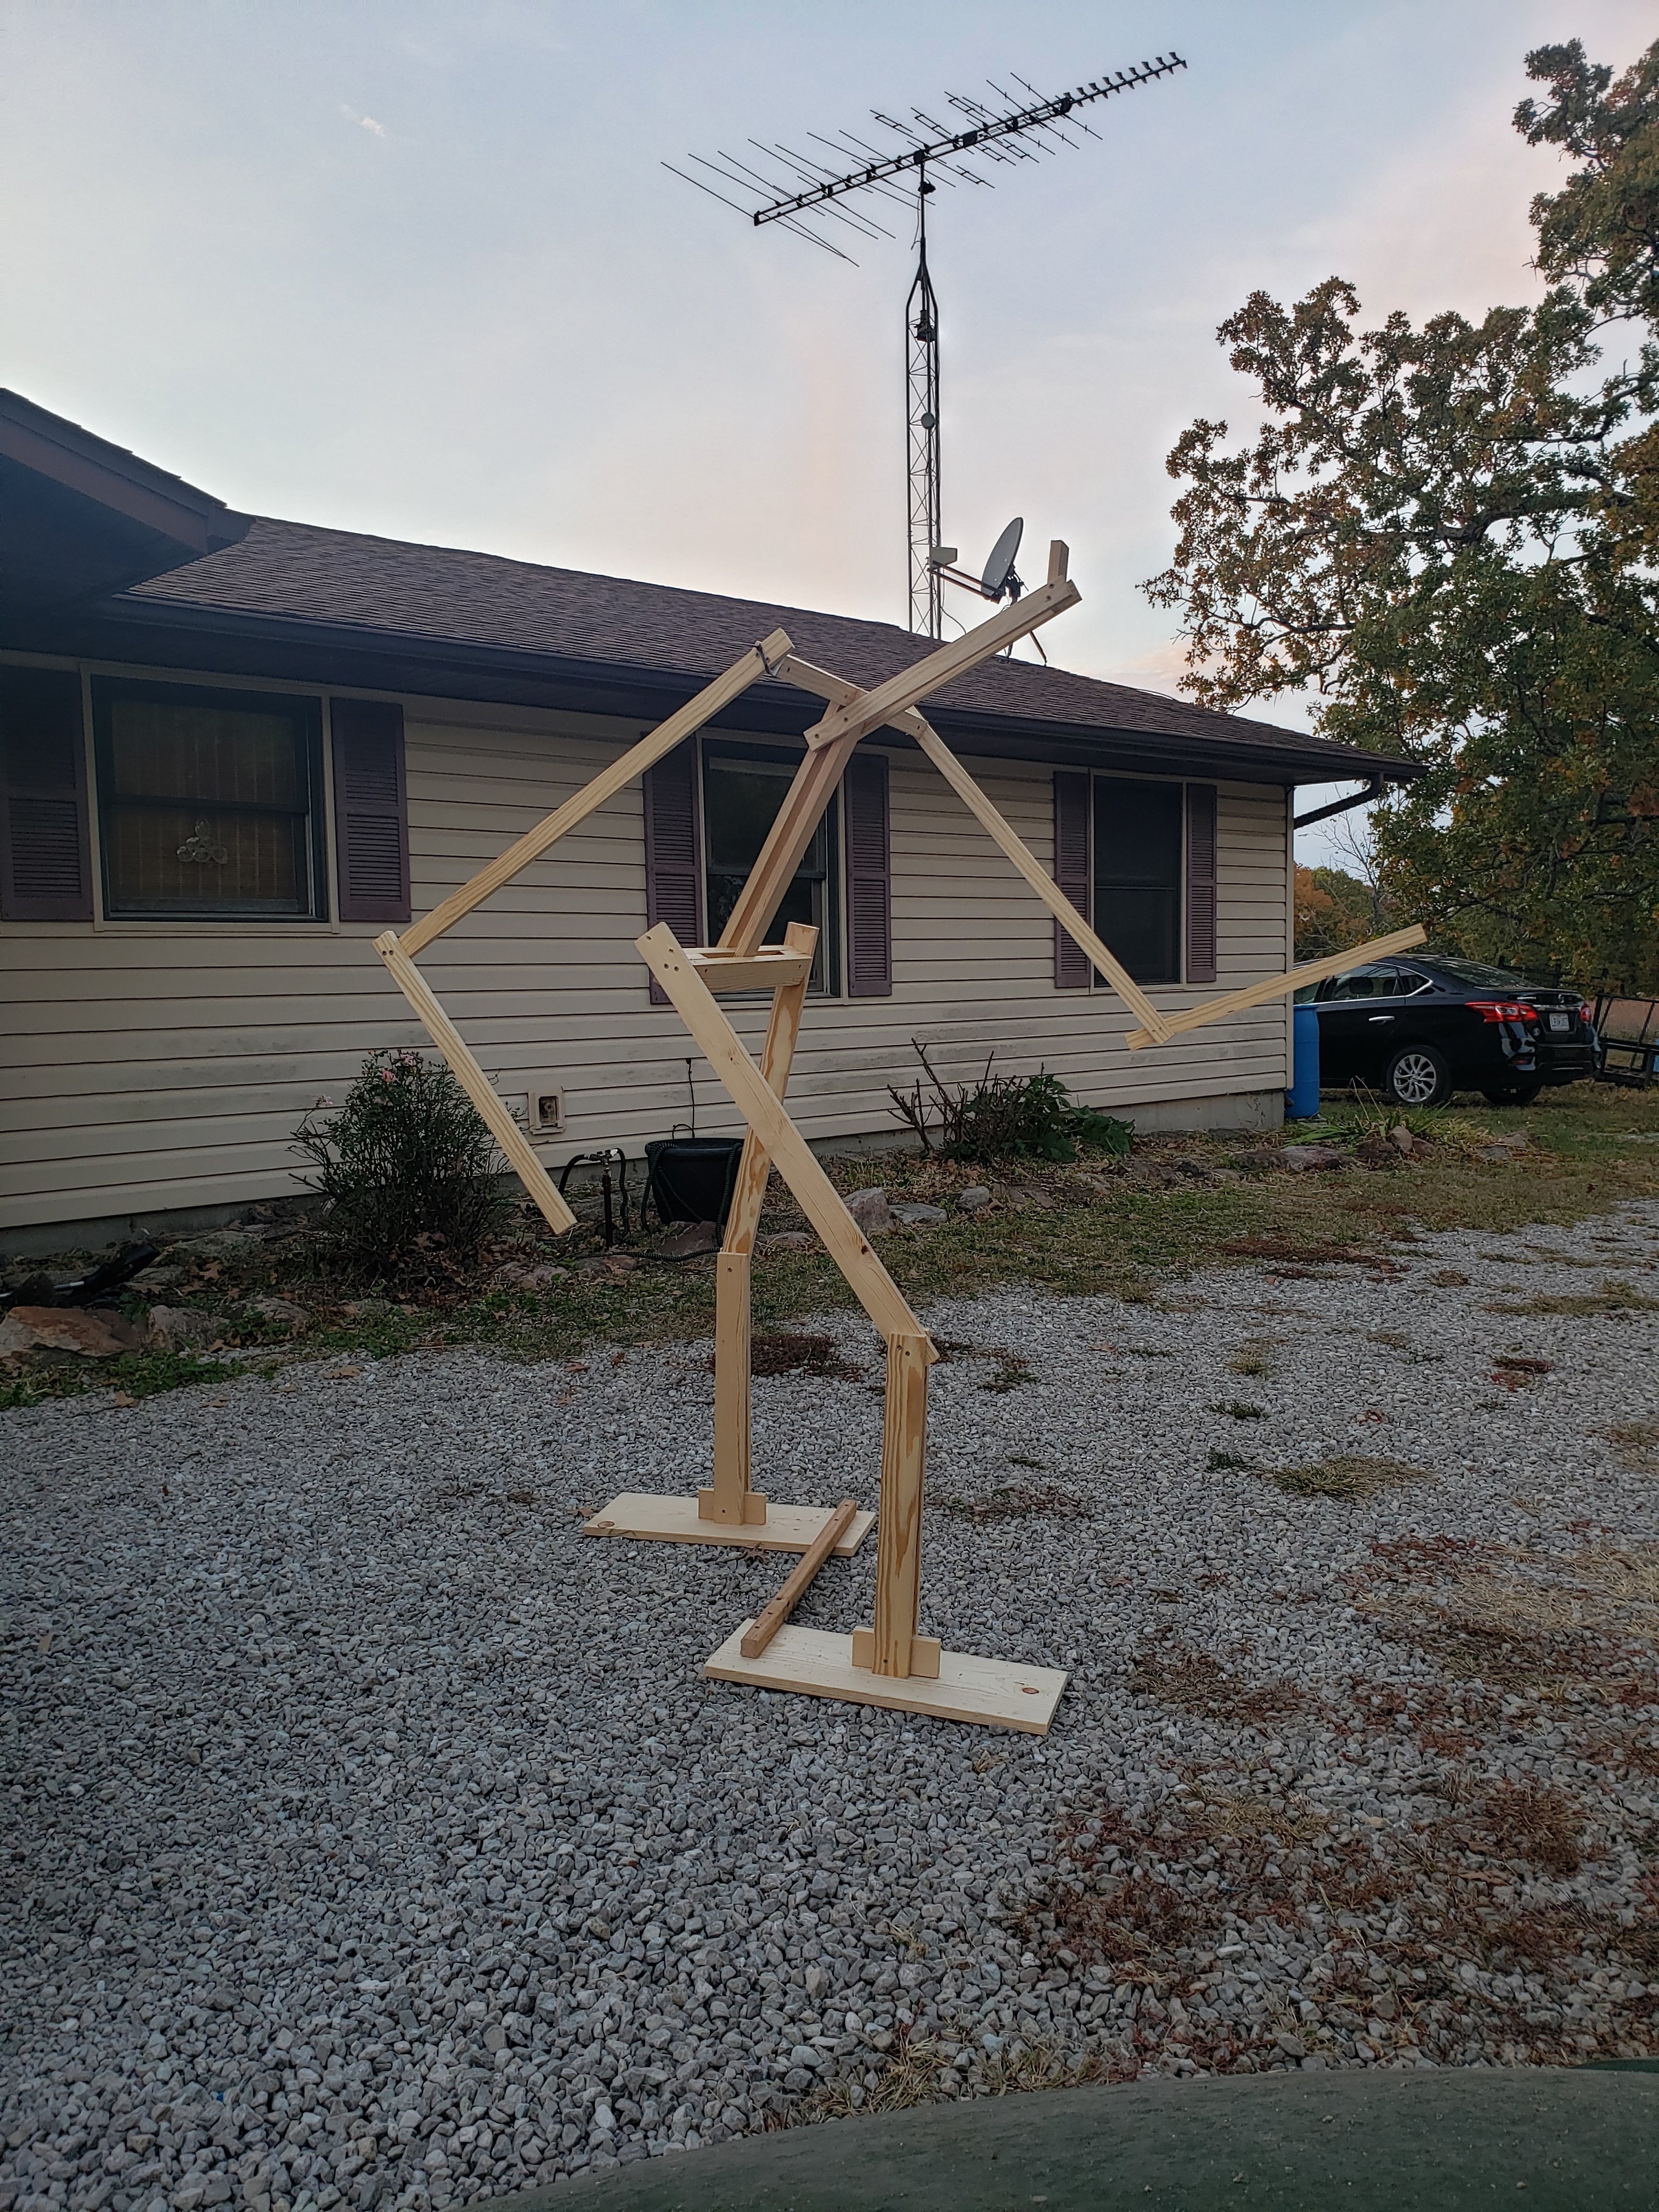
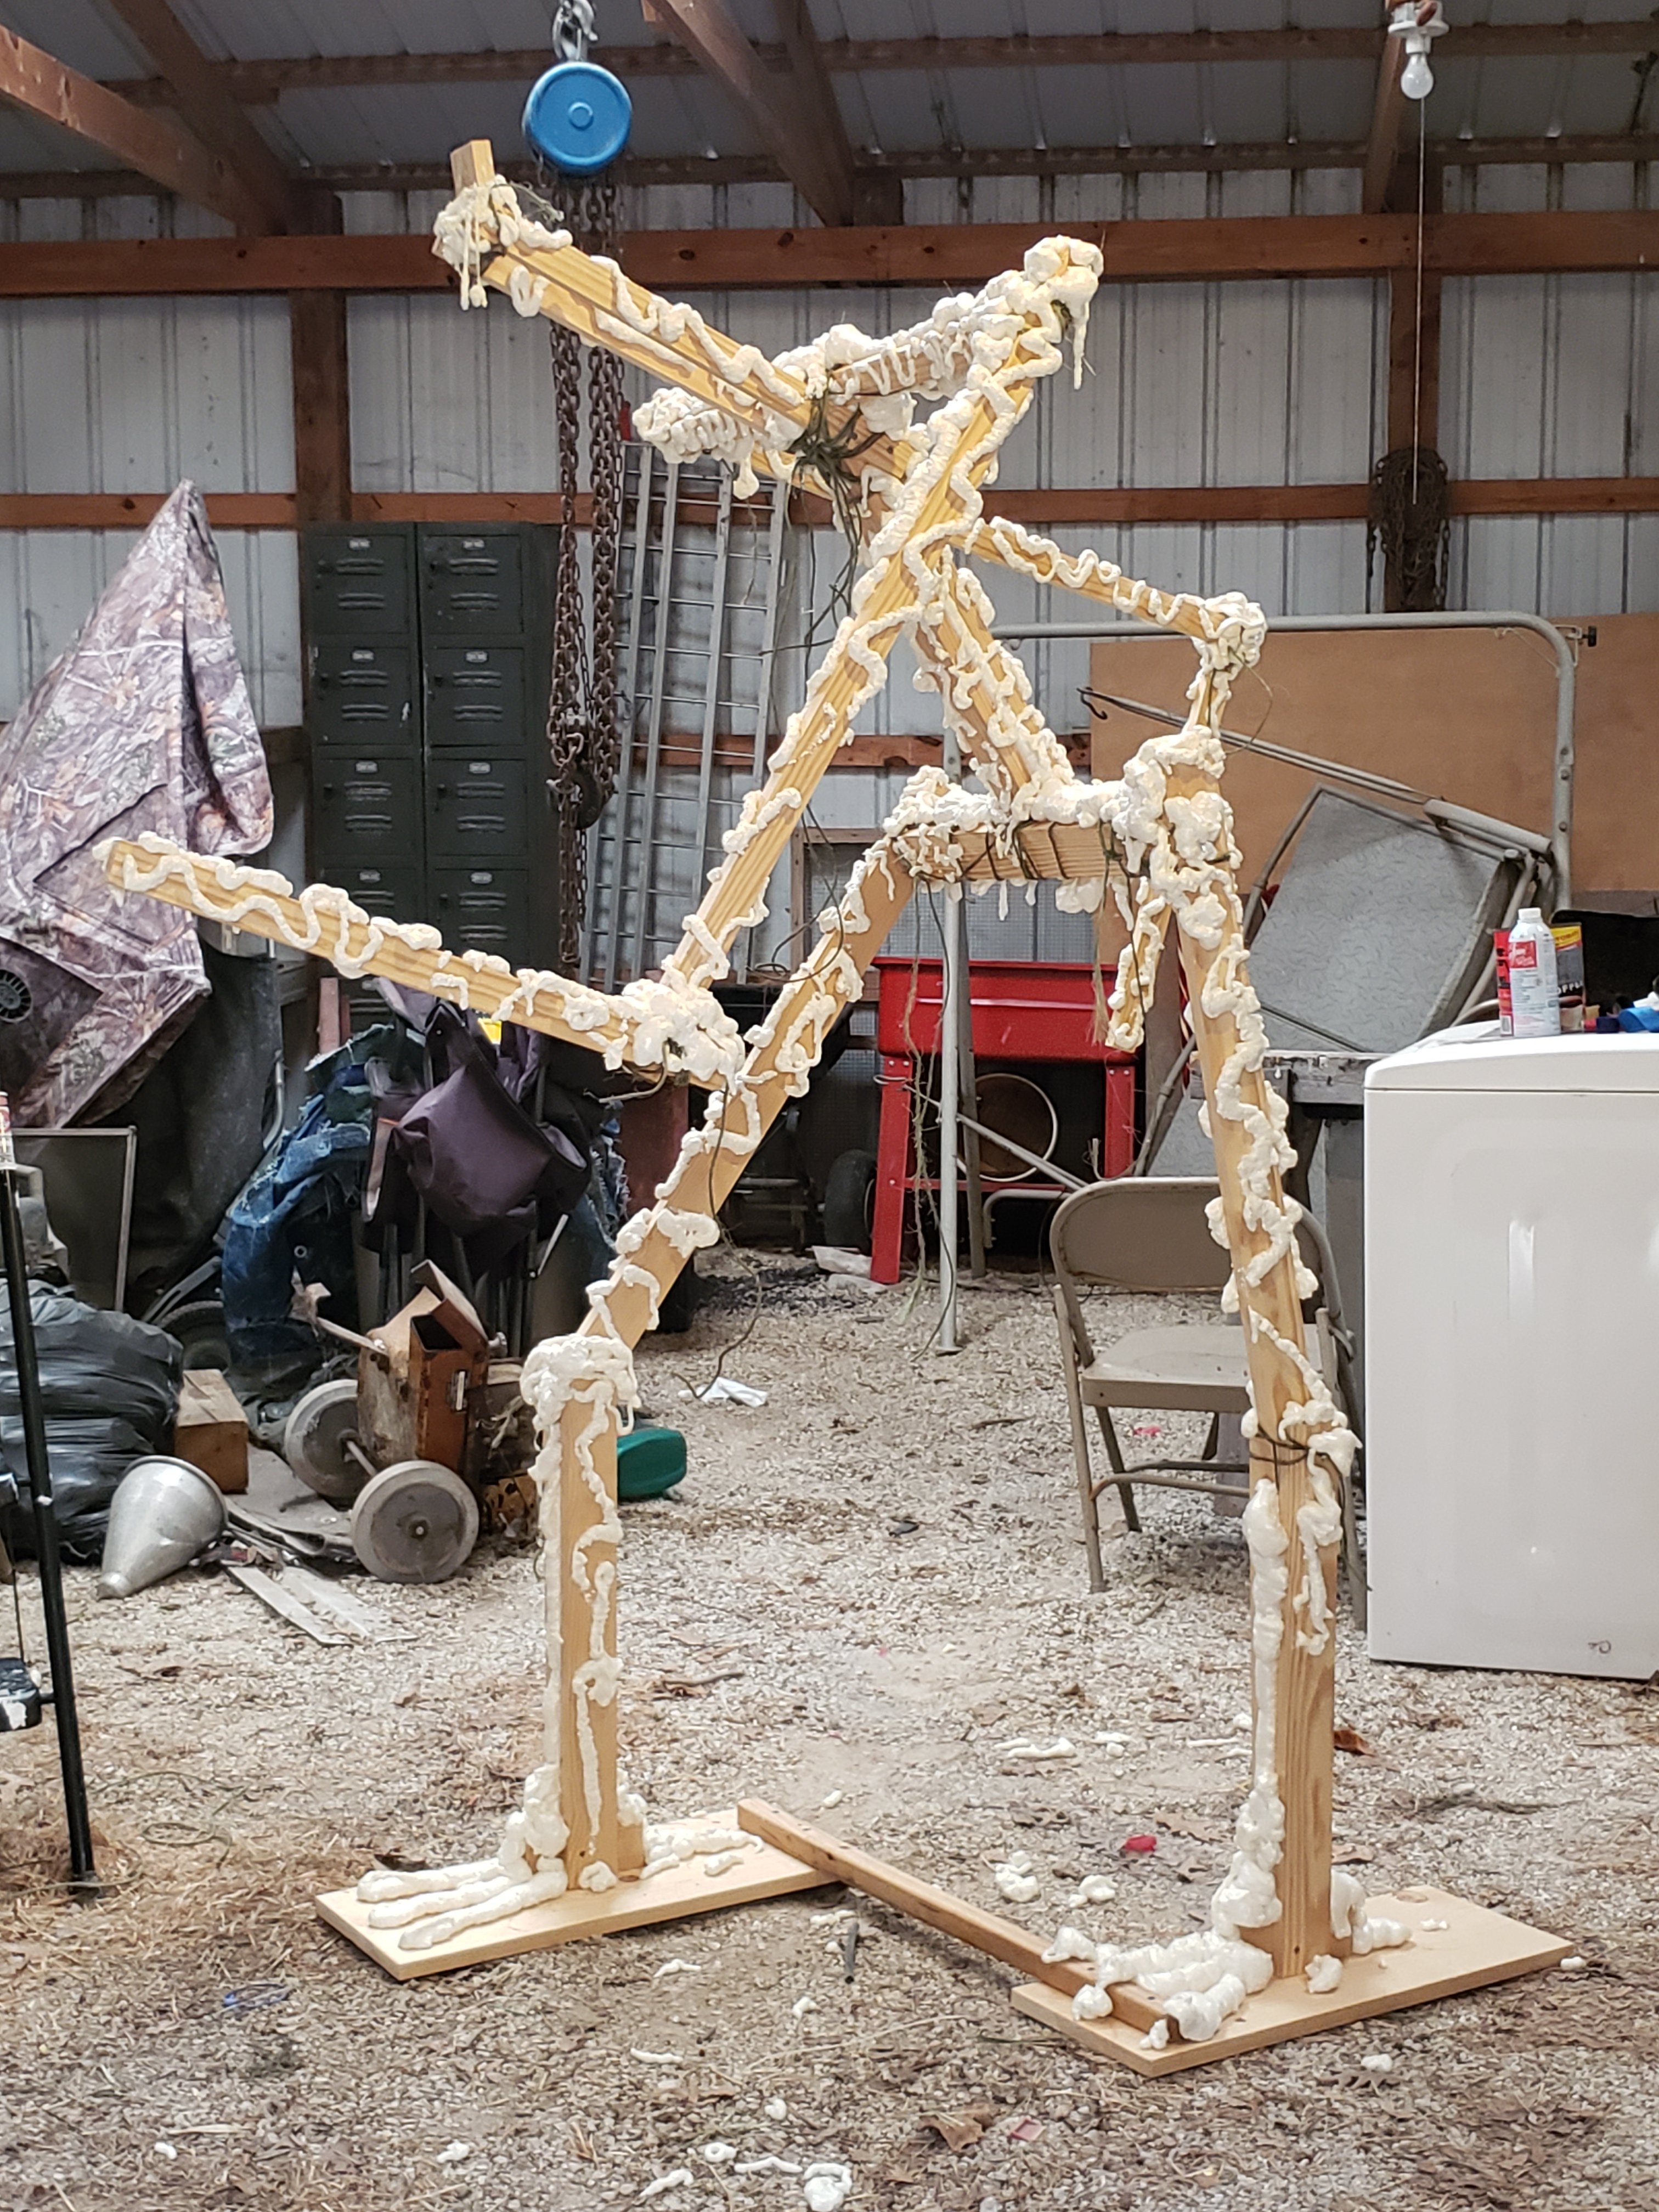
I promised to finish telling you how I did all this, so here it is. My husband Tom helped me with building the frame of the Grim because I have arthritis AND I’m only 5’5. He’s 6’0 and if you look at the pictures of him standing next to it, it’s somewhere around 7′ or so, which means I need a stepladder to reach past it’s hips.
Most of the frame is built from 1×2’s and 1×3’s which means it’s very light for lumber, but also fragile and not especially stable. We changed up the build a bit from the Pin I was working off of, which helped some, but he still lost an arm during a storm the following evening that had to be put back on once he was moved to the barn. I managed to knock the other off as well while moving him.
Betty Cat decided she wanted to help with the build. 🙂
I can’t tell ya’ll how glad I am to be on here right now instead of TikTok. I had NO freaking idea how incredibly awful it would be to listen to myself talk for 6 minutes about this stuff. I’m so bad at it. Give me the keyboard any day. I can’t freaking backspace when I’m talking and it’s incredibly annoying.
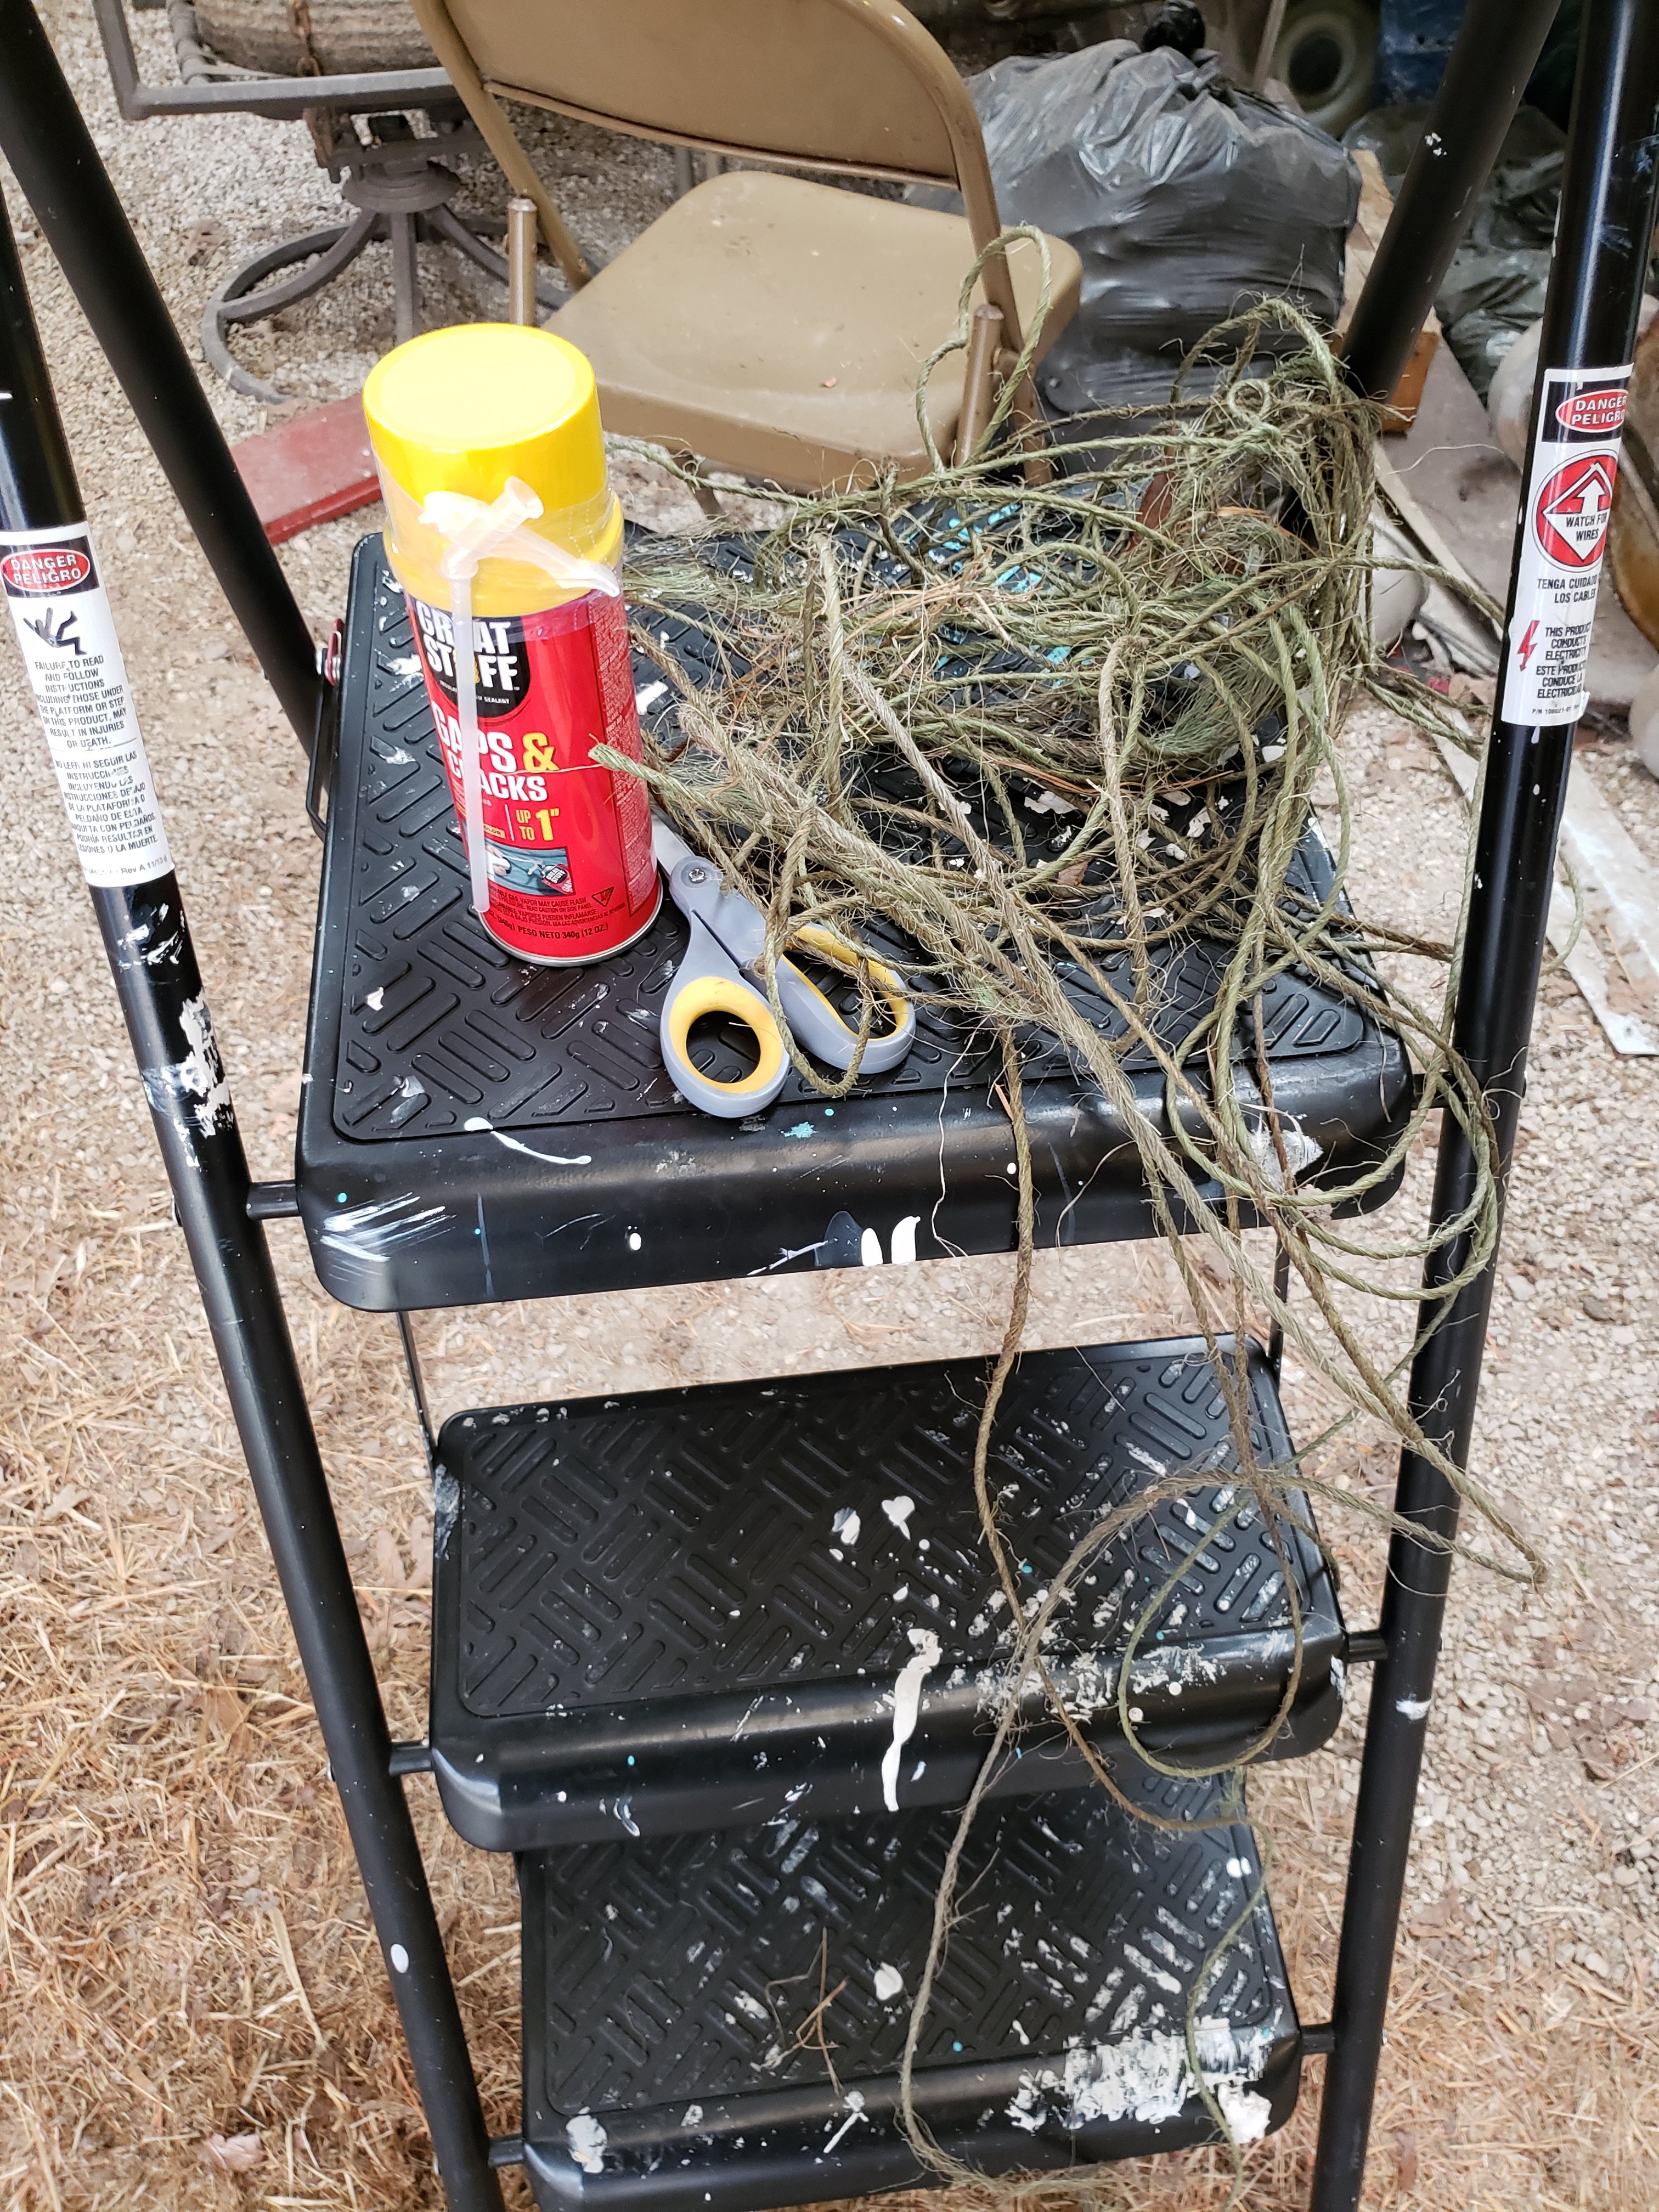
I found this wad of green bailing twine lying on the floor of the tractor barn and decided it might be just the thing for tying up the joints of the Grim. It also looked kind of cool hanging down, like he’d ripped himself loose from the garden or something. This firmed up the joints enough I was confident that the arms would stay on well enough to let me do the next part.
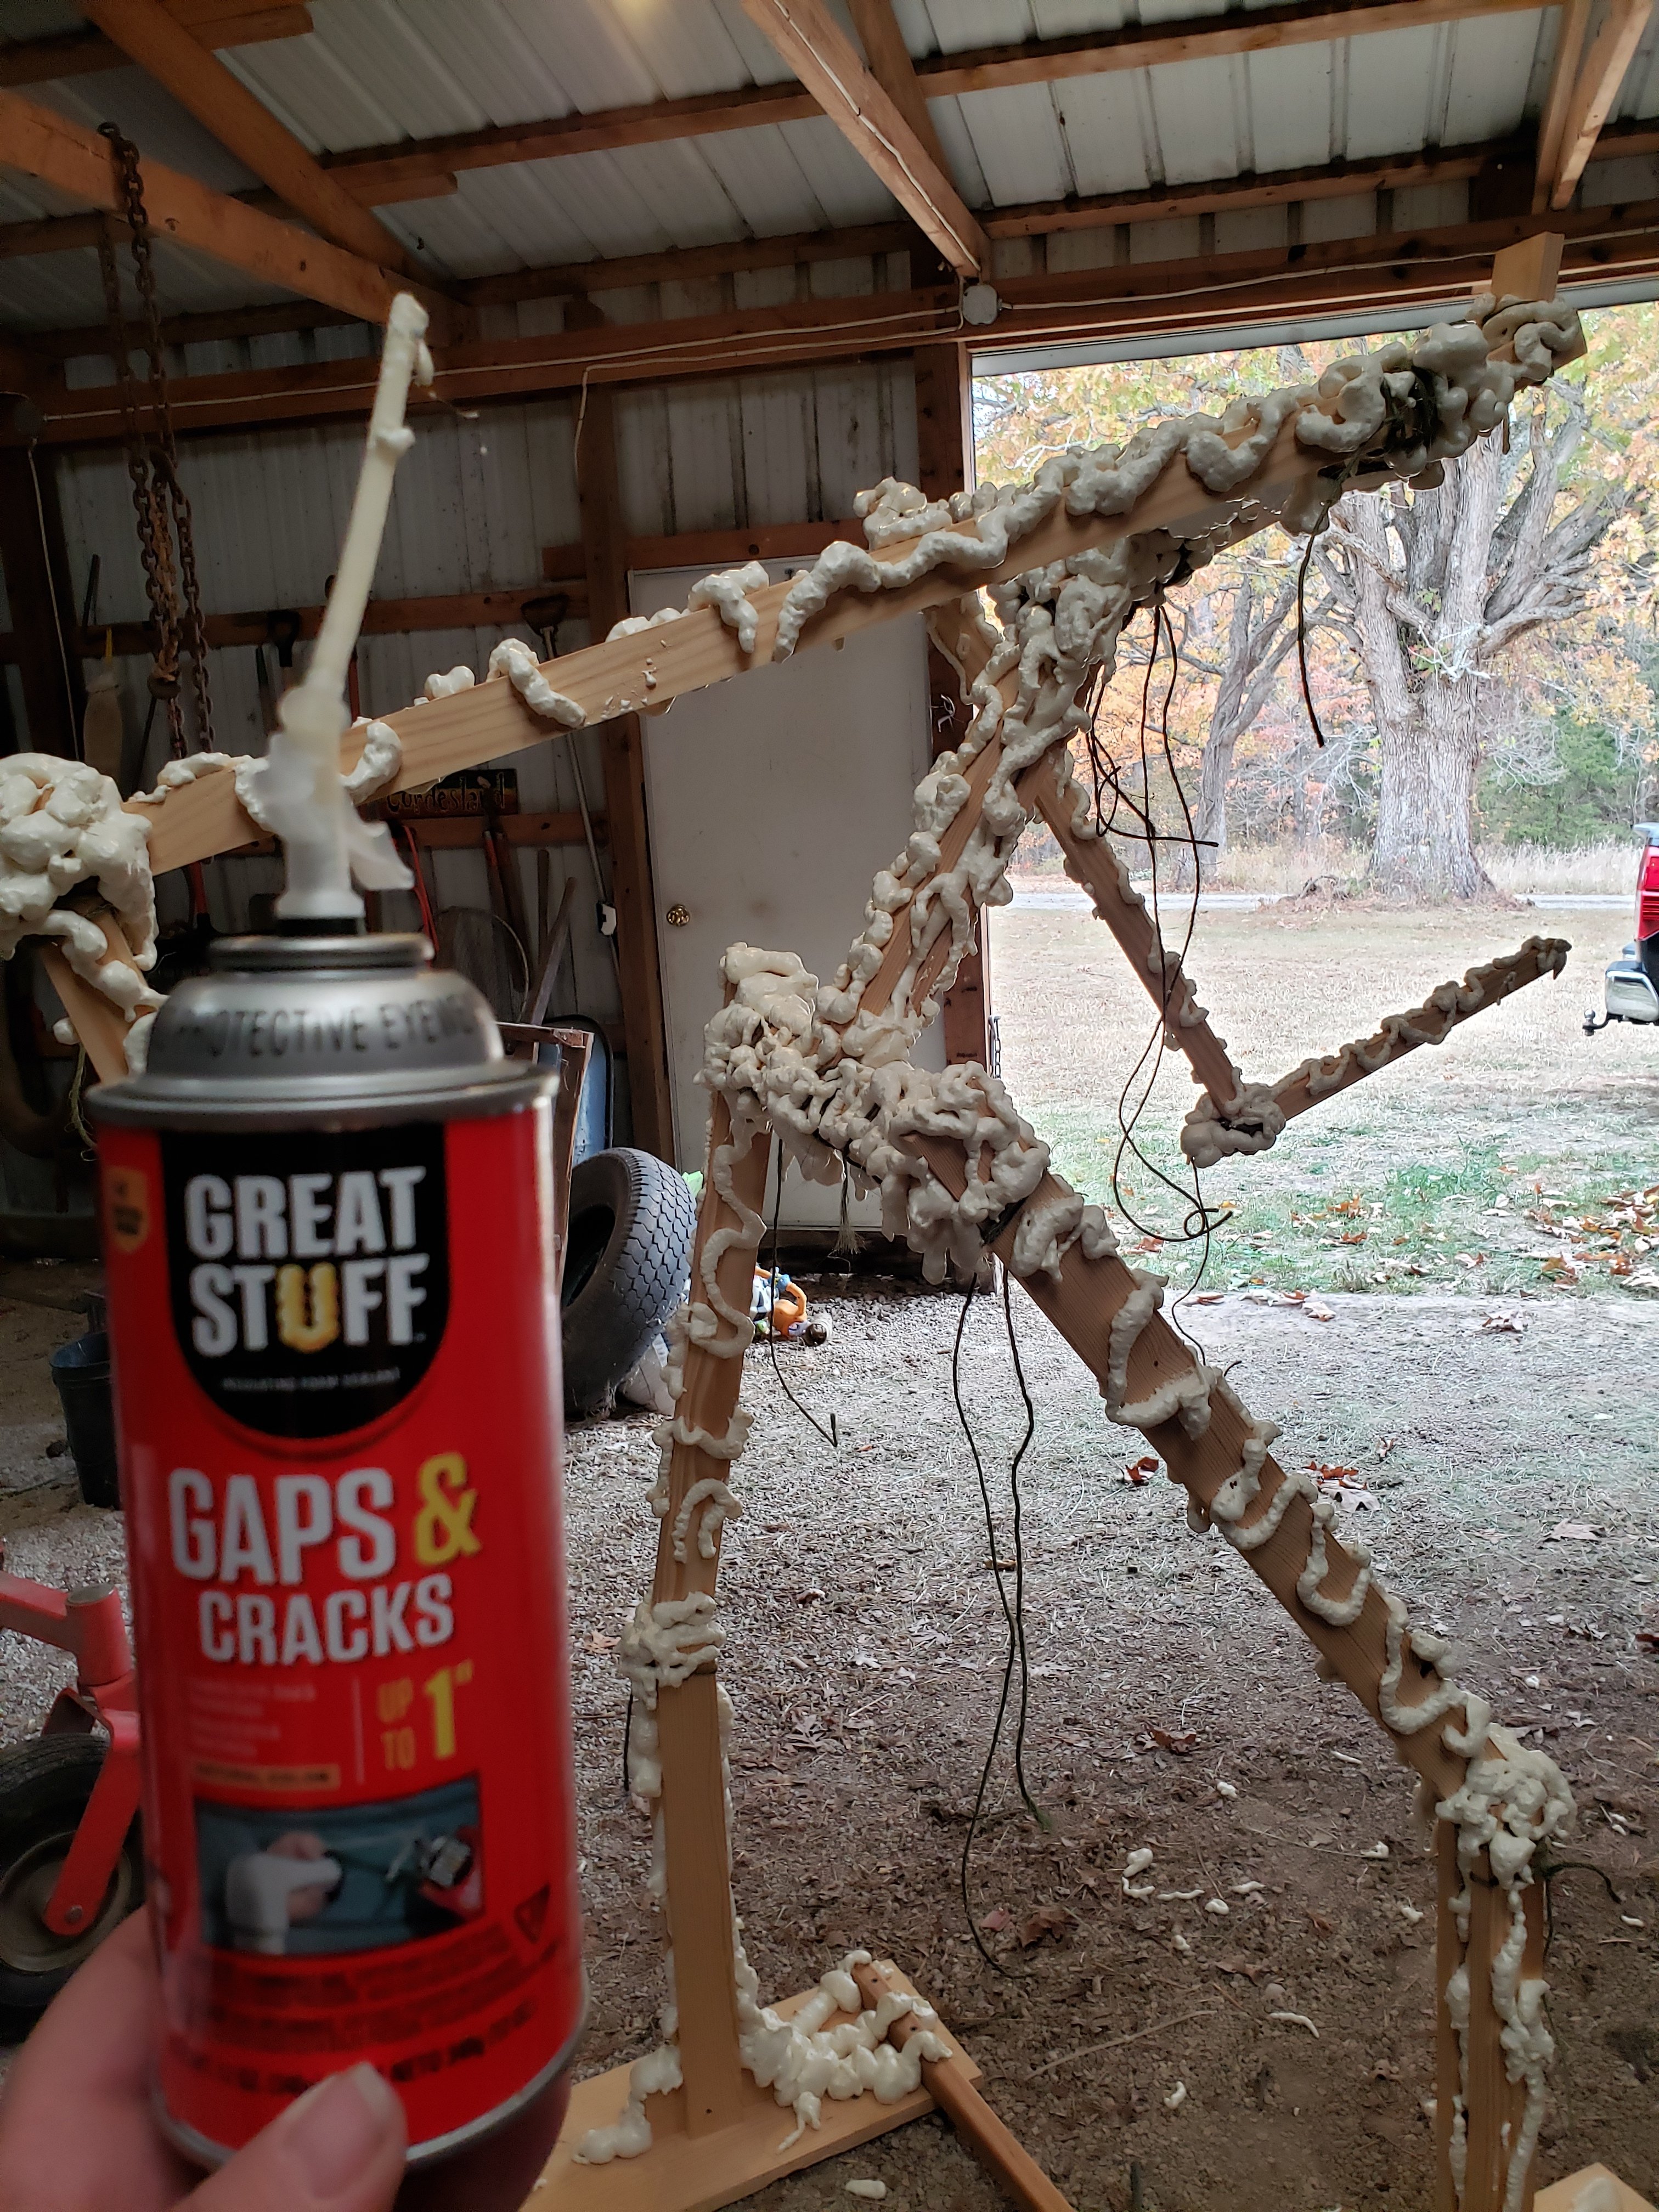
I used two kinds of Saran Wrap on this build. The regular see-through kind and the opaque kind that will stick to damn near anything it comes into contact with. Normal Saran Wrap doesn’t hold in cold very well either, but the Press and Seal stuff is crazy sticky and will hold to itself even if it freezes. I used the expandable foam that you get at the hardware store for sealing up gaps and cracks in your house. It also sticks to raw wood pretty well unless you pick it off. The foam was used to make “vines” all over his body, to form the feet, fill the gaps between boards and create knobby joints. It expands as it dries, so it gets into all the tiny splits in the wood that we made while screwing it together. (Even pre-drilling, 1x lumber is delicate)
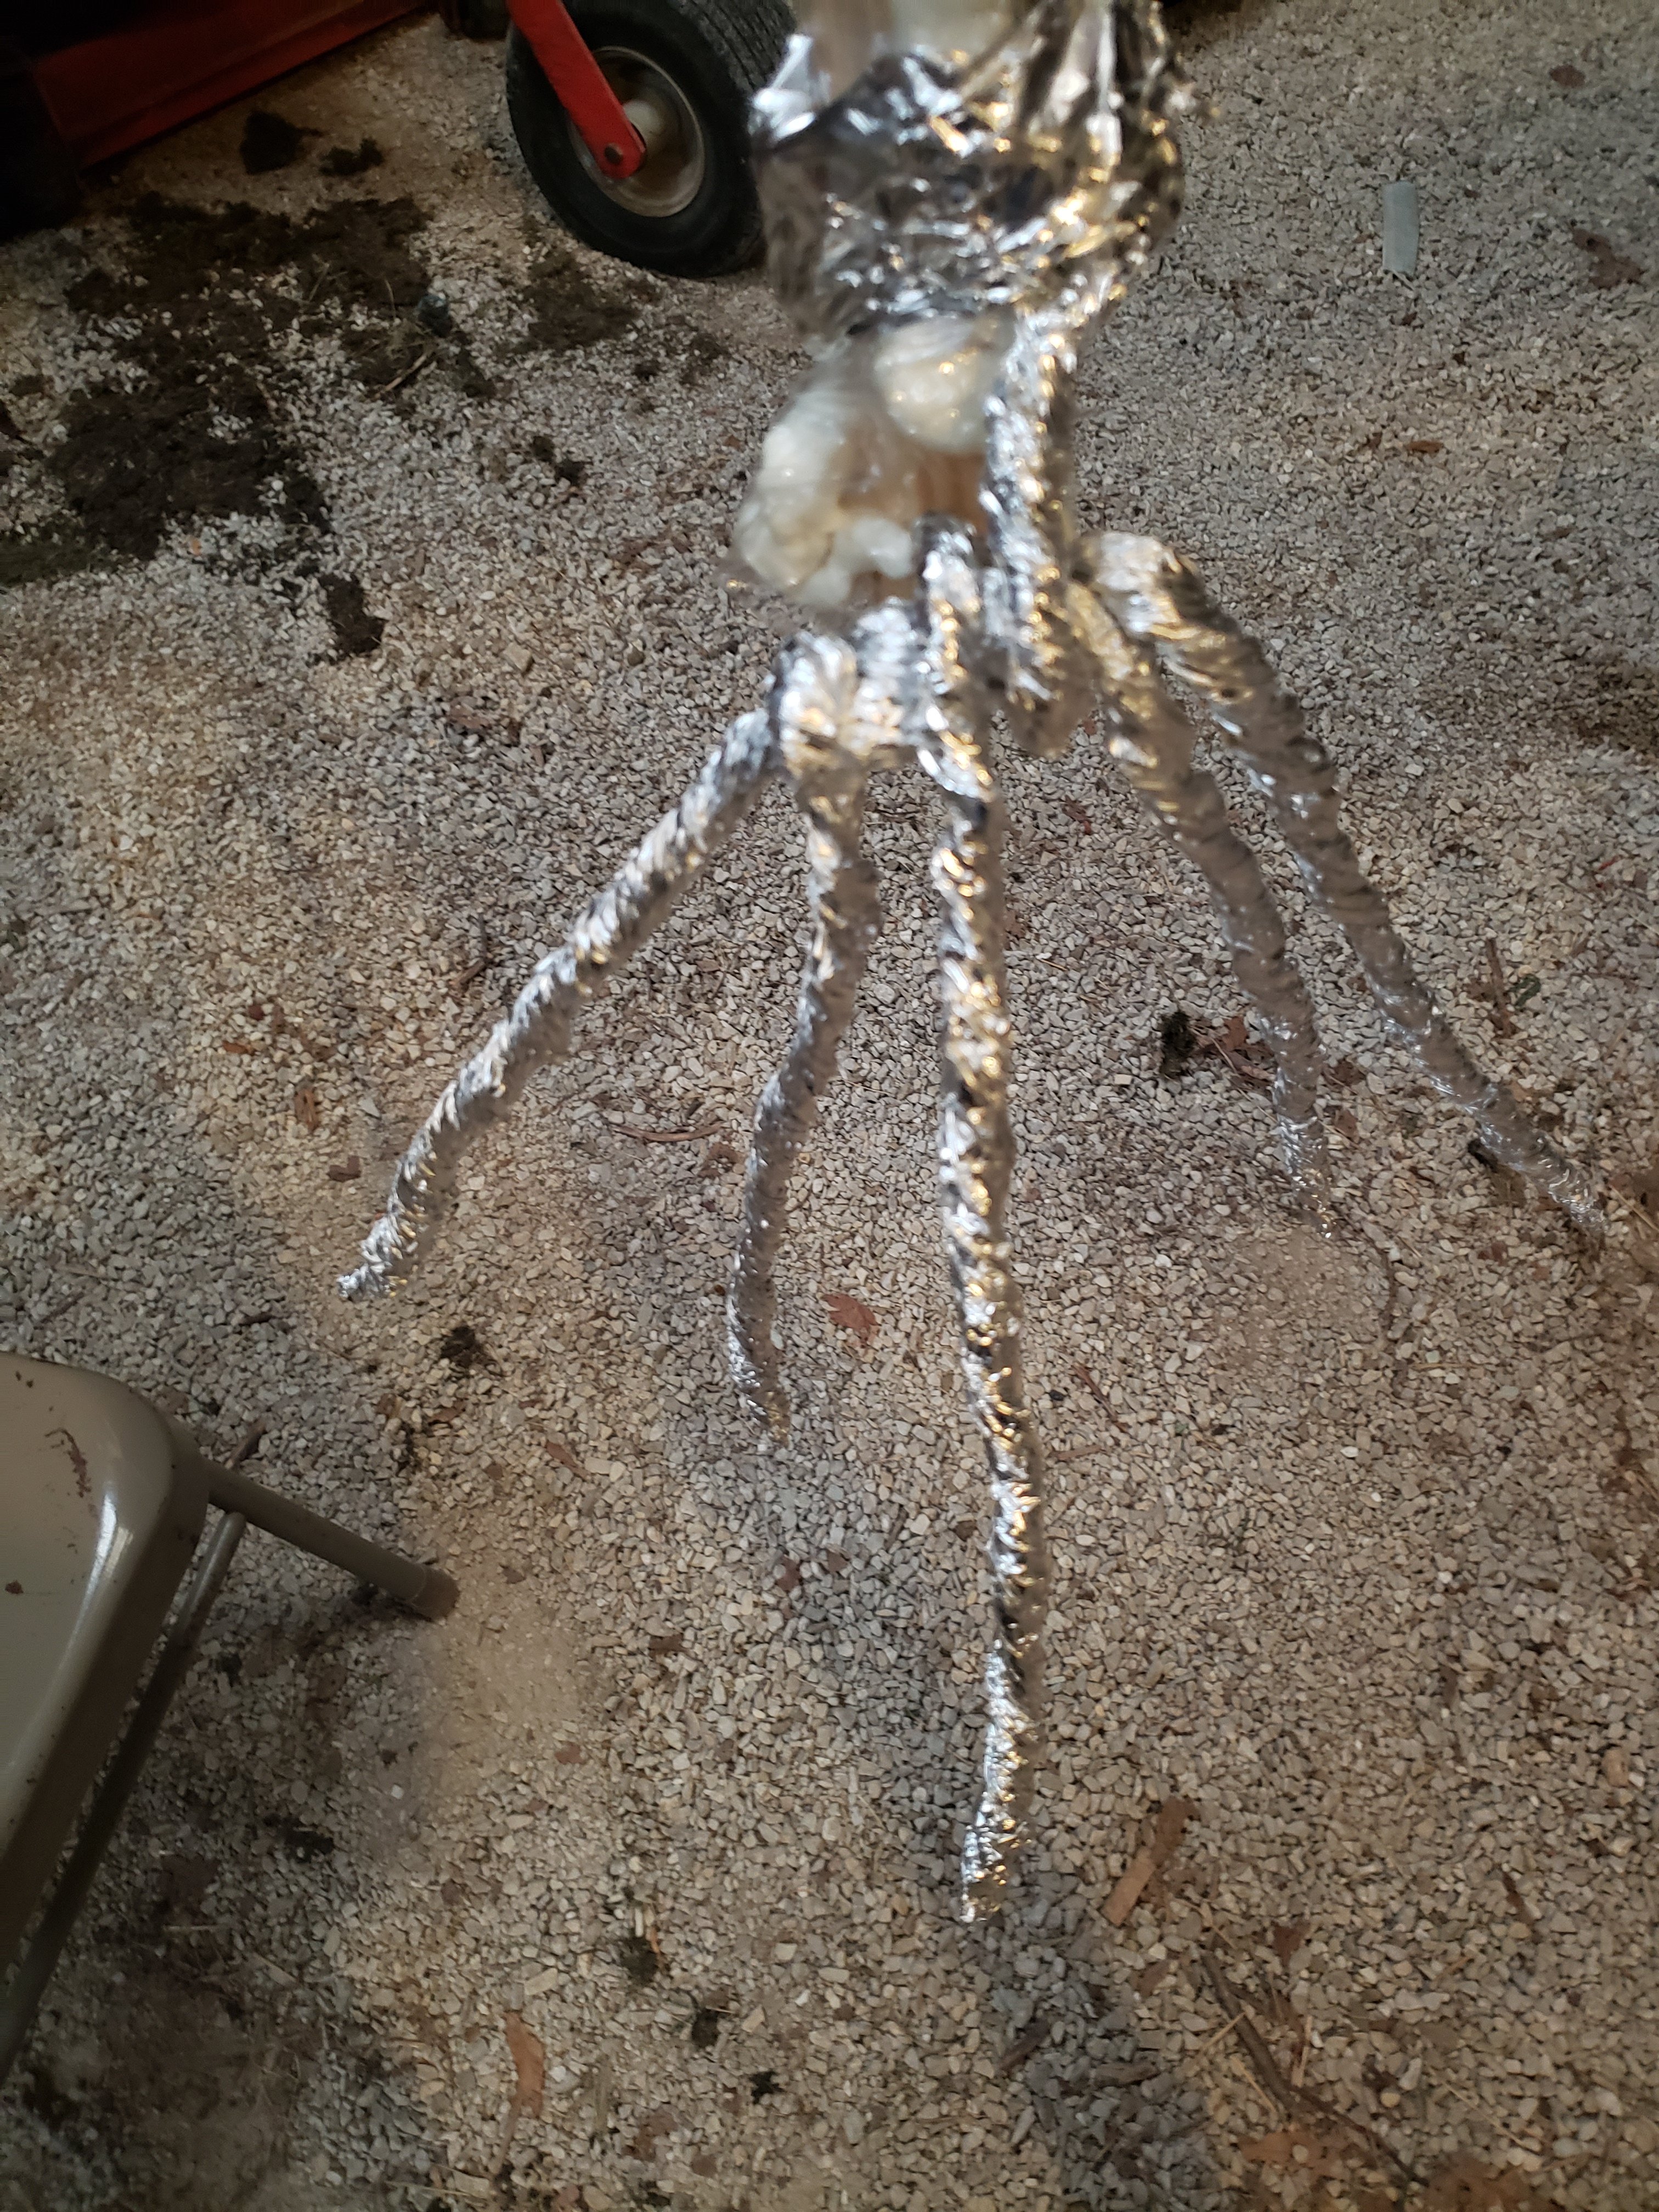
The ribs are garden stakes that I jammed through the foam in his spine, then bent to curl in like a ribcage. I wrapped them in Saran Wrap and a bit of twisted foil to give them a bit more girth. I then wrapped the entire Grim in clear Saran Wrap, from his neck to his ankles.
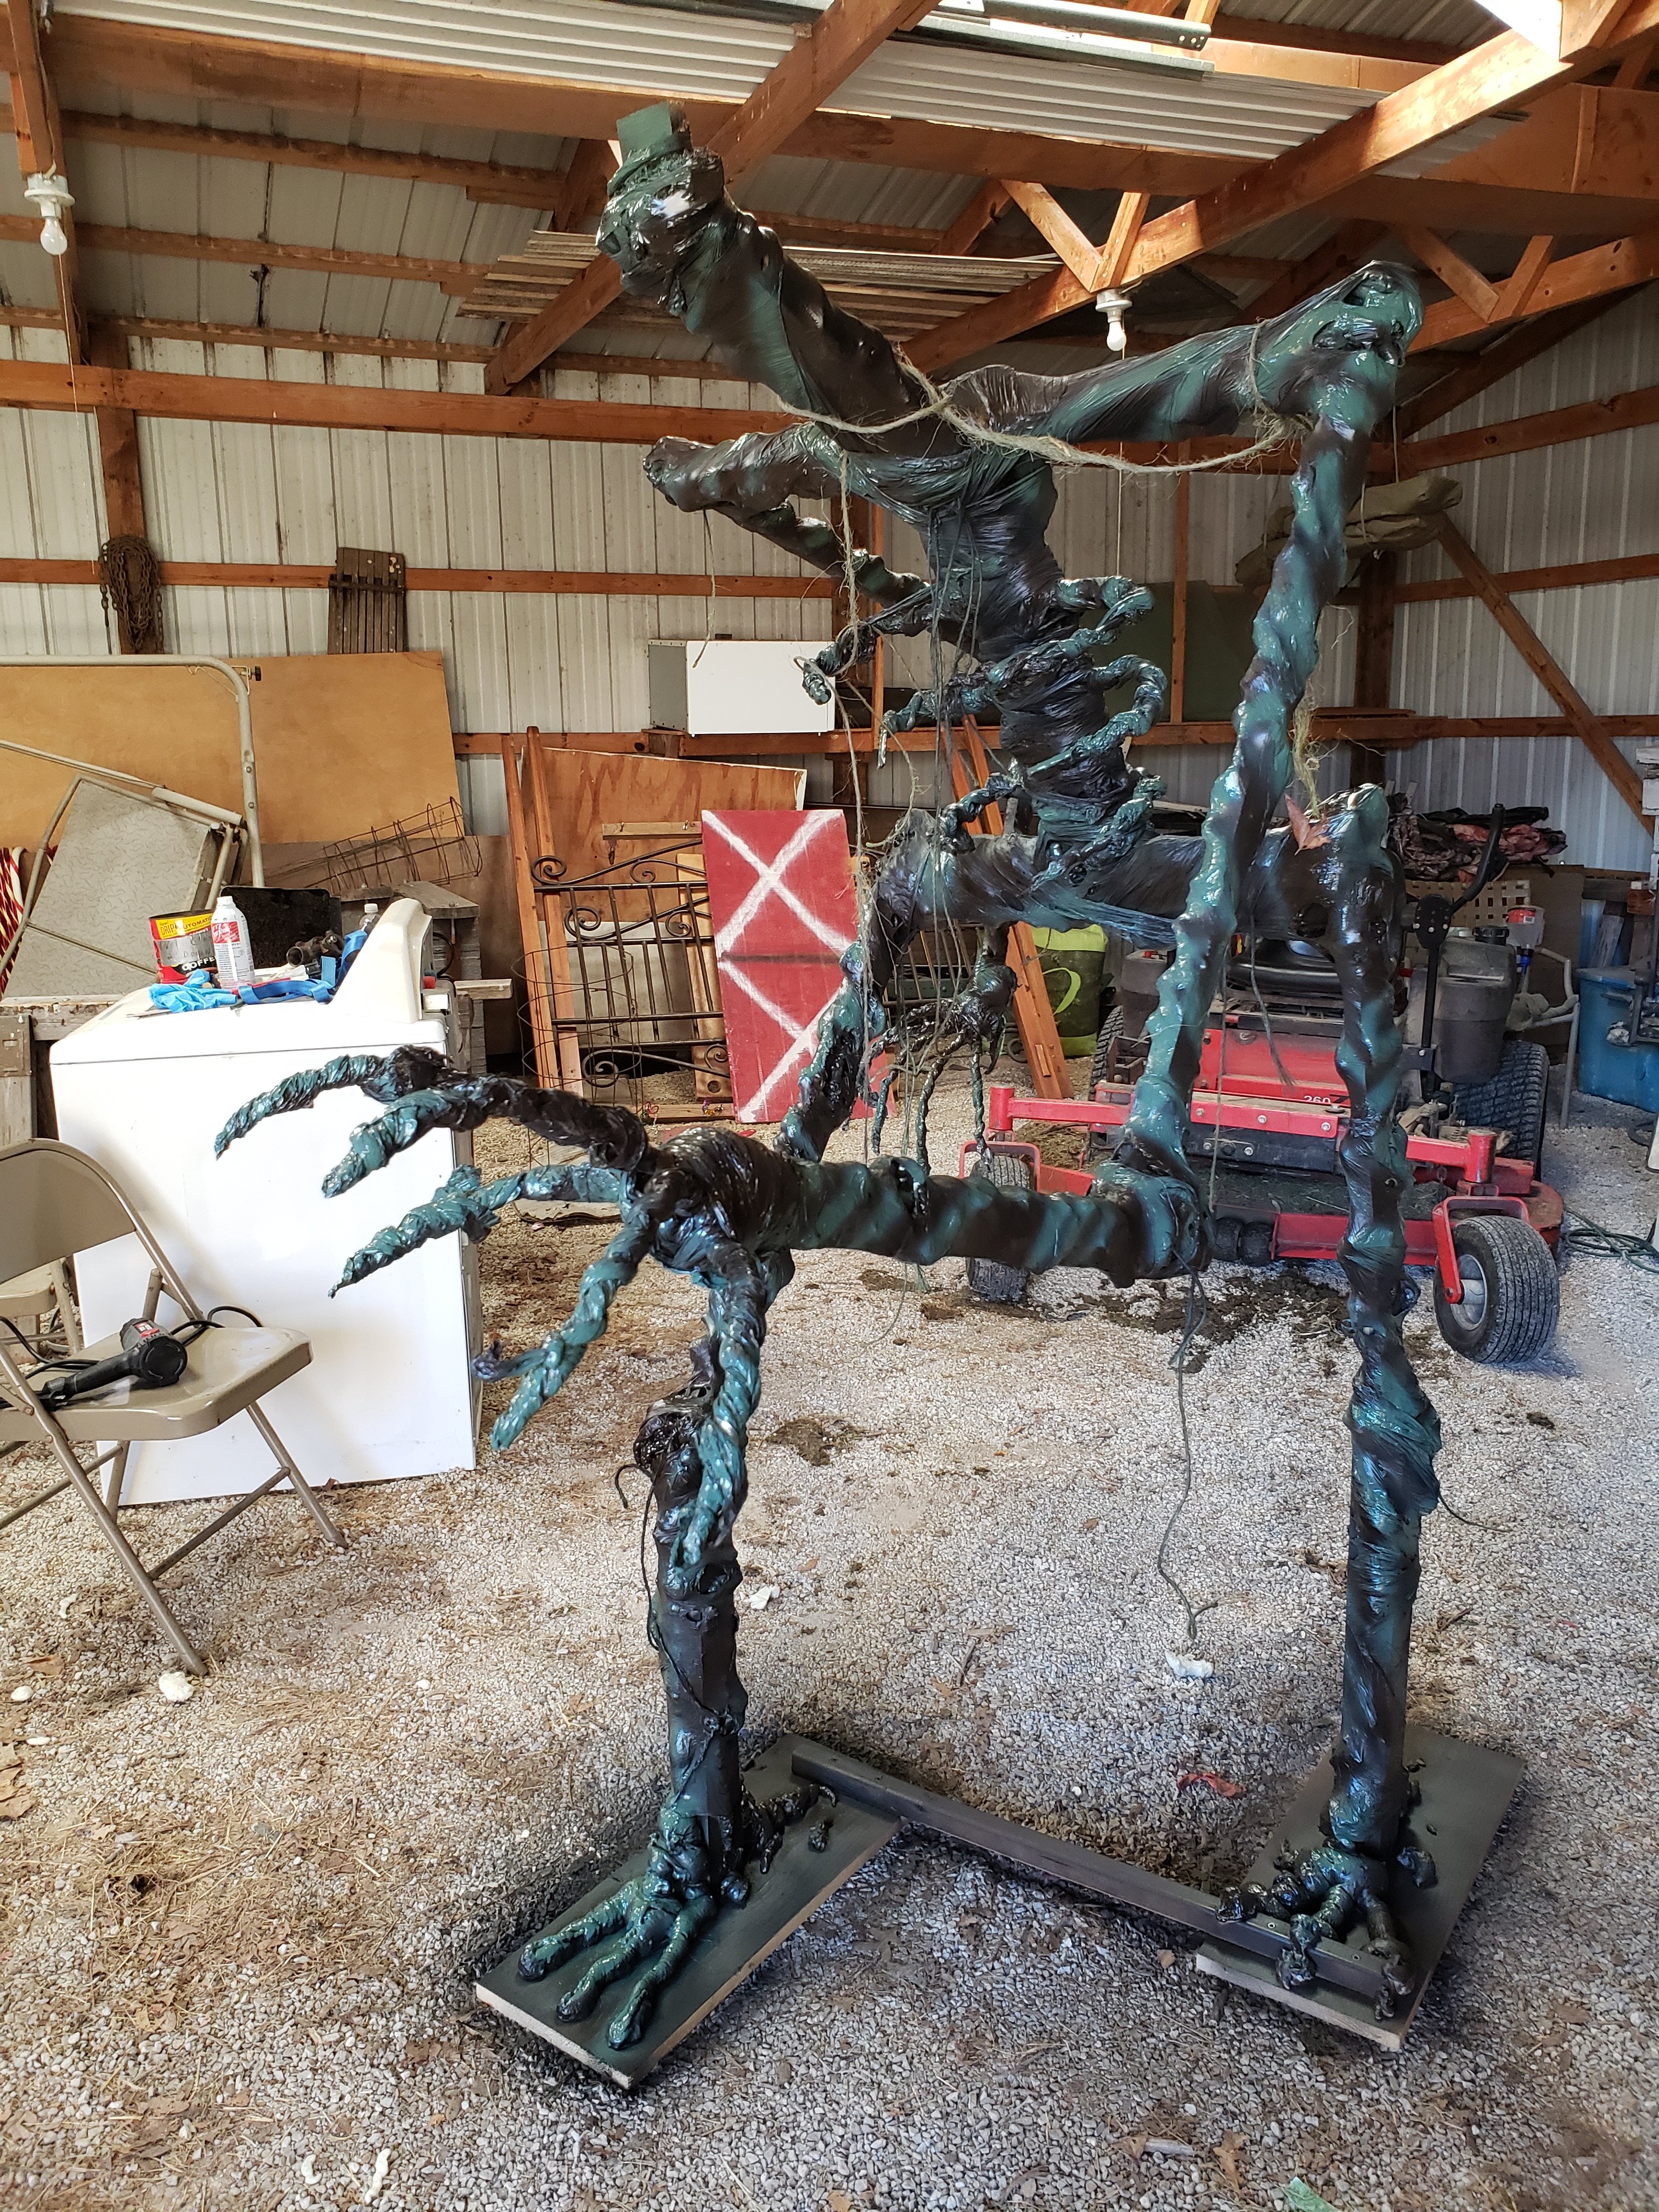
Using the heat gun on the clear Saran Wrap shrinks it down against the foam and wood, puts a few holes in in it here and there and wrinkles it up so it looks like aged, desiccated skin. I thought this was a really cool effect. The opaque sealing wrap does not behave this way though, it only shrinks up and contorts or melts. I used a combination of both on the Grim’s hands since I wanted some of it to shrink and form to the fingers and some of it just to add bulk.
I made fingers from twisted foil first, then used the sticky opaque wrap to go between and down each finger, wrapping the remainder above them to form a palm for the hand. After I had the sticky wrap on, the fingers were stiff enough to be posable. I left what looked like a creepy hot mess overnight and came back to paint it the next day.
I used a combination of black, brown and green over the entire body, keeping the green mostly over the places where the foam stood out so that it would look like winding vines on the skin. Covering all the foam and wrap really made him look like something more realistic.
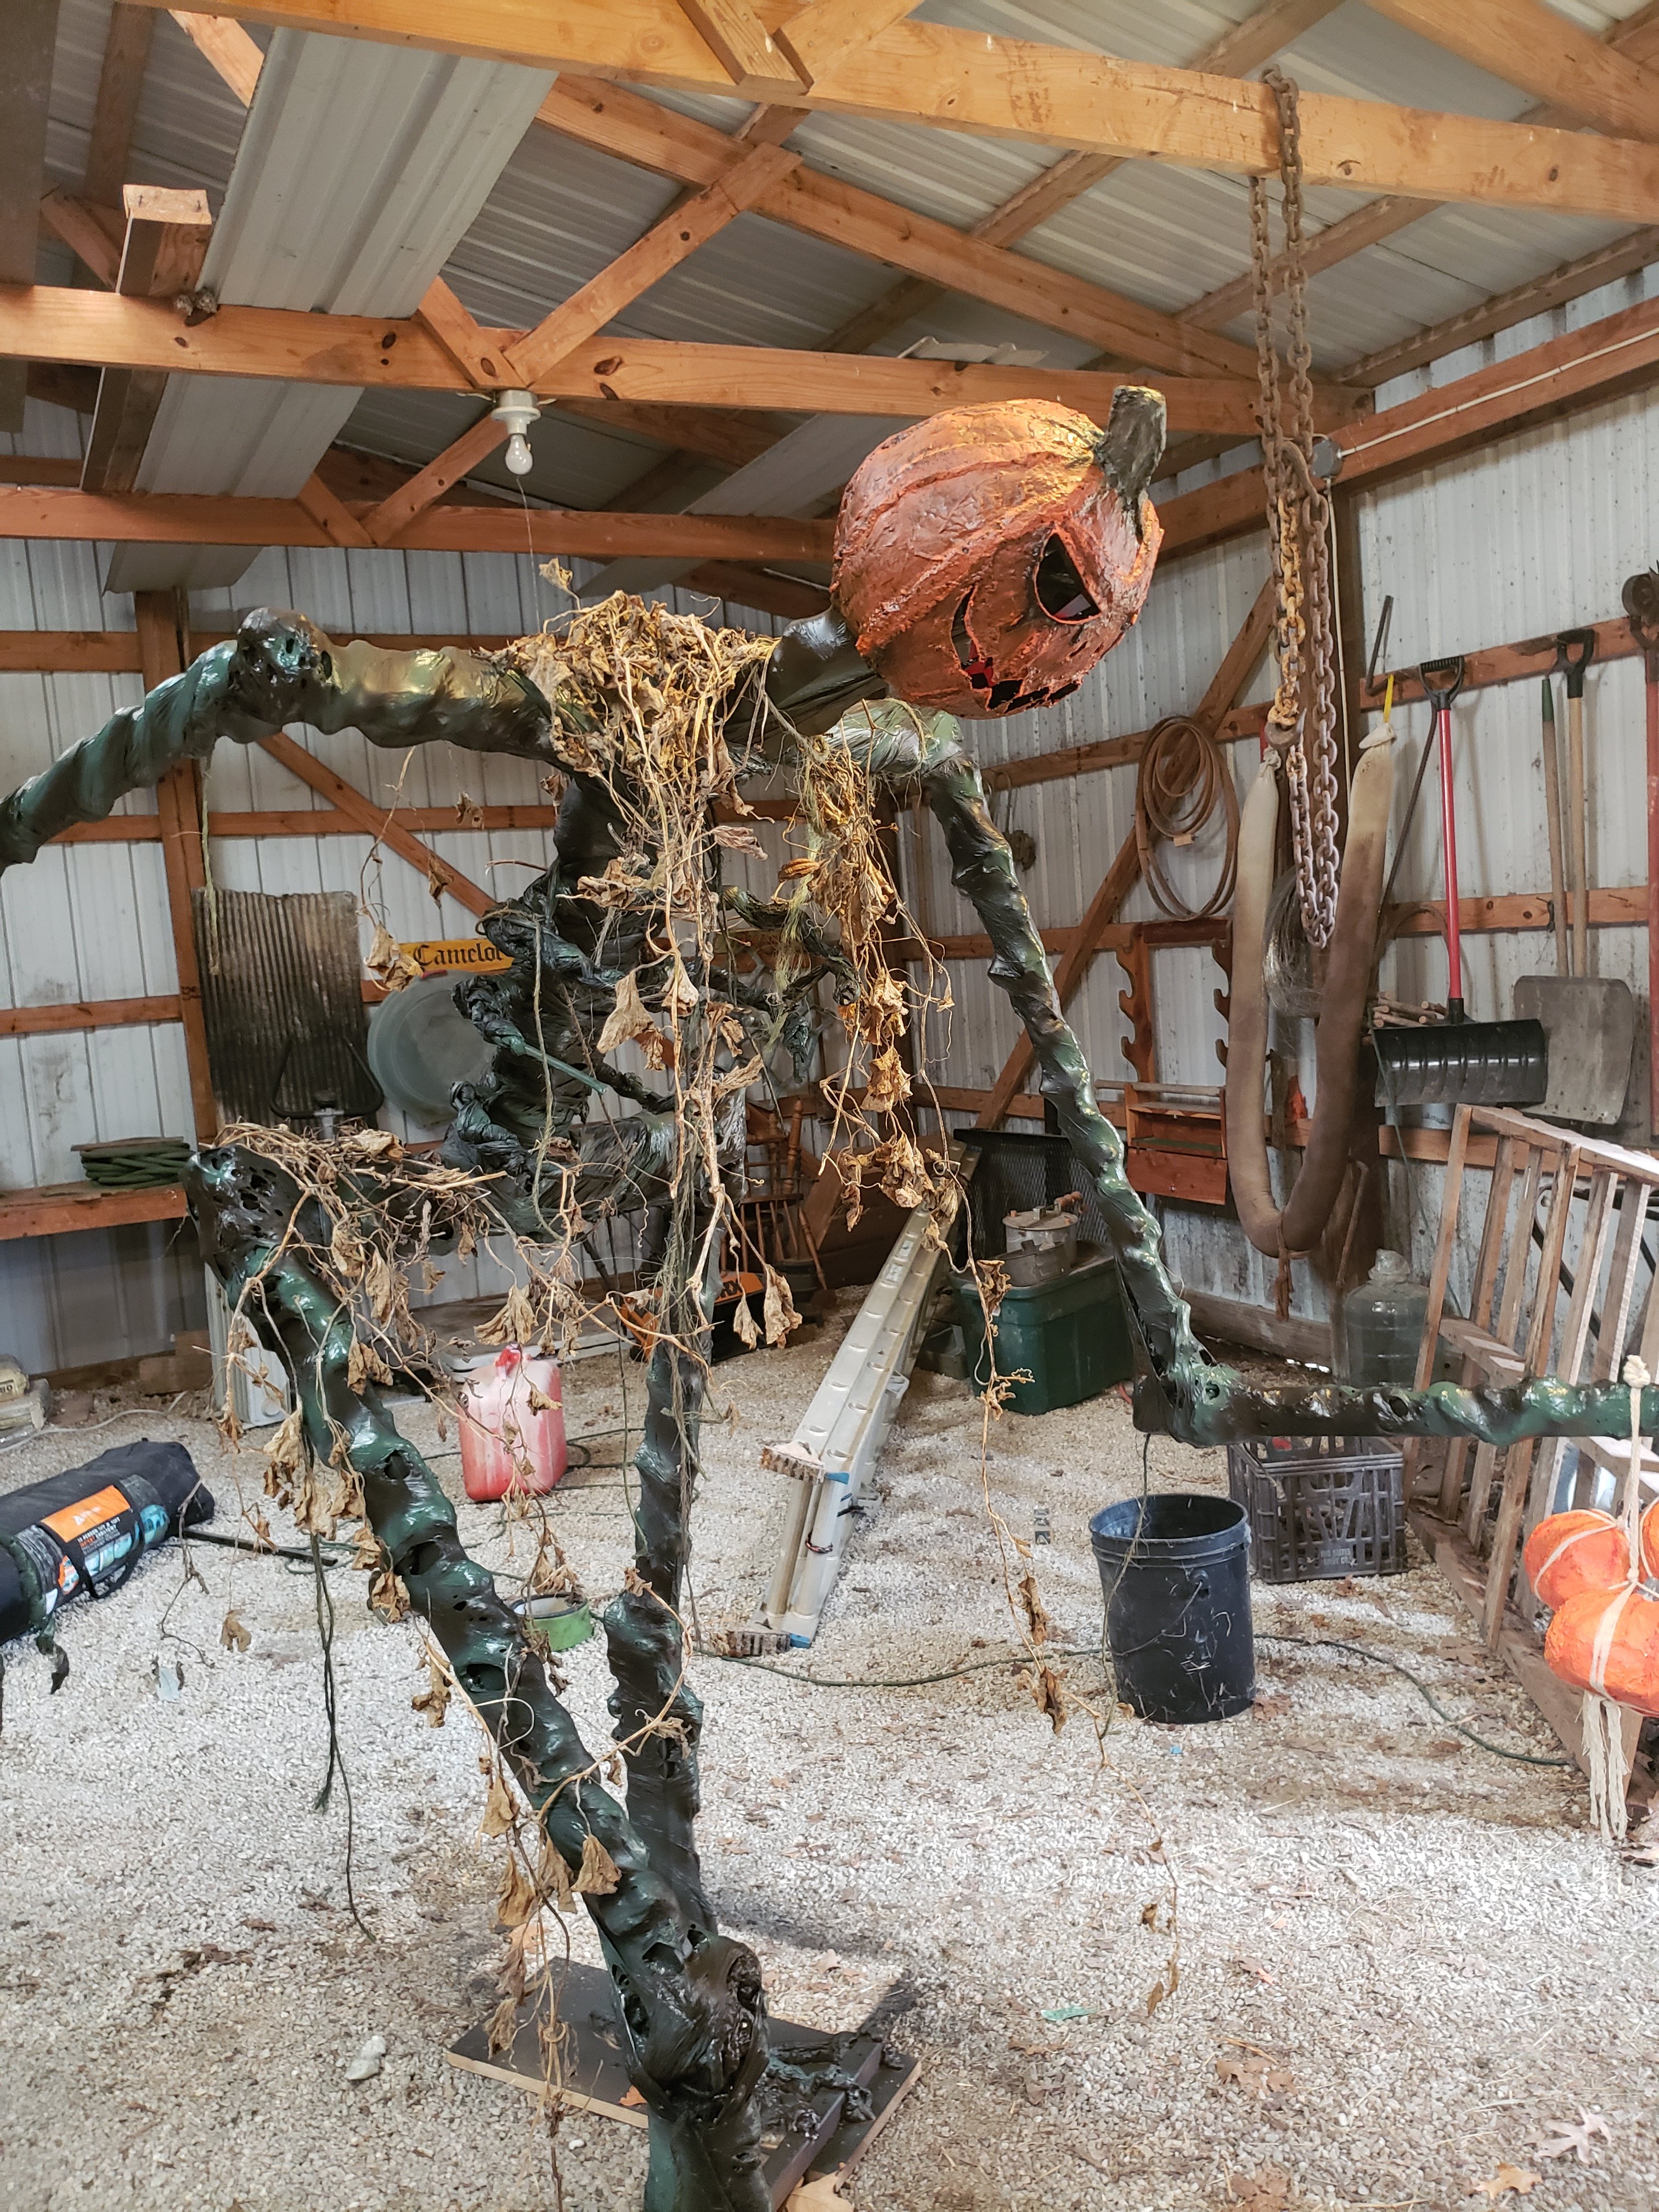
Here’s the final build, with the head on, his little Jack O’ Lantern captives over his arm and a few dead vines from our garden to drape over the rib cage.
My daughter added some red glow sticks to his head before the party and a white tea light in each Jack O’ Lantern so he’d glow after dark.
And that’s it! My first monster build. We’re already talking about what we may create next year. Have a safe and happy Halloween everyone!
I’m working on a few paper maché projects for a 4-H Halloween party we’re having. I’ve also started a Tik Tok account to share my art with a new audience.
Holy hell ya’ll. I never imagined speaking for 2 minutes coherently would be such a struggle. I write MUCH better than I speak. On video I sound like a complete freaking Goober. I’m going to do them anyway, but fair warning, do NOT expect miracles. LOL
I spent several hours driving in circles in Downtown St Louis last week (by choice, I wasn’t lost) while Tom and the kiddo went to see the Cardinals. They won 2 tickets, mom played chauffer, which meant I had lots of time to cruise around, people watch and think.
I’ve decided I need to step up my art game. I need to share more stuff, try more things, look for places to get new ideas. I also need to ride that monster Ferris Wheel at Union Station sometime, but that’s beside the point. Now that they’re relaxing some of the Covid restrictions, we might be able to go up there and see things again.
This week, I’m doing a bit of writing and building paper maché things for our party. I just completed 3 small Jack o’ lanterns that I’ll share with you- they are part of a larger build I’ll post later.
This video, I didn’t talk in, so no sounding like Pennywise doing a bad impression of Stuttering Bill.
Here’s how I made those paper maché pumpkins:
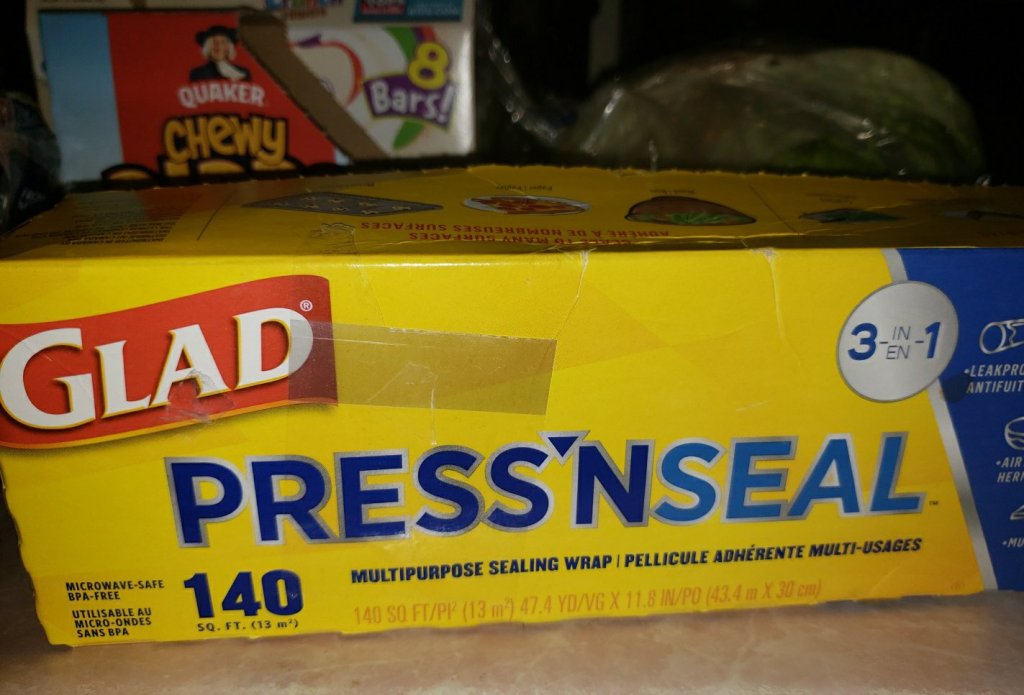
STUFF I USED– Glad Press N Seal Wrap, painter’s tape (masking tape works too), string or yarn, small bowl for holding watery glue, newspaper, magazines, etc to tear into strips, white glue (like Elmer’s school glue). Acrylic paint. If doing texture, you will also need cheap toilet paper (maybe use some of the 2020 stash you tossed in the back of the cabinet when Charmin came back in stock), Premixed joint compound (not DAP brand), more white glue and flour to make the paper maché clay.
1)Wrap a halfway solid object.
I have a weighted handball that I use for therapy. It’s bigger than a softball, but not as big as a grapefruit. I covered this entirely in wax paper and tape, then wrapped that with Glad Press and Seal saran wrap. After I had several layers, I cut a split and removed the ball. I forgot to take pictures of this part. Sorry!
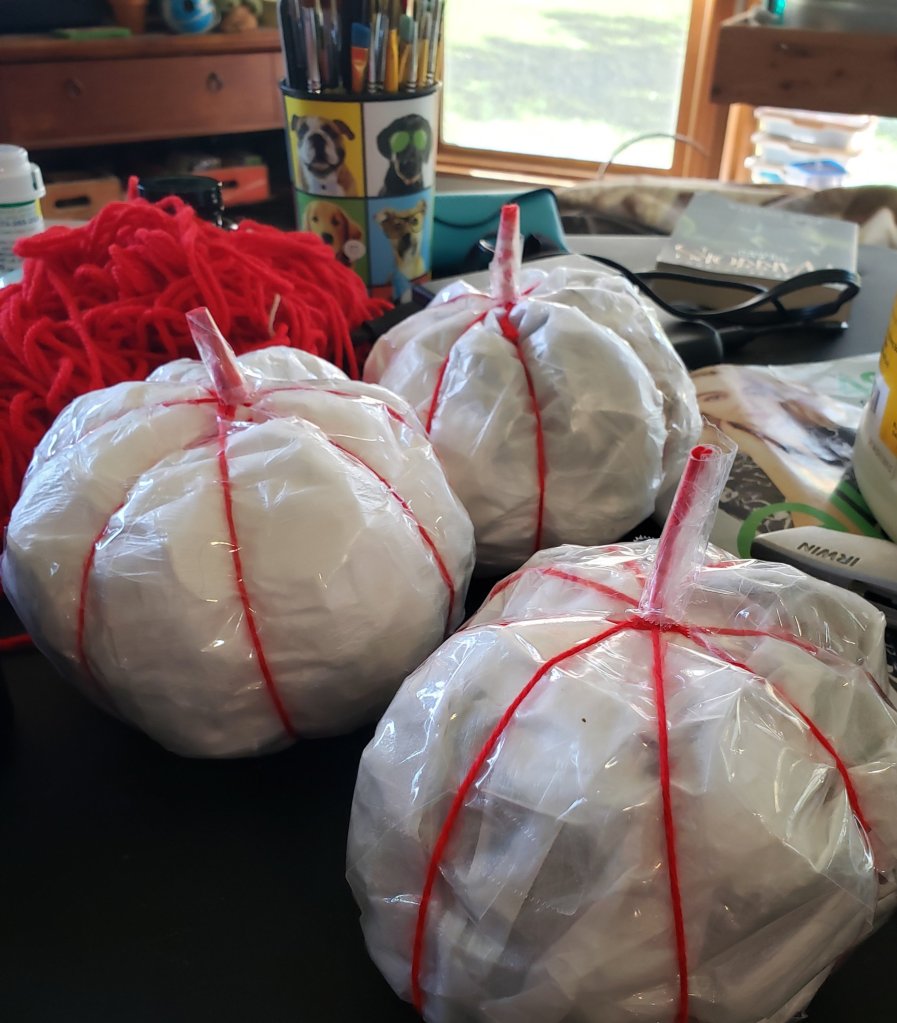
2) Stuff it. I restuffed the Saran Wrap ball with plastic grocery bags and taped up my cut. I then used yarn to tie around the ball. I left the tops of the yarn until the end. Tie your yarn like you would secure a package. Slip under the ball, bring the ends over the top, tighten down. The more you tighten the yarn, the deeper the lines on your pumpkin will be.
Turn the ball and tie again at least twice more, then twist the top leftover string and trim off to about a 1/2 inch. This will be your stem. I wrapped tape around the string ends to secure them to each other and thicken the stem up a bit.
3) Paper maché
For the paper strips, I use what I have. I get a ridiculous amount of plant and clothing catalogs, so I used a lot of those. Tear or cut your strips (if you have issues with jagged edges) into manageable pieces.
I use plain white Dick Blick school glue (like the white Elmer’s) thinned with water for paste. I don’t like the idea of the old fashioned flour paste, since it can mould. How thick or thin you want it is kind of personal preference, my solution was about 2 parts glue 1 part water.
Drag your strips through the glue, then gently through your fingers. You don’t want it dripping, but coated enough to stick to itself. Use a very light touch or you’ll tear the paper.
I alternate the direction of my strips to prevent gaps and help with strength. I went all the way around vertical, then horizontal, the next layer vertical angled right and so on. I found it easier to do a couple layers, let that dry overnight and add 2-3 more. You want to let it dry completely before moving on to the next step.
4) Let it dry and cut faces.
You want your paper very stiff with no give before cutting. If it gives or you have weak spots, repeat layers and let dry again until it feels strong. It can pull apart or collapse if you skimp on layers or dry time.
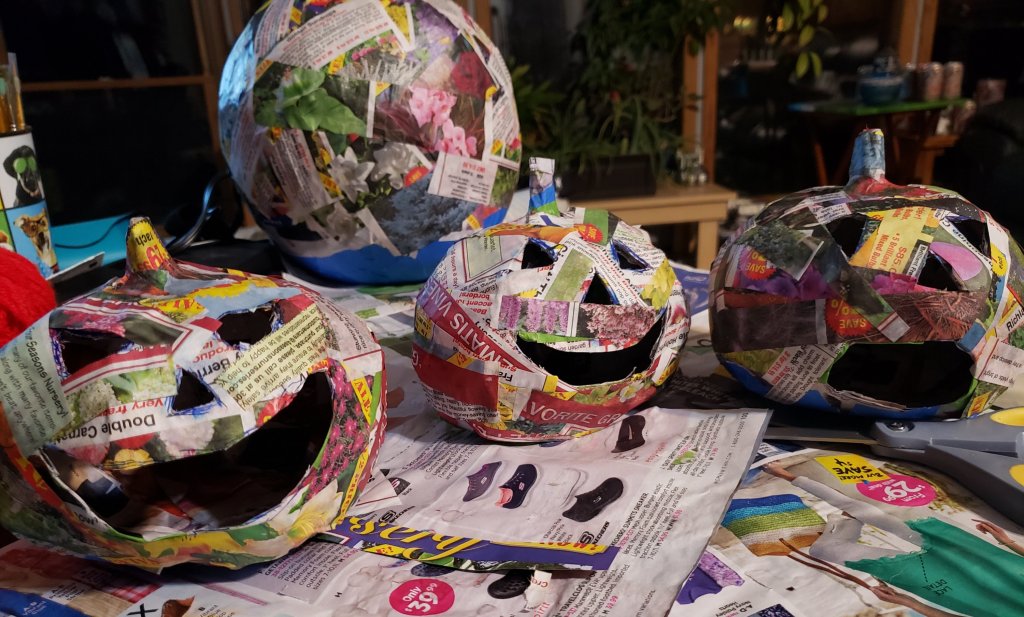
I cut the faces of my Jack O Lanterns with an exacto knife, then I cut the bottom out of each pumpkin and removed all the stuffing, wax paper, Saran Wrap, tape and string. The Press N Seal took a little effort to remove, as it wants to stick to EVERYTHING including itself.
At this point, you should be left with pumpkins that are nothing but paper and look like this:
That larger pumpkin in the back is the head for the other part of the project I’m working on.
5) Texture. (This step is optional)
At this point, you can start painting if you like. I added another layer of detail here to give my finished pumpkins a bumpy appearance and beef up the vertical lines on them. If you’re going to do the texture step, I would paint the entire pumpkin with a primer coat first and let it dry, so that the texture doesn’t make your paper shell wet and heavy, causing it to lose shape. Also, the texture will require a minimum of 24 hours dry time, depending on how thick you put it on, but in my opinion was absolutely worth it- it added a lot of character they would have been missing otherwise.
So for texture, here’s your recipe:
They call this paper maché clay, but I found the texture of it be less like clay and more like slightly congealed oatmeal… which is is as gross at it sounds to stick your hands in. I wore medical gloves. Google paper maché clay if you’d like to experiment with other recipes. I modified this lady’s recipe, she makes some really cool masks with it.
PAPER MACHE CLAY-
-1 1/4 cups wet toilet paper (They recommended putting it through a food processor. I just used a kitchen wisk to break it up into tiny mush in water.)
-1 cup premixed drywall joint compound (Don’t use DAP brand, it has something in it that will prevent the clay from setting properly)
-3/4 cup Elmer’s Glue
Her recipe calls for 1/2 to 1 cup of white flour and 2 Tablespoons of mineral oil. I skipped both of these, which may be why my consistency wasn’t as smooth and was more like oatmeal that clay. For these pumpkins though, my version worked great and I don’t have to worry about the flour/mildew/mold issue. I’m allergic to mold, so the flour formulas are a big deal breaker for me.
I will also confess that I didn’t actually measure my ingredients, I just dumped the stuff in a bowl- pretty much the way I cook too (this drives my husband nuts. he likes precise, linear steps to follow)
I didn’t get a great picture of this on the little pumpkins, but I took some of the larger one, so you can see the detail.
Like I said, play with your recipe. If you want these texture details smooth, I think adding more joint compound might do the trick- even make it so you can sand it with a drywall sanding block.
If you’re going to add much detail around the facial feature openings, you might reinforce them first with cardboard and hot glue to keep them from becoming mis-shapen.
I just stuck a bit of the ‘clay’ (oatmeal) where I wanted it, then smoothed it into lines or shapes with my fingers, a scrap of cardboard, Q-Tips, whatever worked. When it’s completely hardened, it will be bonded with the maché strips and will feel stiff and solid. At this point, it’s ready for paint.
6) Make it pretty.
I kept my painting pretty simple, since these are going to be outside, in the dark and you won’t be seeing a lot of detail on them. I used a white acrylic primer coat inside and out, followed by 3 different shades of orange on the outside, then painted the stems a grey with a touch of brown mixed in.
I cut some some small circles for the bottom, painted white on one side, and curved the edges slightly to get them inside the bottoms of the pumpkins, then hot glued them to cover the hole in the bottom and painted the outside of that orange as well. You could leave the bottom open if it’s going to be displayed sitting on a surface. It would certainly make it easier to get the lights in them, as I had to shove mine through the mouth, taking care not to damage their faces.
7) Light it up
I used electronic tea lights inside mine to make them flicker and look like a candle. Any small LED light or even a glow stick would work. Obviously you don’t want to stick a real candle in these with a flame, unless for some reason you want them to burn.
Here are my little guys all finished.
I’ll try and get another post on here of the Grim (and how these look added to that build) so you can see the whole thing once it’s put together. The Grim is hopefully going to be about 8 ft. tall and carrying these small pumpkins in one hand. They will be lit as will the Grim’s head.
Don’t ask me where I’m going to store all this stuff after the party. LOL
If you want to hear me be awkward on video, you can check out my Instagram or TikTok accounts. 🙂 Or if you’re an ‘old person’ (as my daughter calls us) and still use Facebook, I’m there too.
As one of her Christmas/Birthday presents this year, I promised my kid I would remodel her room to update it from a kid’s room to something more suitable to a teenager. She’s been waiting on pins and needles to turn 13, I myself could have waited another ten years at least. Where the hell does the time go?
We made a lot of small changes that made a big difference, like taking down all those little projects hanging on the walls that we had done while at the library’s summer reading program years ago. 😥 My friend Marianne gave us several really framed wolf posters that she’d stored in her attic- they had hung in her son’s room when he was a teenager. Seems like HE should still be a teenager and not 30-something now with his own family….
So we hung the wolf posters, her dad installed a flat screen that we had stashed after upgrading our living room TV and hooked up the old Xbox 360 in there along with the legacy Nintendo thingy- forgive me gamers, I am and painter and gardener, I don’t know all the systems and terminology. I found a day bed (she wanted a “bed that I can sit on like a couch”) in deep blue velvet with silver studs that reminded me of furniture I saw when staying in the Hard Rock Hotel in Las Vegas. The effect is doubled by the fact that she now has at least 4 guitars hanging on her walls in between the wolf posters. She is the guitar player that I dreamed of being, but never took seriously or put the practice in to become. She even got special permission from the school band teacher to play guitar with the band, though they had never had a guitar in the Middle School Band before.
The one thing this room is seriously lacking is closet space. Like me, she tends to favor older furniture over the new pressboard stuff. We went out and scoured antique stores until we found an end-table with a drawer. It had a really cool sliding hidden compartment that we didn’t even discover until I was putting in the truck and strapping it in to bring it home. We did not find the armoire I was hoping for.
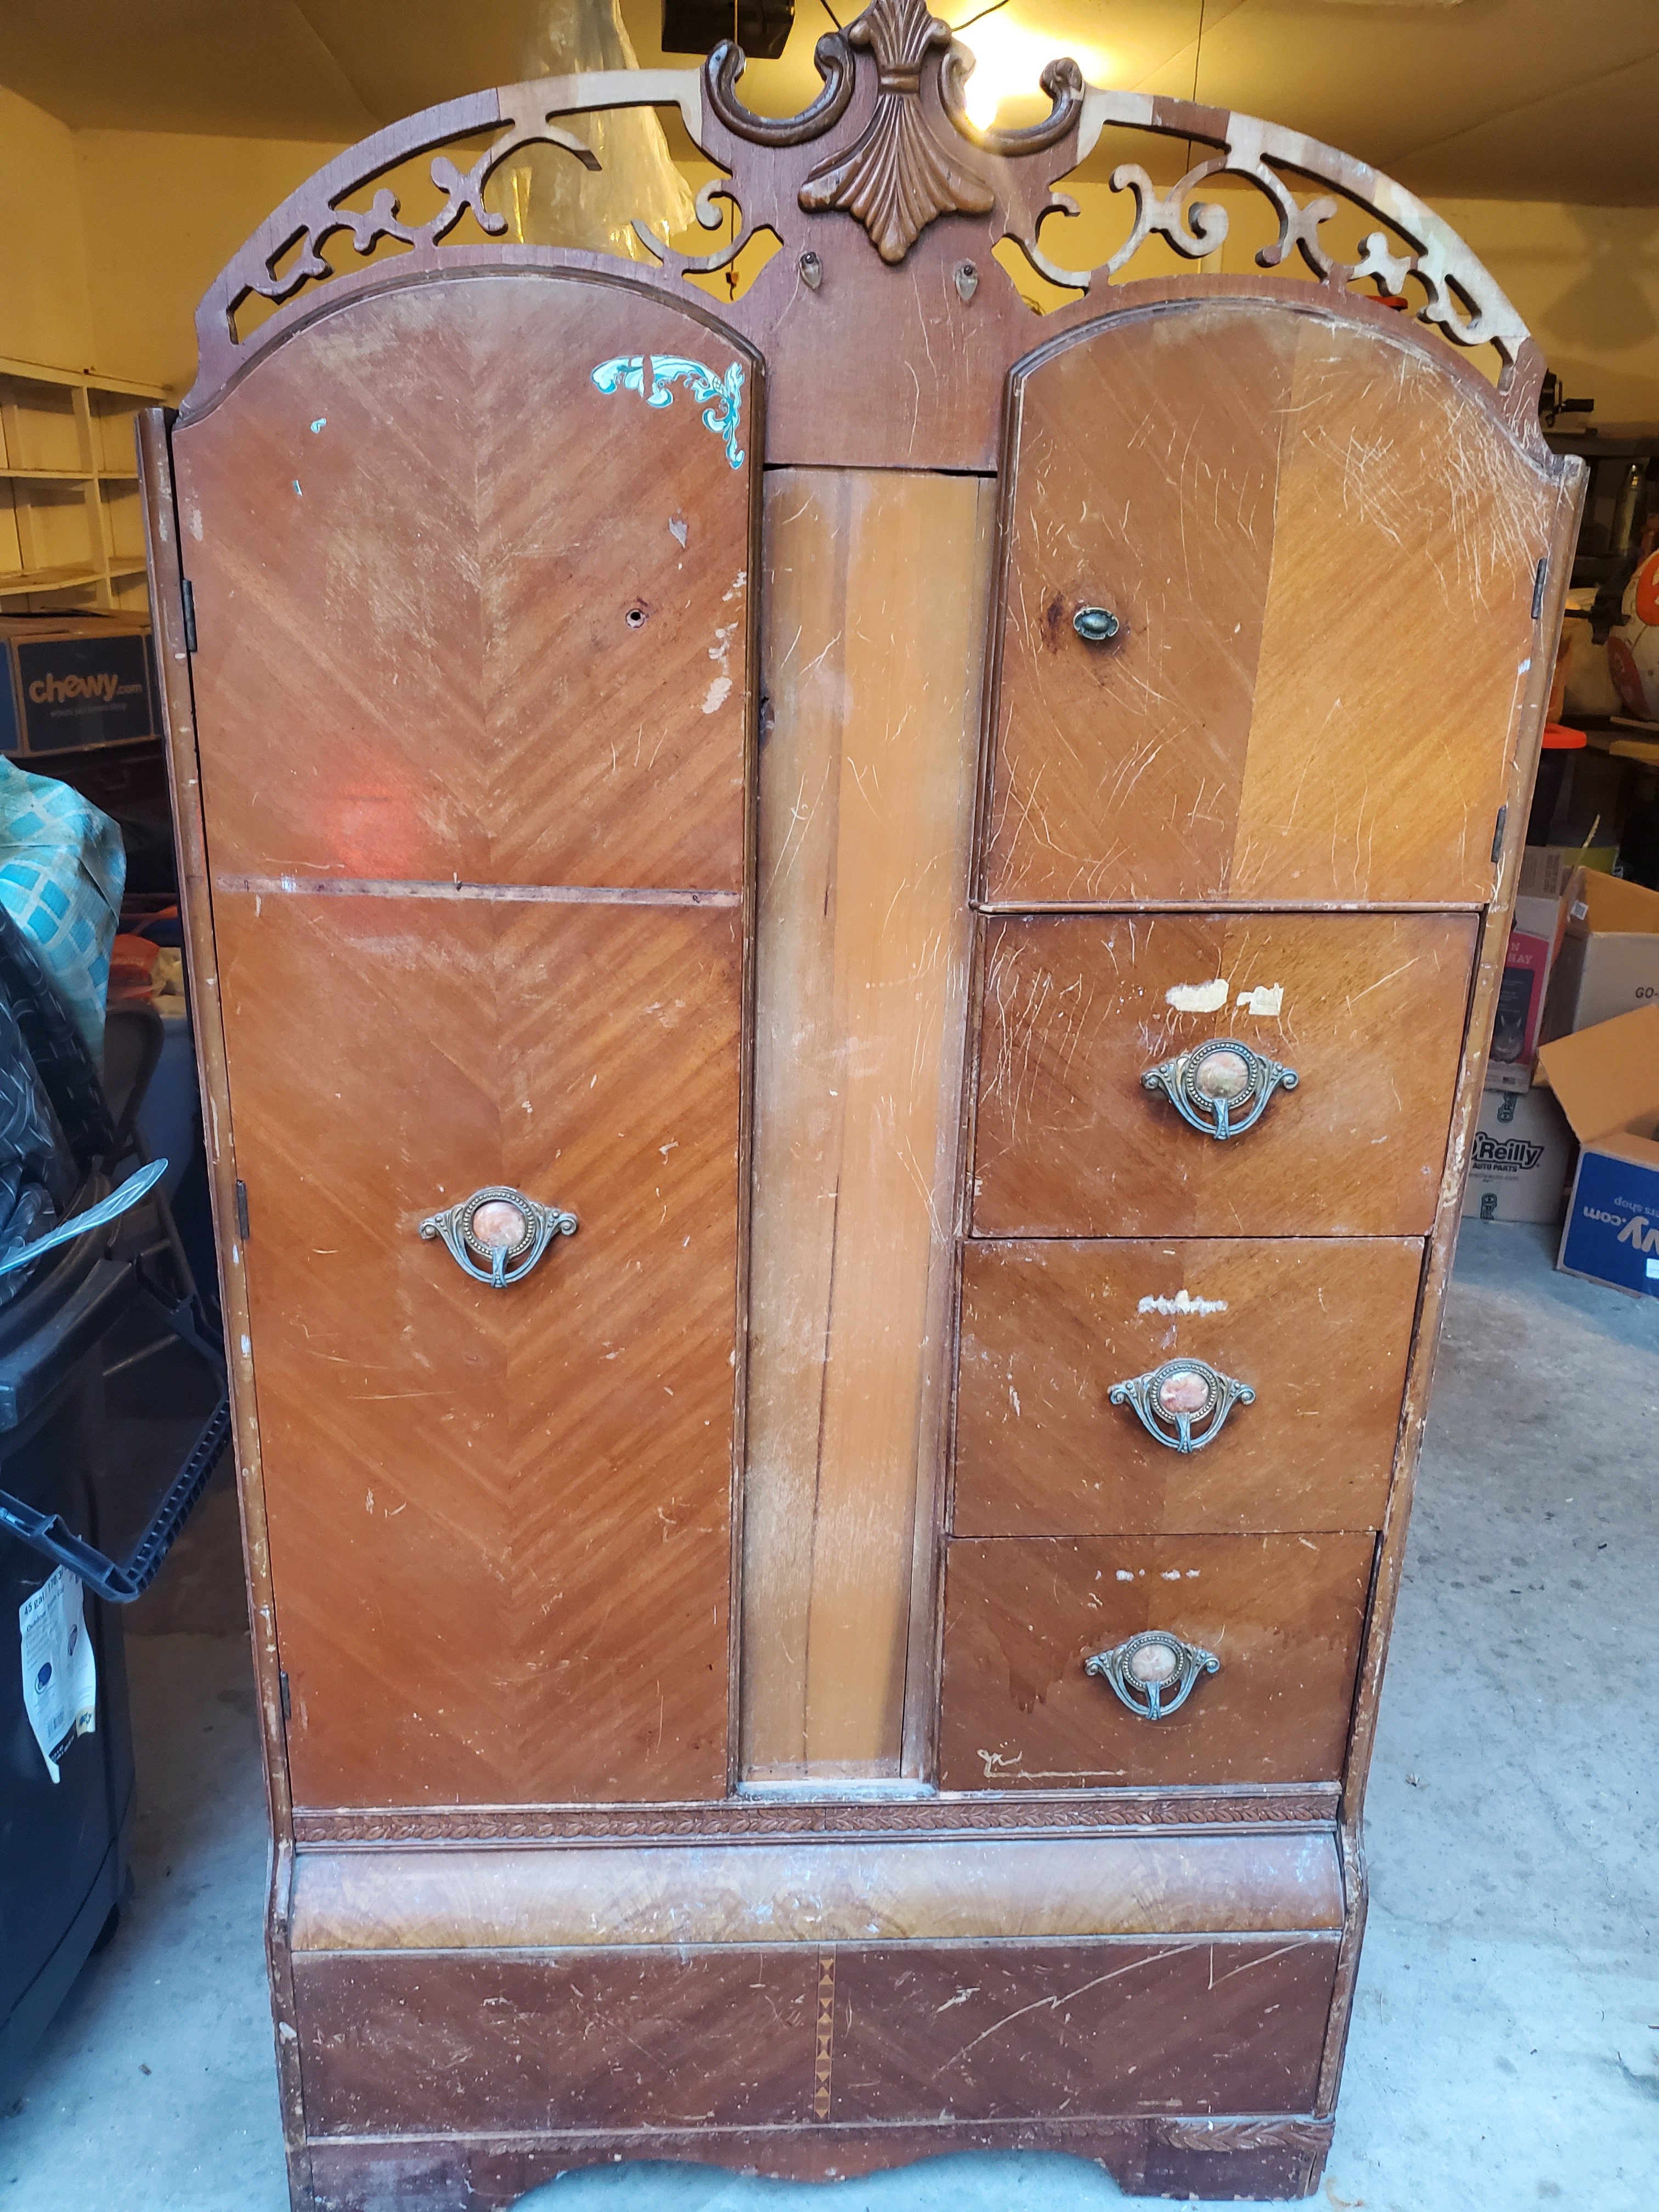
It’s not my first choice of places to buy furniture, but I went to Facebook Marketplace. We’ve had a good luck picking up a few things from there. I found a toilet for the front house, we found an upright baby grand piano that someone was just giving away. It needs tuned, but it’s absolutely gorgeous and I’d probably keep it even if it didn’t play at all. Real ivory on the keys and everything. I found several armoires online, but most of them were newer, which meant pressboard and put together like garbage- then I came across this:
Poor sad abused cabinet. 😦
I swear, it looked better in the pictures online. I don’t remember what she was asking for it originally, ($75 I think?) but as we were driving to Waynesville to pick it up, she messaged us and said, “I was moving the armoire out to the garage and it fell down the stairs in the process. Do you still want it?” Well *$#!, we were already on our way, so I figured I would at least go and take a look at it in person. I offered her $20 and she took it. At first glance, it didn’t look too bad… I mean it was really scratched up and the base had split, but it was real wood, it still felt solid and I thought for $20 I could work with it.
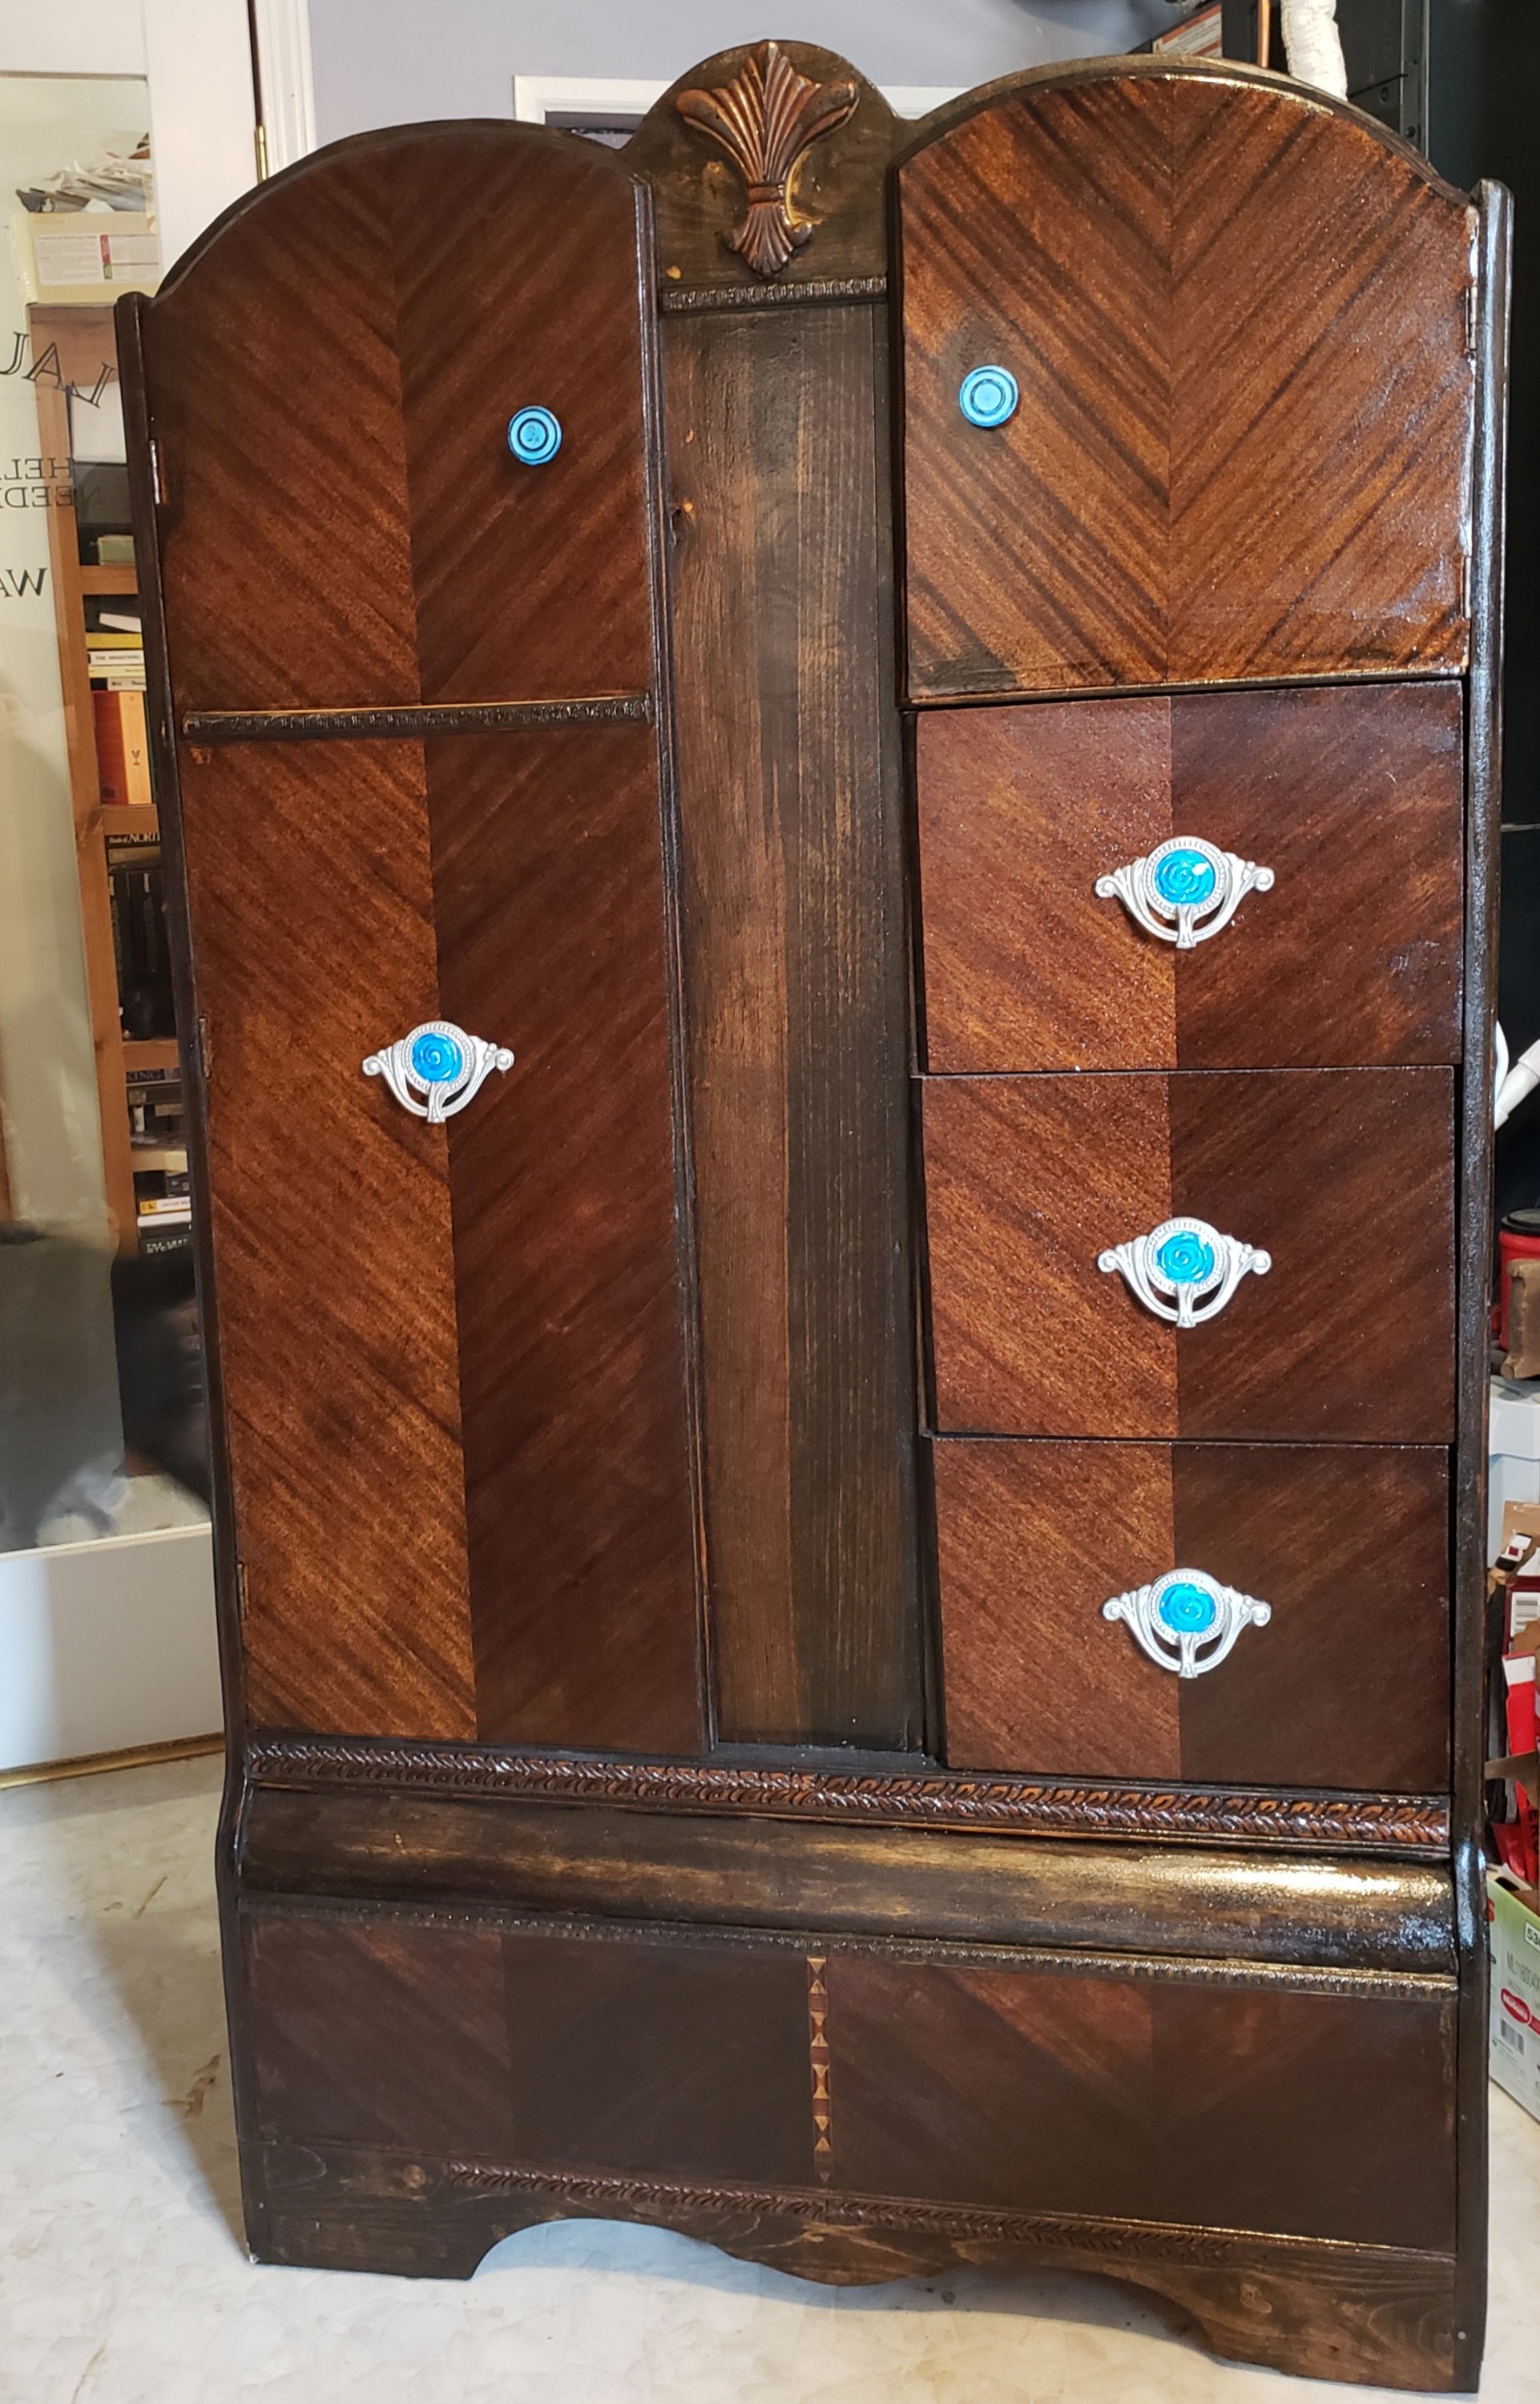
Once I dug into it, I realized that it had took a bit more damage than was immediately visible. The fall had knocked everything out of true. There were trim pieces missing, a knob was gone, the mirror that originally ran down the front was gone, there was a huge crack in the base, a smaller crack in the center where the mirror had been and the entire back was dry rotted and peeling. I stripped it down to just the frame, then glued and clamped all the cracks overnight. The next day, it felt much for sturdy and stable. The top scroll work was busted all to hell, but we didn’t want it anyway- where the cabinet was going to sit, it would be too tall and block the view of the TV. I cut the scroll work off and just left it with 3 arches; I did keep the Fleur-de-lis to re-attach to the middle arch when I was finished. My daughter decided the original handles would be ok in a different color. I had thought they might be shell centers, but they turned out to be plastic, so I took them apart and painted the centers to match the bright blue knobs we’d be using, then sprayed the metal part with a metallic silver.
I accidently put these on upside the down the first time.
I spent almost 2 days just sanding off the finish, the extra glue from fixing all the cracks and the deep scratches from being dropped down a staircase prior to us picking it up. I wish I’d remembered to take a picture of it stripped down- but I didn’t. 😦
I used Minwax penetrating stain in Jacobean. I only put on a single coat, because I didn’t want it so dark that it hid the chevron pattern on the doors, plus I kind of liked that the single coat in a dark color really showed off the red and brought that chevron out much better than the original caramel-colored finished did.
I used a polyurethane on it that was specifically for use on furniture and a had a higher durability- this is going in a teenagers’ room, after all. I got in a hurry with the poly and had to re-do one of the doors because it dripped and streaked from applying too much without sanding between coats. If you’re re-finishing a piece of furniture, perhaps the BEST advice I can give you is don’t get impatient when it comes to the finish coat. The first coat of this sucked right into the wood and was gone in about 10 minutes, this armoire was built sometime around 1940’s (I think?) and didn’t look like it had been treated with anything in many, many years. (I couldn’t find a makers’ mark anywhere, so I guessed it’s age by looking up photos online and comparing to other armoires.) The lemon oil I applied after sanding soaked clear through the inside the outside of the cabinet overnight, the wood was so dry and porous. It looks and feels like a different piece of furniture, now that it’s been cleaned, oiled and refinished. I added new latches to keep the doors closed properly, the old ones had worn out. All in all, I spent about $80 on the entire thing. (FYI, I did have the Gorilla glue, blue acrylic, metallic silver and the two blue knobs and wood stain already on hand. I only purchased polyurethane, a strip of milled trim, a sheet of cedar for new backing and two grits of sandpaper- a 60 for stripping and a 120 for finishing.) If I’d had to purchase stain, glue and paint and the knobs, it probably would have added another $30-$40. Still, $110-$120 is a very reasonable price for a solid wood armoire, considering I couldn’t even find press-wood/laminated versions for that price. Also, this has SO much more personality than a boring white laminated rectangle.
So here’s the finished cabinet. It’s in her room now, she hasn’t decided yet what’s going in it. I did cut a hole through the back so that the gaming system could be stashed inside the upper cabinet, along with all the controls and the TV remote. No more dogs tripping over cords on the floor, yay!
It isn’t perfect, but I think it looks a hell of a lot better than it did and it’s now a useable piece that should last her for years of use.
My next project it going to be the utility room floor. I’m tired of looking at the boxes of tile sitting in our kitchen, so I’m going to try and finally get that accomplished before spring hits and I don’t care about house projects for at least 6 months. LOL
I’ve already been planning garden layout and browsing seed catalogs. 🤩
Remember all those gourds I grew over the summer and have been drying? I wound up with about 40 of them that dried properly, so one of the projects I’m doing with my 4-H crafts group this year is to make birdhouse gourds.
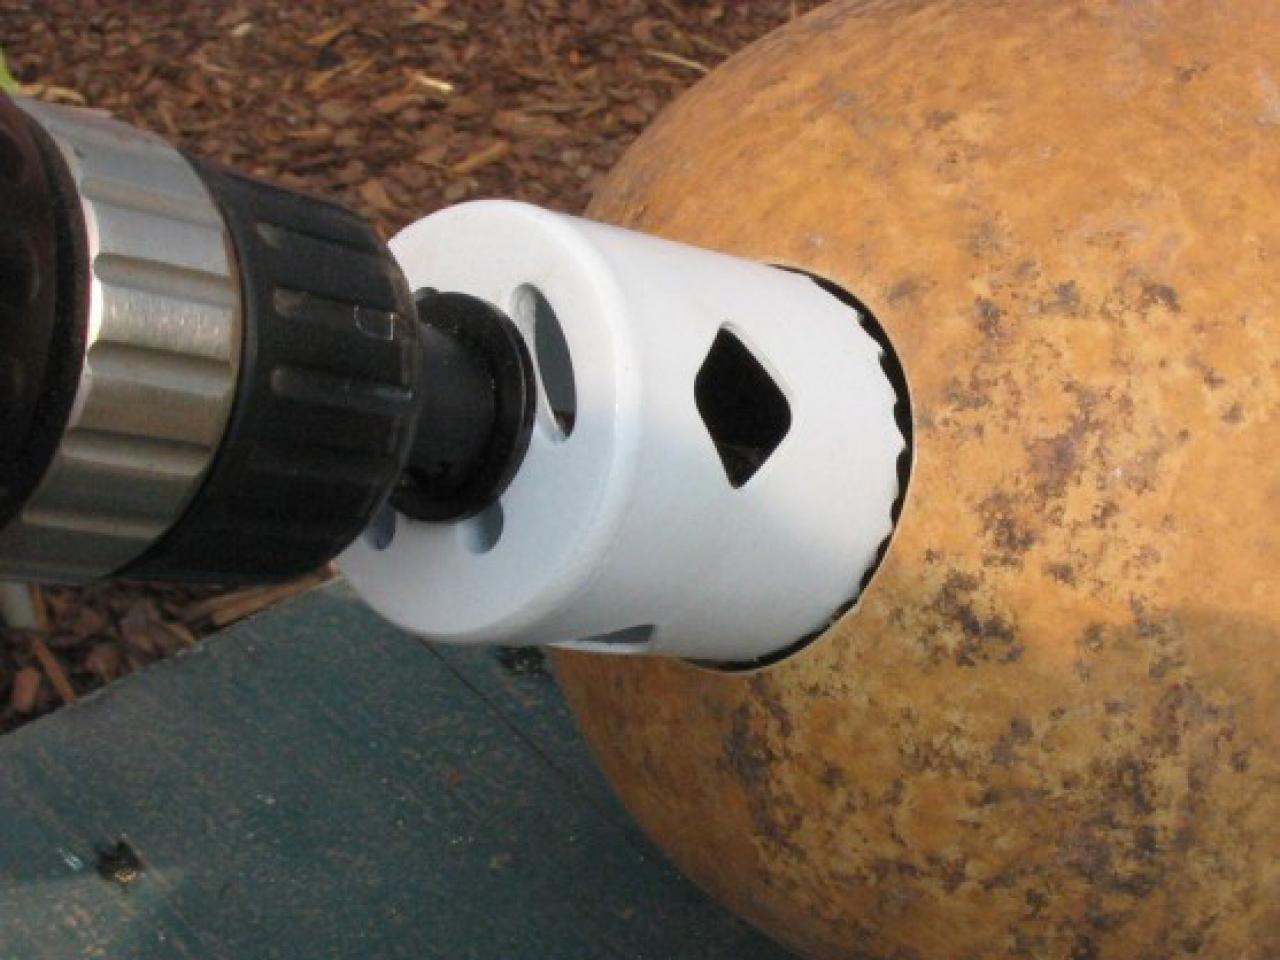
I pre-prepped a little before they go there, bleached them and scraped that thin slime coat off with a flat razor blade and let them dry over night. The girls drilled holes yesterday, cleaned out the insides and saved whole envelopes worth of seeds to take home and hopefully grow their own gourds. I’m posting the instructions I gave them before. (Pictures aren’t mine, they are screenshots from the tutorial I used to figure all this out at https://www.diynetwork.com/how-to/outdoors/structures/how-to-make-a-gourd-bird-house)
HOW TO MAKE A BIRDHOUSE FROM A BOTTLE GOURD
Grow and dry a gourd.
You can buy birdhouse gourd (bottle gourd) seeds online or at your local nursery. They take 6-8 weeks to grow before the last frost, so you’ll want to start seeds inside and transplant into your garden, or get them in the ground right after last spring frost (around Mother’s Day in this part of Missouri)
To dry your gourds, you need to hang them in a place where they will get air flow on all sides and if inside, warm and dry. Do not hang them in a basement or cool, damp area- they’ll just rot. You can leave them outside, but make sure they are in a sunny area with good airflow on all sides. I trim the stem long- leaving about 6-8 inches- then run a needle through the base of the stem and poke a thin piece of wire through to hang the gourds from a nail or fence.
Your gourds are ready when you tap on them and they sound like a tight drum, or you can shake them and hear the seeds rattling around inside.
Clean your gourd and drill a hole.
Using a hole saw, drill a 1 ½ inch hole into your gourd. We use 1 ½ in particular, because this will keep bluebirds safe if they nest in your gourd. A larger hole can allow aggressive European Starlings access to the bluebird’s eggs or young and the starlings will destroy them to take the nest.
With a long knife or spoon, clean out the seeds and pulp left inside. It doesn’t have to be spotless, the birds wont mind.
Use fine grit sandpaper to smooth the outside of your gourd, then soak for about an hour in a bleach solution of 1 part bleach to 9 parts water. Wipe clean, then let your gourd dry completely.
Use an exterior latex paint to seal and prime the outside of the gourd. (Avoid oil based paint- they take WAY too long to dry) If you prefer the natural look of the gourd, you can also seal it with wax.
If using paint, do two coats, let both dry completely, then spray with a clear coat of outdoor polyurethane to protect your paint. If you’re going to decorate your gourd with designs- you’ll want to paint your design before the polyurethane step.
Drill some small holes in the bottom of the gourd for drainage so it doesn’t hold water if rain gets inside. You can also drill a couple small holes through the neck of the gourd to add a bit of wire or a strip of leather for hanging.
*Painted designs will last longer and stay brighter if you choose a spot out of the sun. The birds will also appreciate a shady location when it starts to heat up outside! 🙂
I have another saw blade available on Cordes Farm’s Etsy shop! This one is on a hand saw, rather than the round blades I’d been using. I found it on the wall in our red shed- which according to our neighbors that have lived here for years, used to be a poultry barn sometime around the 1960’s/70’s. Also according to neighbors- it was one of the largest poultry operations in the state at one time. Now it’s just “the red shed” to us and it’s full of random stuff that Paw Paw Max has put there when he couldn’t think of where else to stash them. We were poking around in there when my brother Stephen came to visit and he spotted 5 or 6 antique handsaws hanging on the shed wall, which was a great find because I was already starting to run out of round ones to paint on. I’m not particular though, I’ll paint on just about anything and these are really cool. I looked up the saws online and best as I can figure, they are about 40-50 years old. Most of them had the Warranted Superior Eagle symbol still intact on the handle, some of the emblems were missing, one of them has a plastic handle. Of the Warranted Superior saws, all have wooden handles with ivy scrollwork carved into the wood. I found many of these on E-Bay, ranging in price anywhere from $15 to several hundred dollars depending on how old they thought they were. I don’t have any way of authenticating the age of mine, I just know they are vintage old things from Max’s shed. These cleaned up pretty easily, since they’d been hanging indoors out of the weather, there was minimal rust, mostly just spider exoskeletons (eww) and dirt (we don’t mind dirt). I washed them, let them dry and sprayed the fronts with a rust arrestor/primer which cured for a while before I painted on the first one. I dabbled a bit in oils on a painting for my daughter and decided I’m not a fan, that I much prefer my acrylic, so this one and probably most of my future paintings is in acrylic. I’m too impatient with the drying time of oils- I have a bit of that Veruca Salt thing going on of “I WANT IT NOW.” Three days for some thing to dry so it doesn’t smear is WAY too freaking long, so acrylic it is.
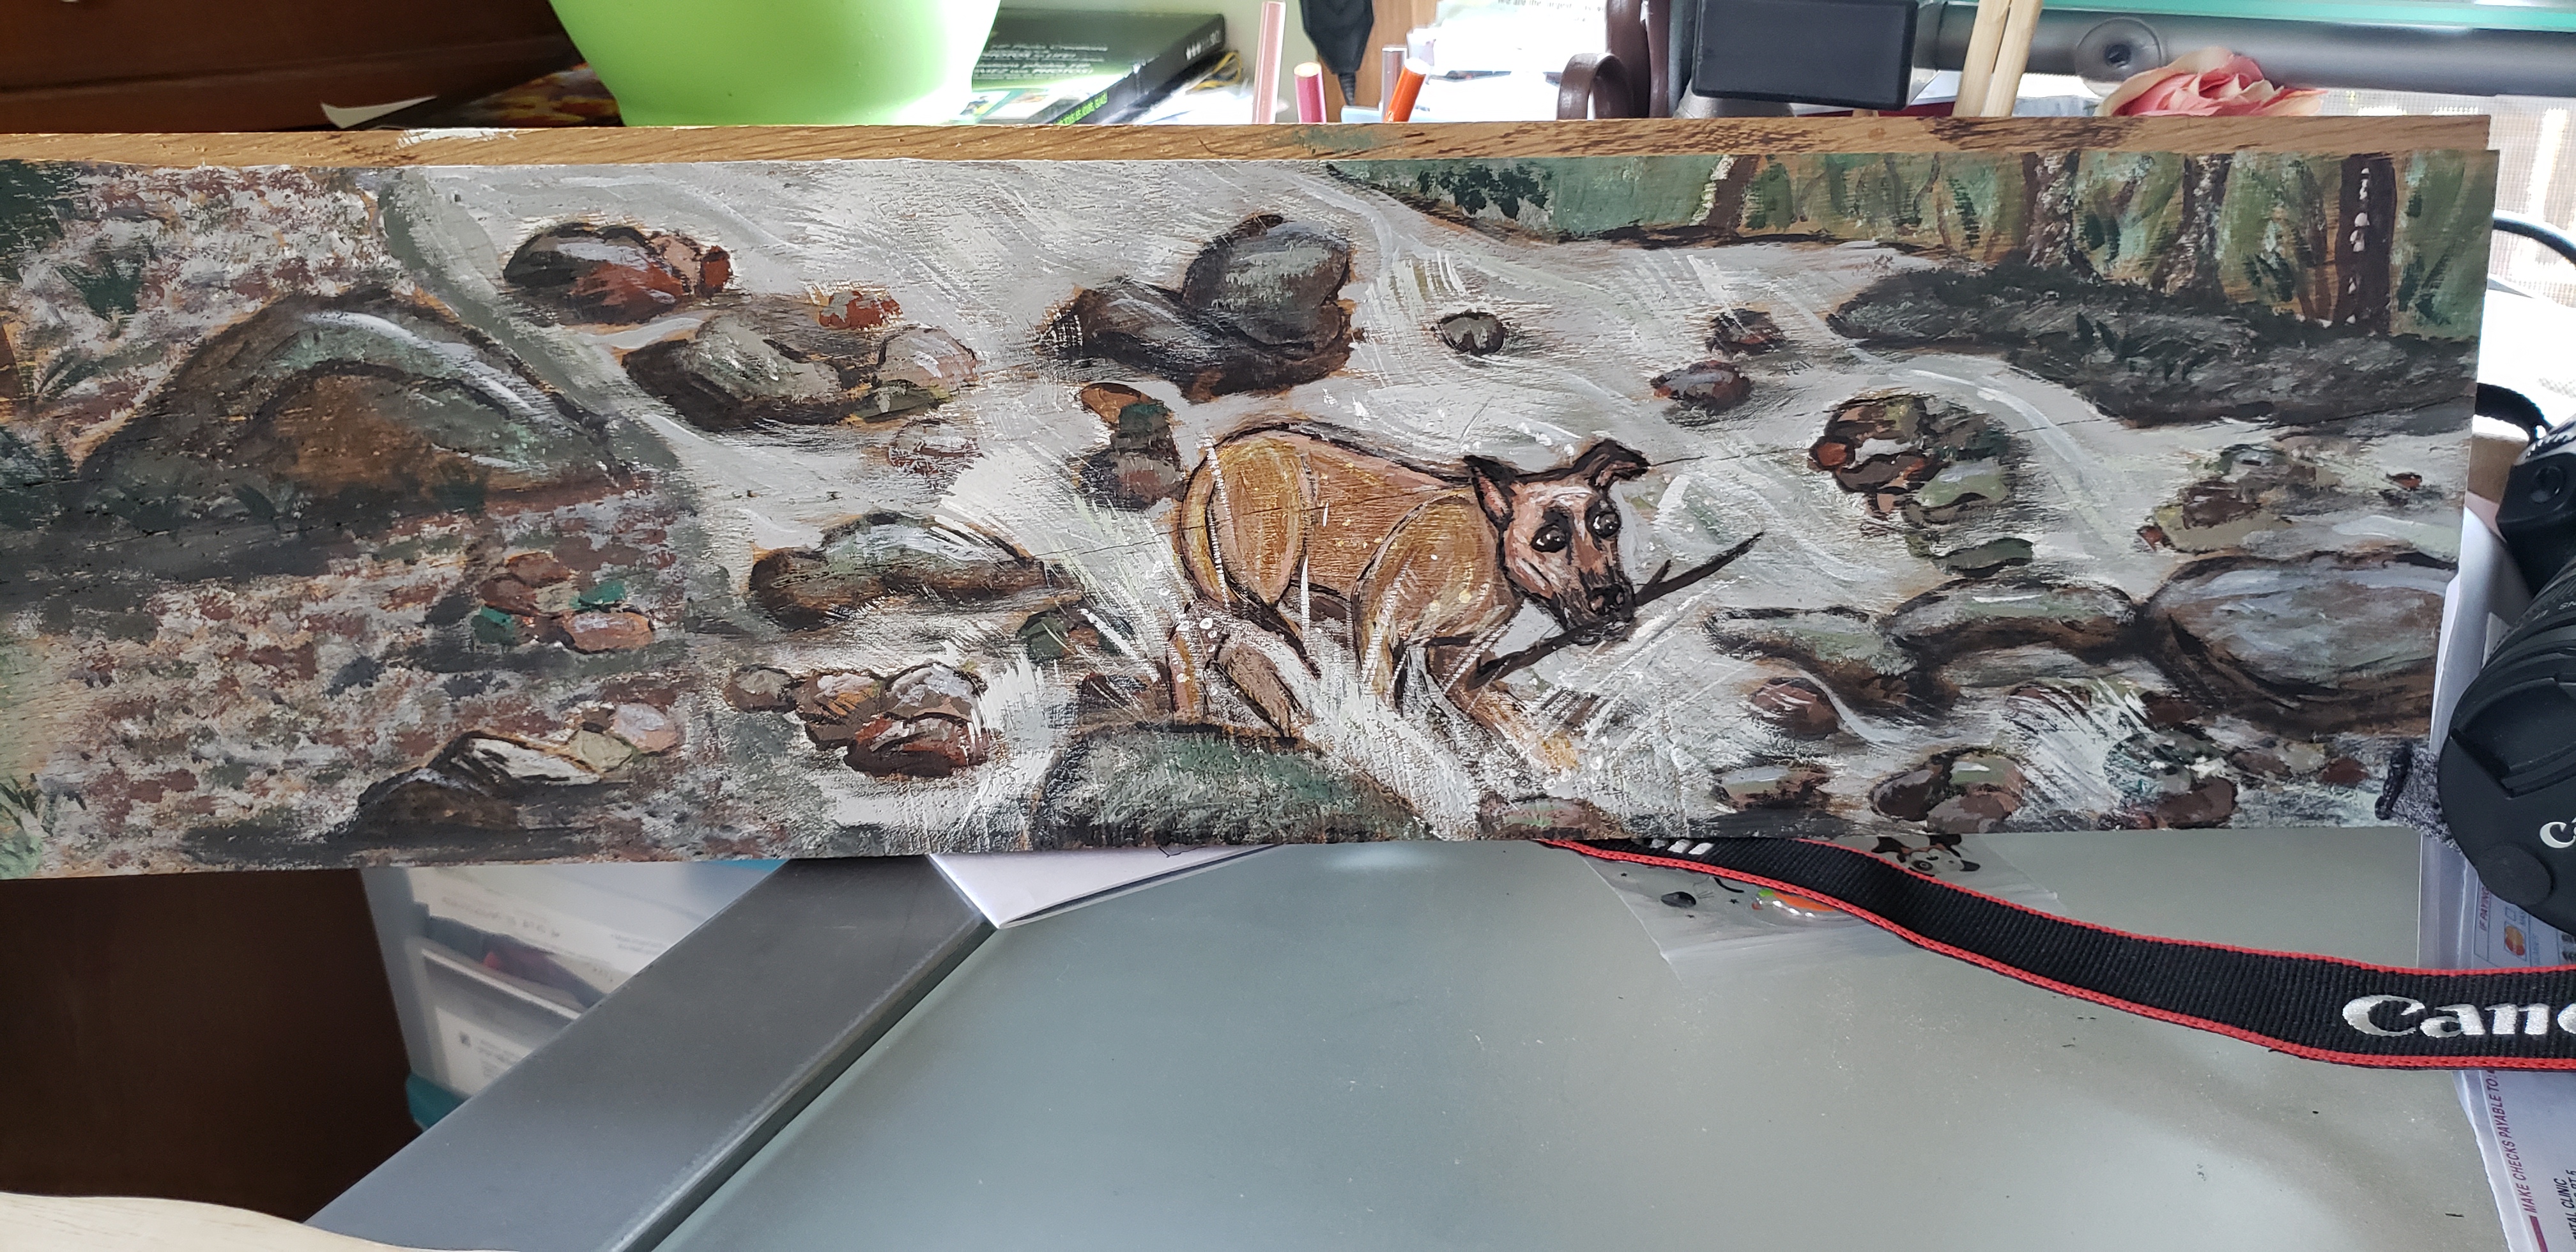
Anyway, this painting is a conglomeration of our field, the neighbor’s field, a lovely sunrise picture I saw and just a bit of random nature stuff from off the top of my head. I’m working on a turkey one next that is put together in a similar way. To some, boring I know, but this is what I’m attracted to and what I love. Most of the photographs I take are landscapes, old buildings, plants and animals too… other than that period of time where my daughter was small and I ran around behind her photographing and video taping her every move. She’s almost a teenager now and doesn’t appreciate that like she used to. 🙂 She does like my painting though and asked me to do one for her room of our dog that passed away recently. So I painted her Ollie in the creek fetching a stick. That one is just done on a piece of barn wood that she went and found in the garage. I’m working on a fall scene in oil for her too, but it’s not finished yet because… that freaking dry time. The Ollie painting game me a chance to work on my rock painting technique and play with the new fan brush I picked up, which seems to work great for running water. Mostly greens, blues, browns and greys in that one, I didn’t throw in my usual pop of color because I was working from a particular photograph of Ollie in a friend’s creek.
I’ll post an update when I make some progress on the new turkey painting. I got some new detail brushes also which I’m excited to try out and Ely talked me into buying a set of palette knives, which look really interesting, but also kind of scary. I’m going to be teaching 4-H crafts this year, so I’ll be sure to share some of those that we do too. Although I will confess, most of those will not be original ideas, they’ll be Pinterest projects. Right now I’m off to figure out how to make hand cream because I can’t find the stuff I usually get at Walmart and I’m VERY picky about my hand cream. I figure if I make it myself, at least I know exactly what I’m smearing on my skin, as opposed to the commercial stuff that has at least 10 unpronounceable ingredients in it. Always busy. Keeps my mind from wandering or dwelling. 🙂
I came across these pictures from several years ago and thought I would share. Don’t remember if I ever posted these on Dirt or not…
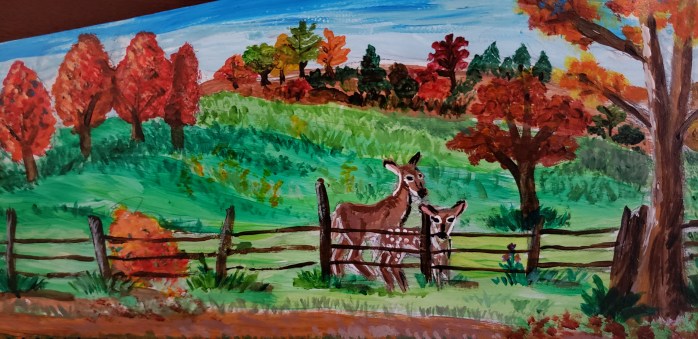
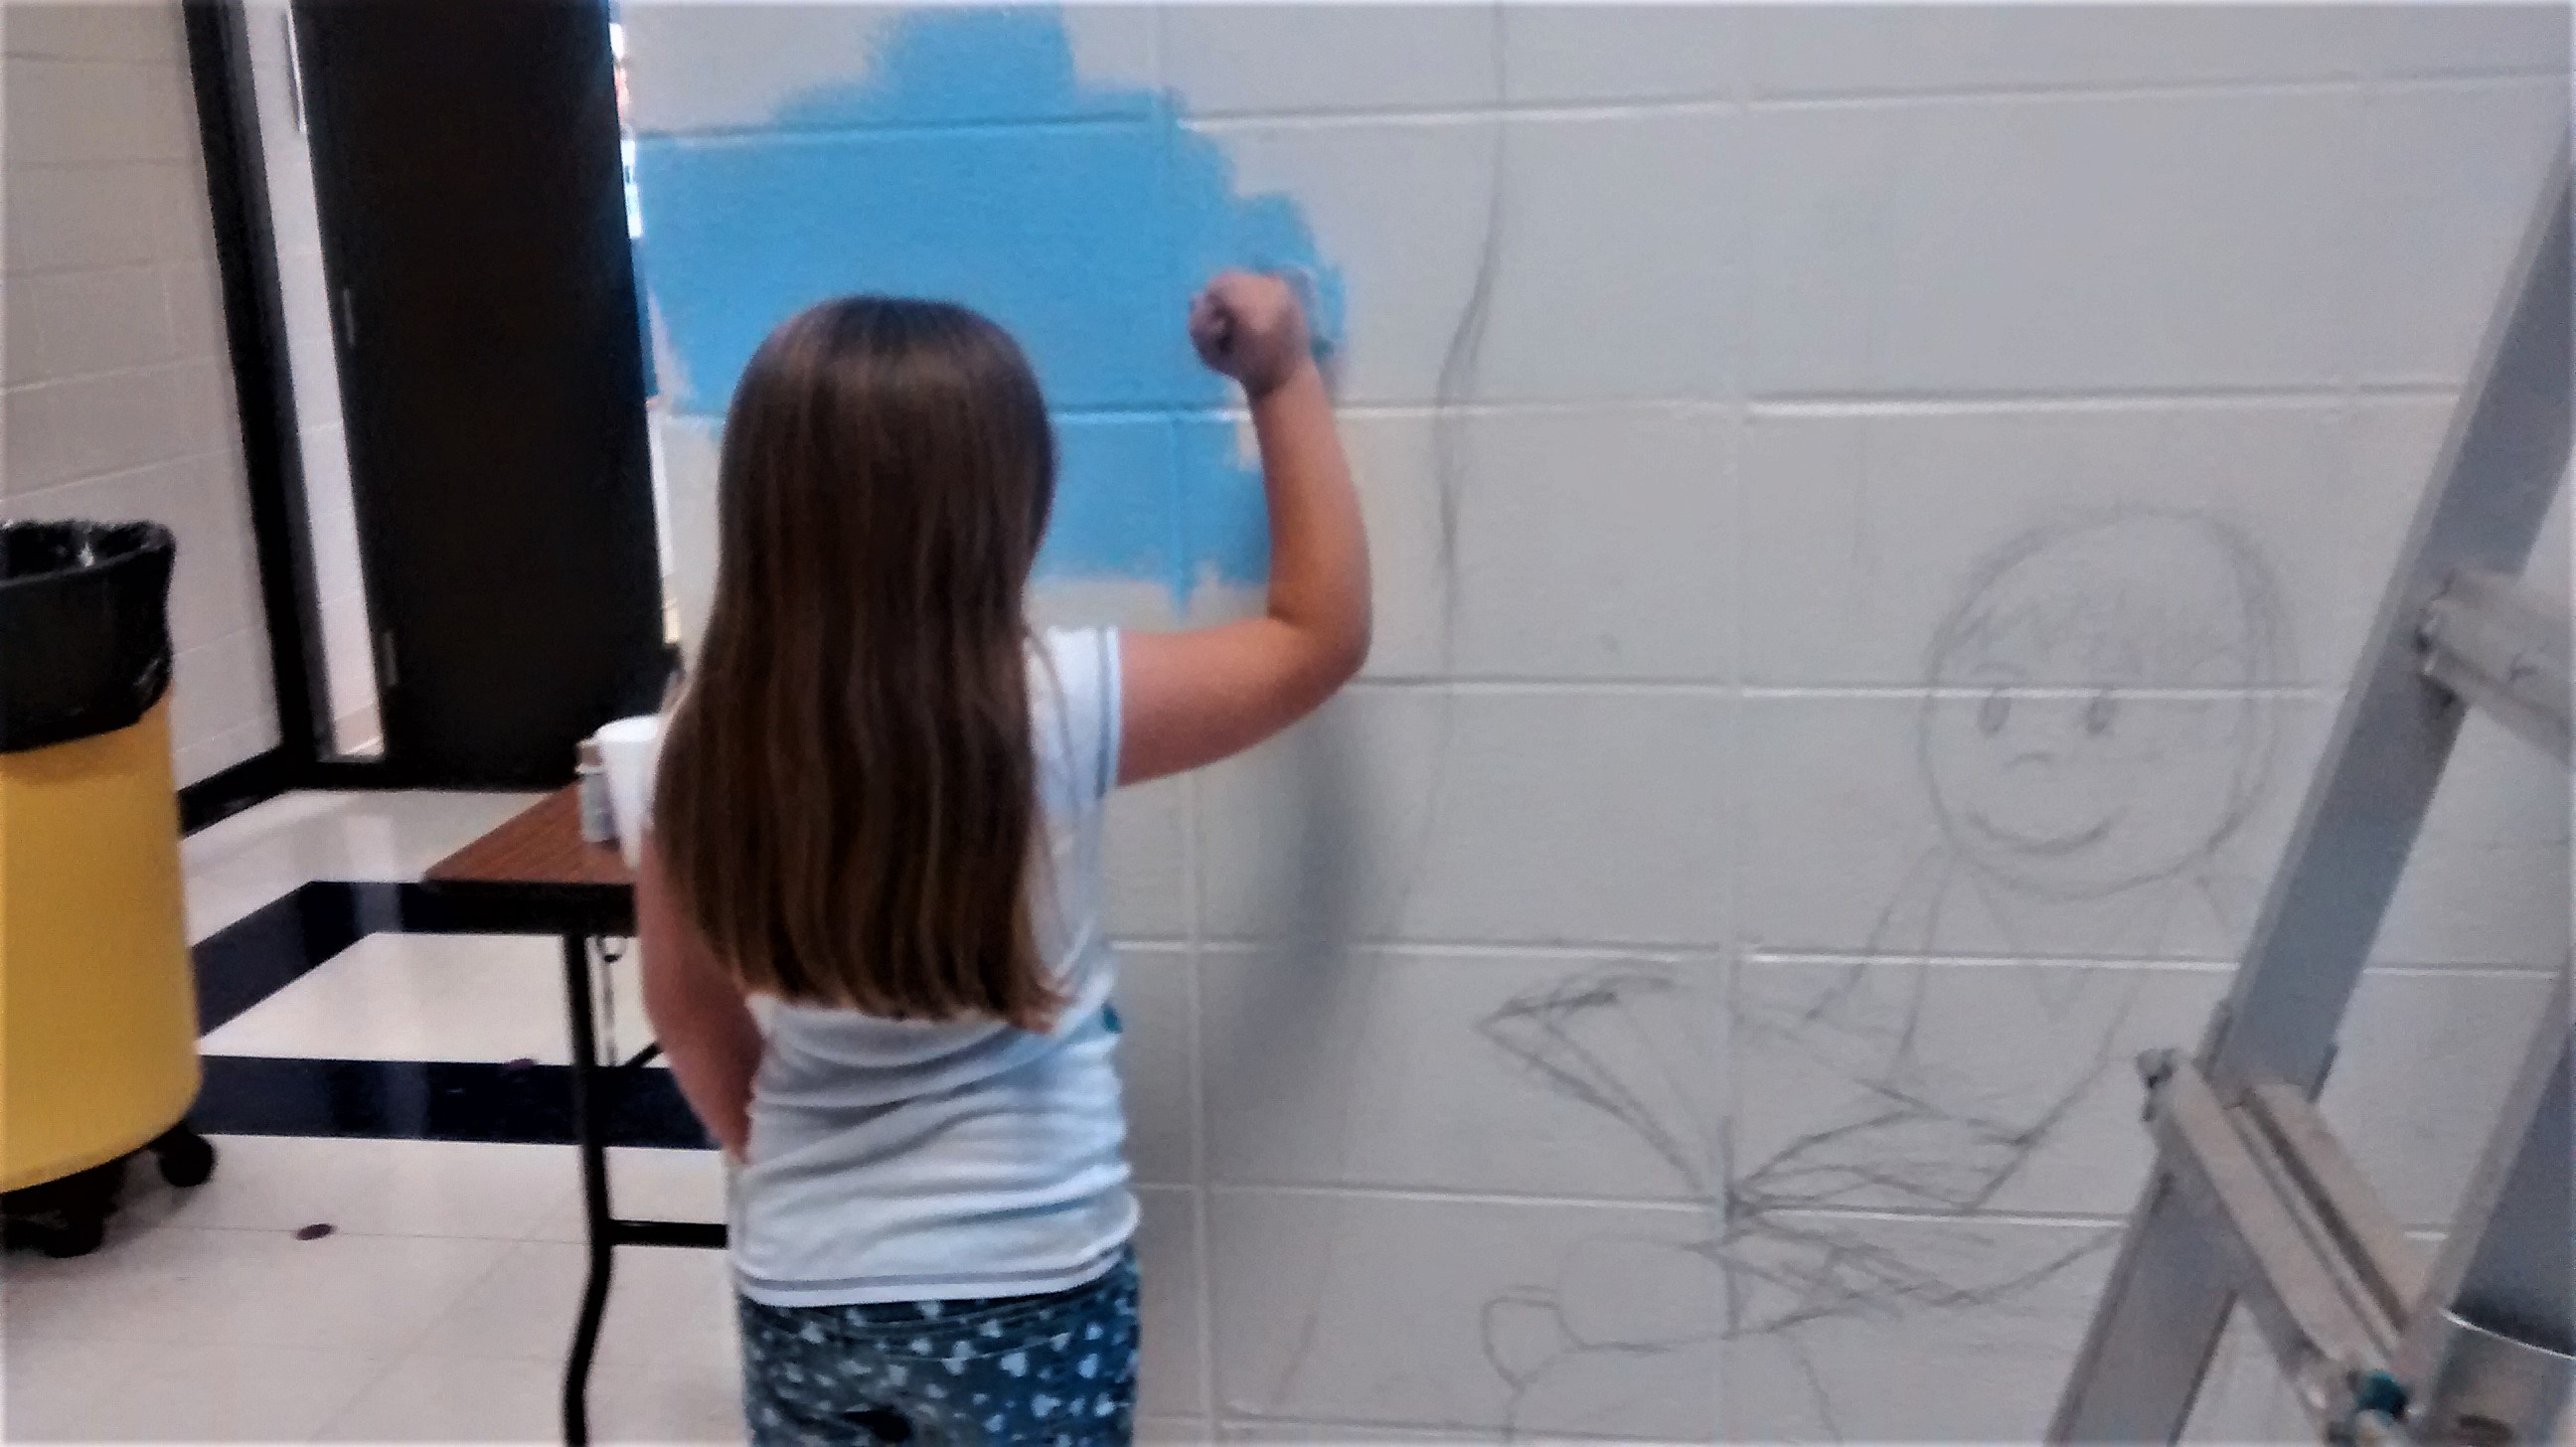
I was volunteering at Ely’s school in Camdenton, Missouri at the time. I had been working a couple days a week for the art and music teachers, really just doing odd jobs like hanging stuff, filling bottles of glue, cleaning out old paint, loading the kiln, laminating stuff, etc. I had also created a couple really cool doors for the music room with door-sized drawings, paper flowers, stuff like that. News got around that I was “artsy” and could “draw stuff.” Those of you that also “draw stuff” or “do art” know that when word gets out that you this kind of thing, people will approach you with projects and either ask your advice, or just ask if you’d do it for them. This is how I got talked into doing a mural at the school- the thing was about 15 feet high and some 25-30 feet across, all along the outside wall of their library, facing the elementary cafeteria. We had to have some kind of special permission from the school board to do it, apparently they have to approve any paint colors or artwork that will be permanent and outside of what they’ve previously voted on.
Sketching out the mural- I punched up the contrast on this picture so you can see the pencil drawings.
We started work in early June, just a couple weeks after school let out. There were still kids there going to summer school, so I had to be careful when they were walking through the hallways, to not be on the ladder when they went by and to keep my supplies close the wall so nobody tripped on stuff. I wish I had taken more pictures of the process. The school’s scaffold was in use by the janitors elsewhere, but I decided after seeing what they brought to stand on that I would just use my own ladder from home. I balanced on the top of that stepladder, holding onto the wall to do the upper part of the mural. It was an adventure. 😀
We had a month to get it finished. It had to be done by the time the janitors came in to wax the floors before school started in August. Until summer school let out, we were only allowed to be there certain hours, so really the bulk of the work had to be done in the three weeks after summer school and before waxing.
Mildly freaking out.
I had never painted anything before.
Yes, you read that right. I’ve done plenty of drawing. I’ve done stuff in colored pencil, lots of digital work, crayons (lol)… but outside of painting walls in my house, I hadn’t worked much at all with paint. The last picture I probably painted was in high school art class. So that look of concentration and mild worry on my face is for real- I wasn’t really sure I could pull this off when I started and was pleased that it came along as well as it did. I would have no issues doing this NOW… well, maybe I’d tell them it was going to take a bit longer than a month to finish!
My daughter came and helped me with painting the large amount of sky and grass that had to be filled in, while I worked on details, but she couldn’t be on the ladder of course. Jeannie (the teacher that picked me to do the project) helped where she could, but she had multiple other painting projects to complete at the same time. She WAS good company and moral support though!
We did finish ON TIME and it was there for all the kids to see when they came back in fall. I loved getting to hear them talking about it and the excitement when they’d come around the corner and see it for the first time. We used the school’s therapy dog as part of the picture, the kids recognized her immediately and even noticed the purple toenails I’d added to the dog’s paws.
It was a lot of work, but a lot of fun. I’d do another one in a heartbeat. AND next time around, I’d actually know what I was doing! LOL
I am now 15 weeks into recovery from a rotator cuff repair/arthritis removal of my right shoulder. Apparently, the last few years of remodeling house has not been kind to my joints. I built up some bone spurs on both my shoulder joint and my collar bone, which were steadily tearing my rotator cuff to shreds while I dry-walled, tiled and painted on our lake house for months, getting it ready to sell. As soon as the papers were signed, I scheduled myself for surgery. The pain had been ridiculous some nights, bad others, just general suckiness the rest of the time. The MRI didn’t show what the surgeon told me afterwards, that I had torn my rotator cuff completely through, there was nothing but a big hole and tattered edges over a nice bone spur on my collar bone. I watched the video they sent home with me and wasn’t surprised that I hurt afterwards for weeks.
I didn’t get to go to rehab after surgery (insurance issues), so I wound up putting together my own rehab schedule. Which seems to be serving me well, as I’m out and doing garden stuff I wasn’t supposed to be able to do until the end of May/June. Thank goodness for YouTube, you can learn to do anything there! I’m amazed at how LITTLE pain I have now. I still have to be careful… I’m not going to be lifting hundreds of pounds with that arm or slinging bails of hay from dawn to dusk, but I can use the weed eater now without wanting to cry, which is just about as pathetic to look at as you imagine. I did minimal gardening last year. I put in a few bulbs, grew my tomato plants, that was about it.
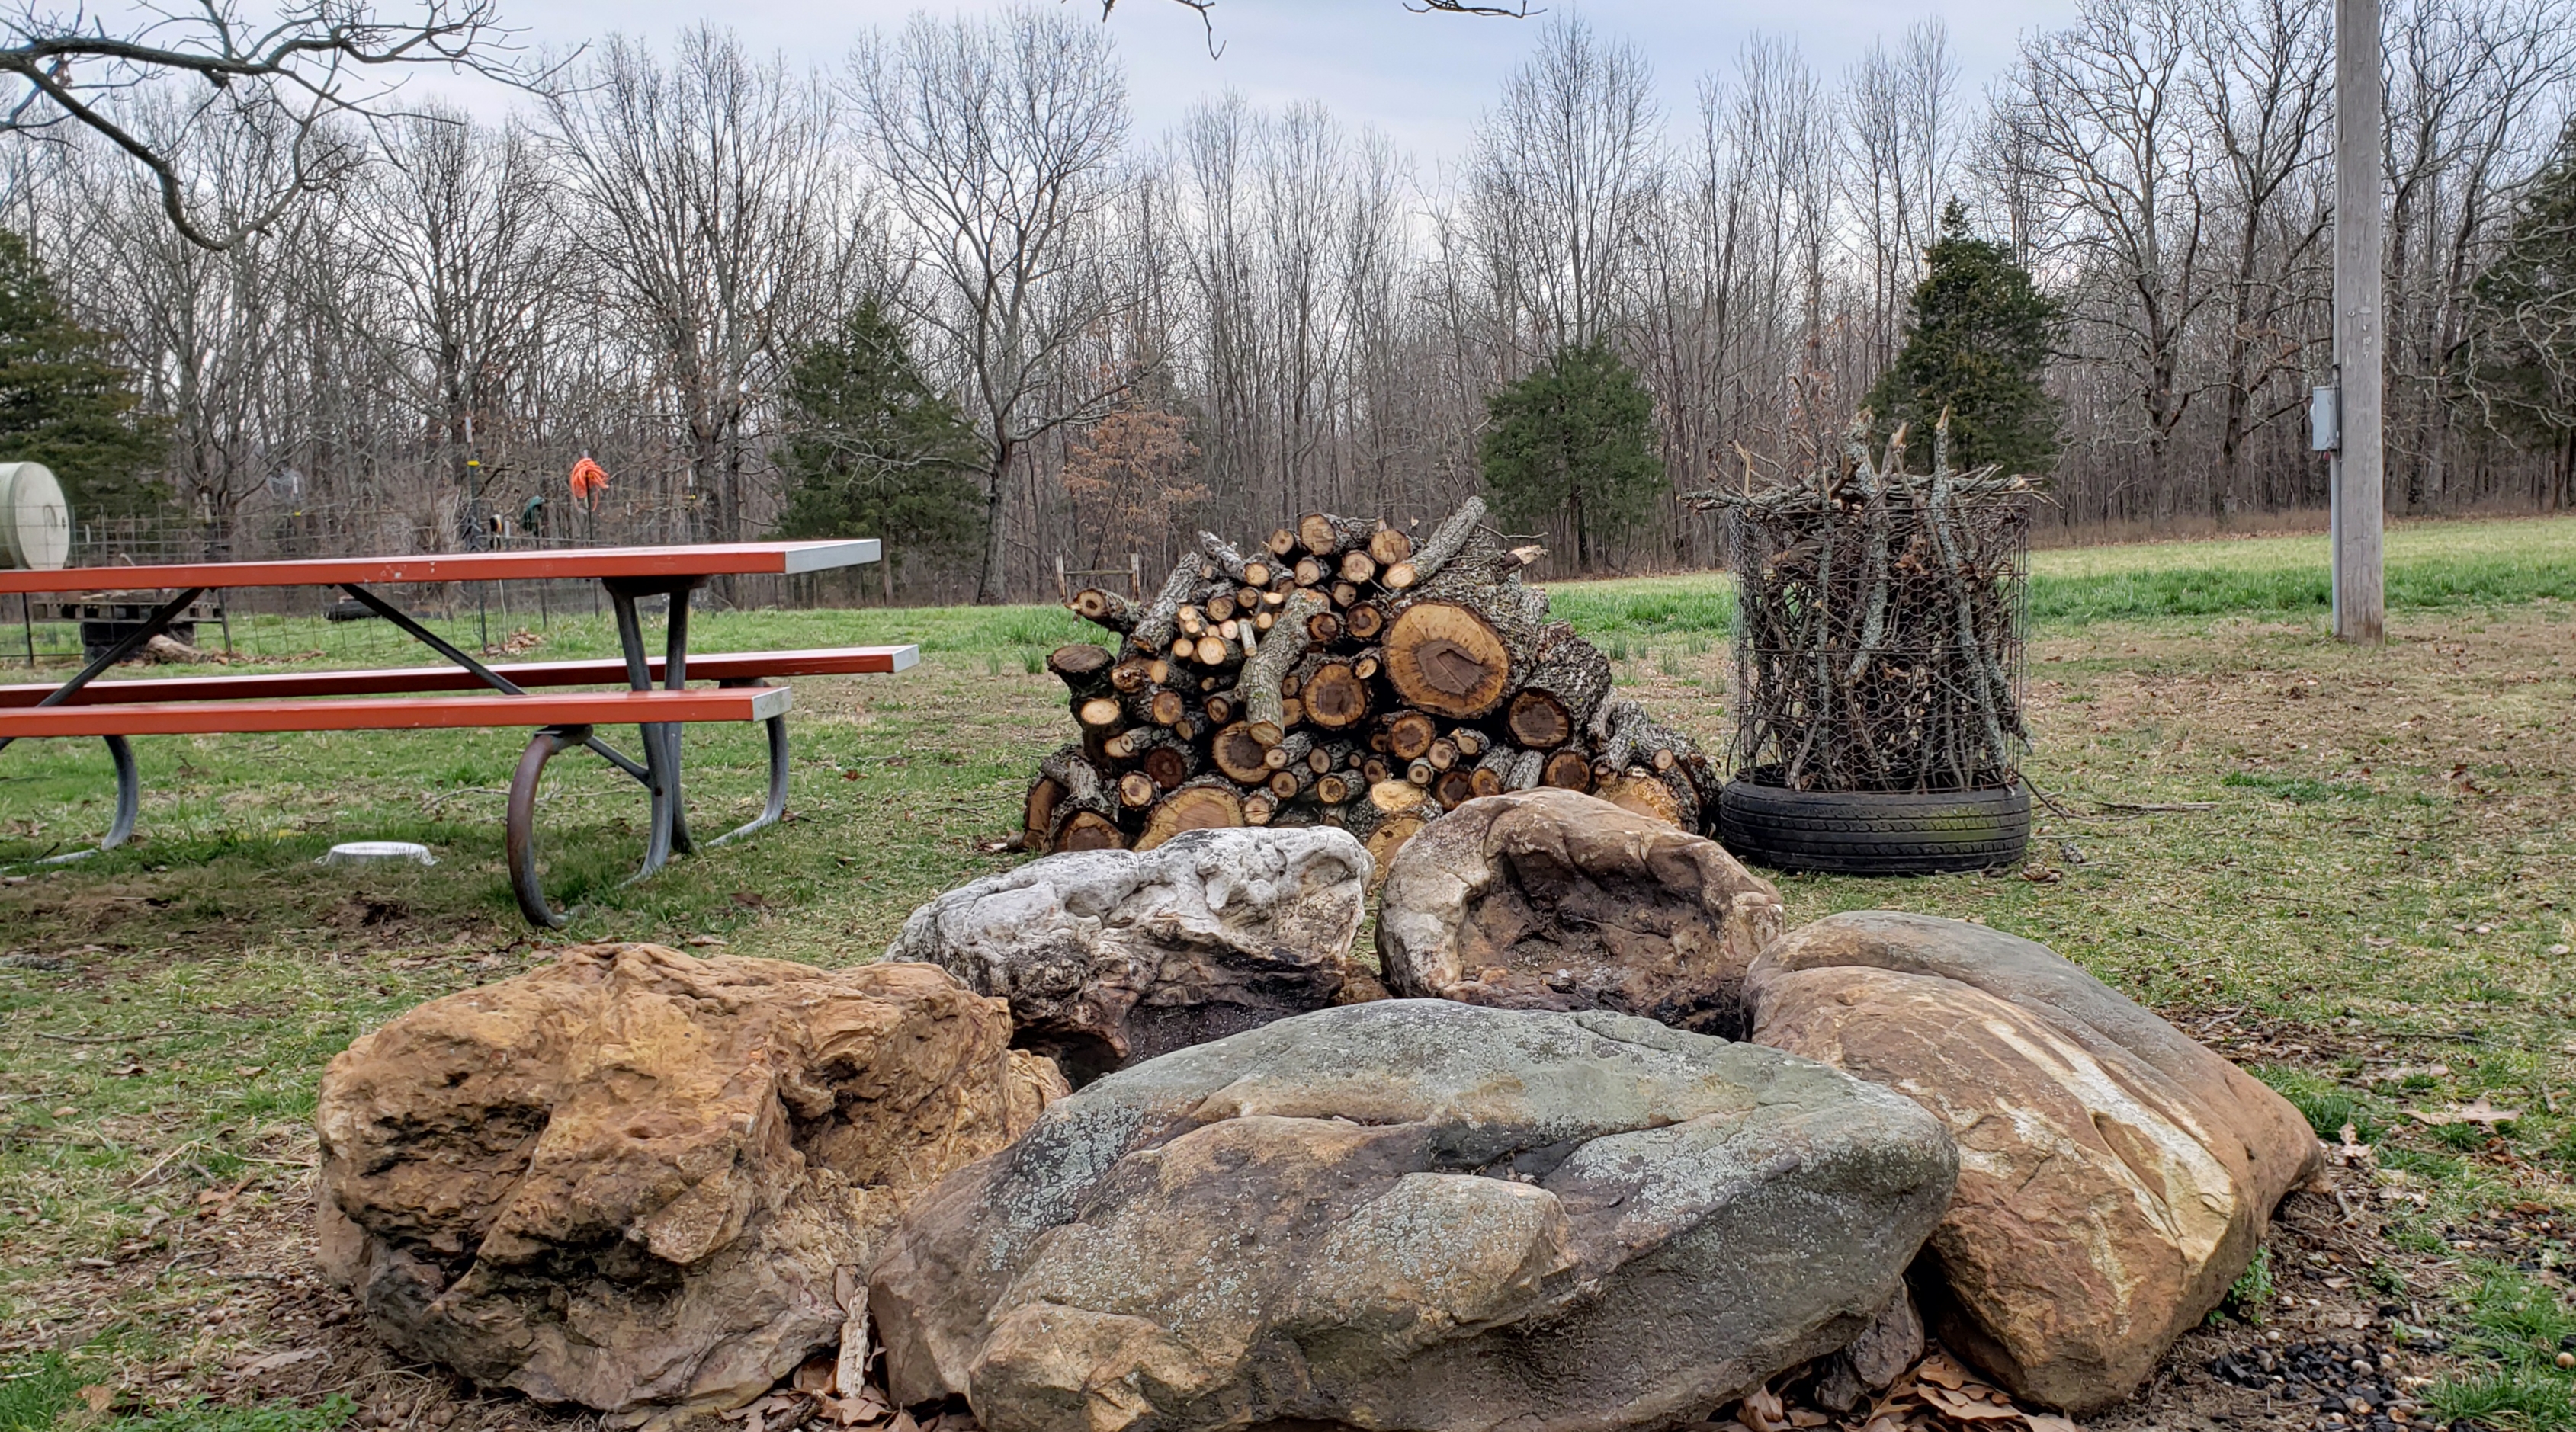
This year, I’ve already cleaned out the lean-to, cut down dead trees, hauled and stacked wood, burned brush piles and built a little cage to hold a bunch of kindling for the fire pit. The fenced garden here is huge. I know I’ve said this before, but it really is just HUGE. Even this year, I’m probably still only going to be using 1/4 of the available space in there. I have a pile of broken stuff in one area that I haven’t hauled off yet and might possibly, maybe in some way down the road be useful somehow. This is the stuff that will find it’s way to the dump when I’m in a purge mood, but yesterday, it got recycled instead.
I had a tire that had once been used for a raised garden bed. I don’t build raised beds in tires, I use hugelkulture mounds, so most of the tires in the garden were of no use for me. (yet) I had some welded wire tomato cages that the ground stakes had snapped off and couldn’t be used for cages anymore. There were a couple portions of chicken wire that were too small to be of much use for anything- I tried to use them to keep the raccoon out of the watermelon last year, to no avail. I took all these scrap pieces, that were already recycled from Paw Paw’s previous garden projects and recycled them again into a kindling cage for our fire pit. We had a big pile of sticks behind the wood pile, that looked unorganized and messy (as a pile of sticks will).
The tire already had holes drilled into the bottom for drainage. I opened up the two welded wire tomato cages with some pliers and re-bent them to fit inside the tire, then closed them around each other again. Now they were one giant tomato cage with no stakes on the bottom; but this was ok, because I shoved them tight against the inside of the tire, and it holds them upright and in place. The chicken wire I wrapped around the bottom of the outside, since that welded wire is pretty rusted and I didn’t want someone scraping their leg against it accidentally and having to run out for a tetanus shot. I then broke up all my sticks into handy kindling size and dropped them in the cage. We now have kindling in a neat container near the fire pit and I have several fewer pieces of junk in my garden. I figure it will be of use at least another several years and if it breaks, I’m out nothing. Maybe by then, I’ll have more scraps to build a new one with. 🙂
This week, I need to get some poop around fruit trees and cut down a dead apple up front, so nothing all that exciting or blog worthy. I do have seedlings coming through, so might write a bit on those. It’s all good shoulder rehab, have to strengthen that rotator cuff back up!