I’ve had some health stuff going on (yay arthritis) and now garden season is here so haven’t had a chance to post much but I wanted to share a quick tip.
Save your cardboard boxes for the yard and garden! I’ve been weeding and weed-eating around trees for years.
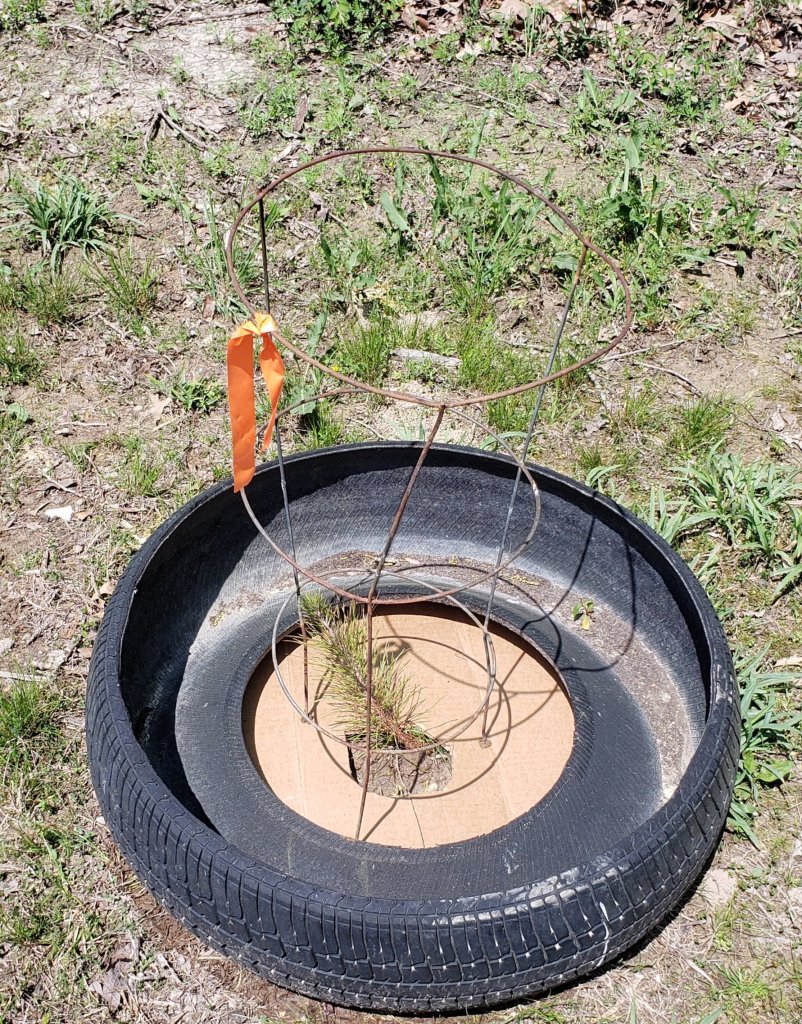
While laying down cardboard to create grass-free areas in my garden for walkways, I realized I should have been using this stuff around all my trees too.
Cardboard is great garden material and if you do a lot of online shopping like I do, there’s an endless free supply. In the garden, it holds in moisture, it keeps weeds at bay, worms absolutely LOVE the stuff and it biodegrades slowly over several years. It’s also soft enough it won’t girdle trees, which could be a danger with the plastic ‘mulch’ discs.
If you’re concerned about the look of cardboard, throw a little mulch on top. I put the discs down and jammed my tree cages through the cardboard to hold it in place. I use the heavy, thick stuff for tree rings. The thin stuff can be used to line pots, or I give it to our rabbits to shred (which eventually winds up in the garden) or tear up and throw in compost.
Friends that visit our house in summer and see the massive garden next to our house often ask me where I do my plant/seed shopping and what I like to grow out there.
I’ll start by saying that my family are not especially adventurous when it comes to vegetable eating. My husband likes his starchy basics: potatoes, corn, peas- pretty much in that order. My daughter is a bit more adventurous; she’ll eat tomatoes, cucumber and snow pea pods in addition to the starchy veggies. They both love strawberries, blackberries and Tom’s jelly from my elderberries last year was a huge hit. I will eat just about any fruit or vegetable, even try some that I’ve never had before and can’t pronounce. I’m less adventurous in the meat department. It took a year or two of living here before I would try venison again, I still won’t touch squirrel or rabbit. Forget the more mid-west exotic fare like groundhog, snake or snapping turtle.
I’m trying to branch out. I’ve been following several Missouri homestead, wildcrafting and foraging sites. I’ll try a lot of mushrooms and edible weeds that my family isn’t too keen to put on their plate. I figure if nothing else, this stuff could keep us alive if there’s ever a zombie apocalypse (might re-think that snapping turtle then too).
This year I’m branching out into more herbs and growing a few unusual things like Stevia and my own tea.
First of all, I have to say that for live plants, my local nursery is the bomb. It’s a little place called Huffman’s out on Highway B, just outside of St James. The staff there are lovely, the owners are wonderful, everyone I’ve dealt with there has been knowledgeable, considerate and they always tell us they’d love to see us again. Huffman’s is my go-to place for mulch, live plants, landscape fabric or just to go wander around browse for ideas. They have a really cool gift shop inside; tons of yard art and they carry that potting soil with the frog on it that the marijuana growers supposedly like. (If it’s good for growing pot, it should be stellar for tomatoes, right?) I’ve gotten several blackberry plants from there that have done very well and we always go get at least several annuals to decorate the back porch rail each year. So this is my shop local place, hands down. In fact, since I’ve found them, I hardly step foot in the garden center at Lowes or Menards, which is where I used to get 90% of my plants from when I lived at the Lake. If you’re in the area, go check them out. They’re on Facebook and online at https://www.huffmansflowersofthefield.com/
Ok, now for the Online shops. These are who I do a lot of my pre-order of seeds from, for the stuff I want to start in the house early or when I want something really specific as I’m planning out the garden in the winter months.
My #1 favorite (and where I spent the bulk of my $ this year) is Baker Creek Seeds. I do most of my seed shopping in January/February before most of the local nurseries are even open after winter break. I’ve found that if I wait until March or April, most everything online is out of stock or extremely picked over. The very well-known sites like Burpee are already having stock issues. Baker Creek had to send out a notice that they were having issues with paper shortages, so seed packages and catalogs could be an issue for them next year. No worries about the catalogs though, they have their entire catalog online with the same pictures and descriptions as the print version.
You’ve probably heard a lot of hype about heirloom seeds in recent years, but not everyone knows why. Heirlooms can be saved year after year. They are true to the parent plant, which means that they are consistently the same, year after year from one planting to the next. Some of these seeds have been around since the 1800’s, passed along from generation to generation. This means you can grow the same pink beefsteak tomato that your great, great grandmother grew in her garden when you were two or the same flowers she had lining the walkway to her house. These plants are tried and true performers, you know what to expect. You know what they are going to taste like, you know that they’ll be the same year after year after year. Baker Creek sells a lot of heirlooms. They are not all native heirlooms though- they get their seeds from farms all over the world. They pride themselves on carrying unusual varieties that you won’t find anywhere else and you certainly will never see at a Big Box store garden center. The homepage of their website is a testament to this- showcasing all the black vegetables and flowers that they are carrying this year. The main office of Baker Creek is out of Mansfield, Missouri (Home of the Laura Ingalls Wilder Festival- if you’ve never been, you should check it out.) You can order online from them at https://www.rareseeds.com/
My #2 this year was PineTree. This is where I picked up the things that were out of stock everywhere else or other sites just didn’t sell. They still had garlic bulbs in stock (out on every other site I checked!), they also had white sage, pinto beans and an heirloom green onion that doesn’t produce bulbs, just the green tops in bunches. This is my first-year ordering from them, so I’ll have to let you know how I liked them later. They shipped my order quickly; I should be seeing it sometime this week. The garlic will be shipped in fall when it’s time to plant. They have a nice selection of loose-leaf teas and herbs for purchase on their site also. Website is https://www.superseeds.com/
#3 Ferry Morse.
I’ve always associated Ferry Morse with Walmart seed shopping- I think because this used to be the primary brand that Walmart Garden centers carried every spring. I’ve purchased a lot of Ferry Morse seed over the years, both from Walmart and online and have had decent results. A couple years ago, they were the only place I could find that had birdhouse or bottle gourds in stock when I went looking for them in late spring. Their prices are awesome. They have a nice little live plant sale going on right now- I’ve not tried their live plants before, but I ordered a couple of tomato plants, we’ll see how it goes. They don’t have a massive selection and most of what they offer is pretty common, but if you’re looking for good basics, their prices can’t be beat. I plant marigolds in EVERY raised bed as companion plants and they have just about every basic marigold available for under $2 a pack of seeds. Also, it was free shipping for any order over $35, where most garden sites don’t offer free shipping until you hit the $75 or more mark. https://ferrymorse.com/
#4 Burpee Seeds.
These folks were always my old favorite and I looked forward to their catalog in the mail every year because it meant spring was almost here, regardless of what that stupid groundhog had to say. In the past couple years though, I’ve had trouble with a lot of Burpee’s stuff being out of stock very early on. I just got my catalog a few weeks ago and already they are completely out of every kind of garlic, several varieties of onion and some of the tomato packs are unavailable. I blame the stupid pandemic- people who have never gardened started gardening during 2020, even if it was just a pot of tomatoes or strawberries on their apartment patio, they had something. Burpee is well advertised, well known and popular, meaning they sell out of stuff faster than the more obscure, lesser-known sites. Because of this, I didn’t get a ton of stuff from them this year. I did find a Chocolate Peppermint plant that I searched for and couldn’t find elsewhere. They also had table grape plants. You would think being in St James, which is considered “Midwest Wine Country” that grape plants could be found in abundance, but if they are out there, I’ve yet to find them. I found a couple at the big box stores, that did well until I took them out of the box. 😦 I’m trying my luck again this year with a pair from Burpee. The Amish that used to own our property once worked in the grape fields outside of town. I see lots of folks in town with backyard grape arbors. I have no desire to make wine, but would love a few table grapes to pick each year. If you’re going to visit Burpee, I would do it now rather than later, they are selling out of their more popular items fast! They still have lots of flowers and landscape plants. https://www.burpee.com/
Just as an FYI, I’m not an influencer and I don’t get anything from any of these companies from sharing my opinions about their sites or products. I’m not a paid endorser or affiliated with them in any way. I did post a link on Facebook for Ferry Morse because they gave me one of those, “Share this link and we’ll give you a percentage off for every person that signs up for an account…” So I guess if we’re friends on Facebook AND you click that AND you order stuff, THEN I am getting something from it… but it’s only a 10% of coupon or something. Nothing all that exciting. LOL
I would first and foremost though encourage you, especially if you are a new gardener, find a local nursery. Not the garden center at Lowes, Menards or Home Depot- but an actual local nursery like Huffman’s above. Try several of them. We have two in our town, both are decent, Huffman’s people won me over in the end though and I’ll go to them every time. Local nurseries will know which plants do best in your area. They’ll know how those plants perform, they’ll know what issues they may have, they can make recommendations based on your space and growing conditions or the amount of time you have to dedicate to your garden. The people working at Lowes will stare at you confused when you ask for Blood Meal and say, “We’ve got Miracle Grow?” They don’t know about most of the plants there and they don’t care. They go out and drench them every day as they’re told and stop if something turns brown and crunchy. You’re not just paying for a plant; you’re paying for knowledge and help making an investment. Local nursery staff can tell you whether that plant will do well in your space. They can tell you if deer will devour it or not. They can tell you if it’s going to draw hordes or Japanese beetles to your yard. They can tell you if it will spread out of control and should be kept in a pot or if it is ok to put in your landscape beds. The people at Home Depot do not notice or care that you bought mint and you’re planting it in your landscape beds. Responsible local nurseries won’t sell you things off of the conservation invasive list that will make your neighbor’s curse you for years. (Dear Lowes, stop selling people Bradford Pear please!!!)
So, this isn’t just another “Shop Local!” pitch. If you find the right fit, you’ll find someone that actually cares about the plants they sell, they want their customers to be happy and come back, they want your garden to be a raving success because it will mean your friends and family will want to shop with them too.
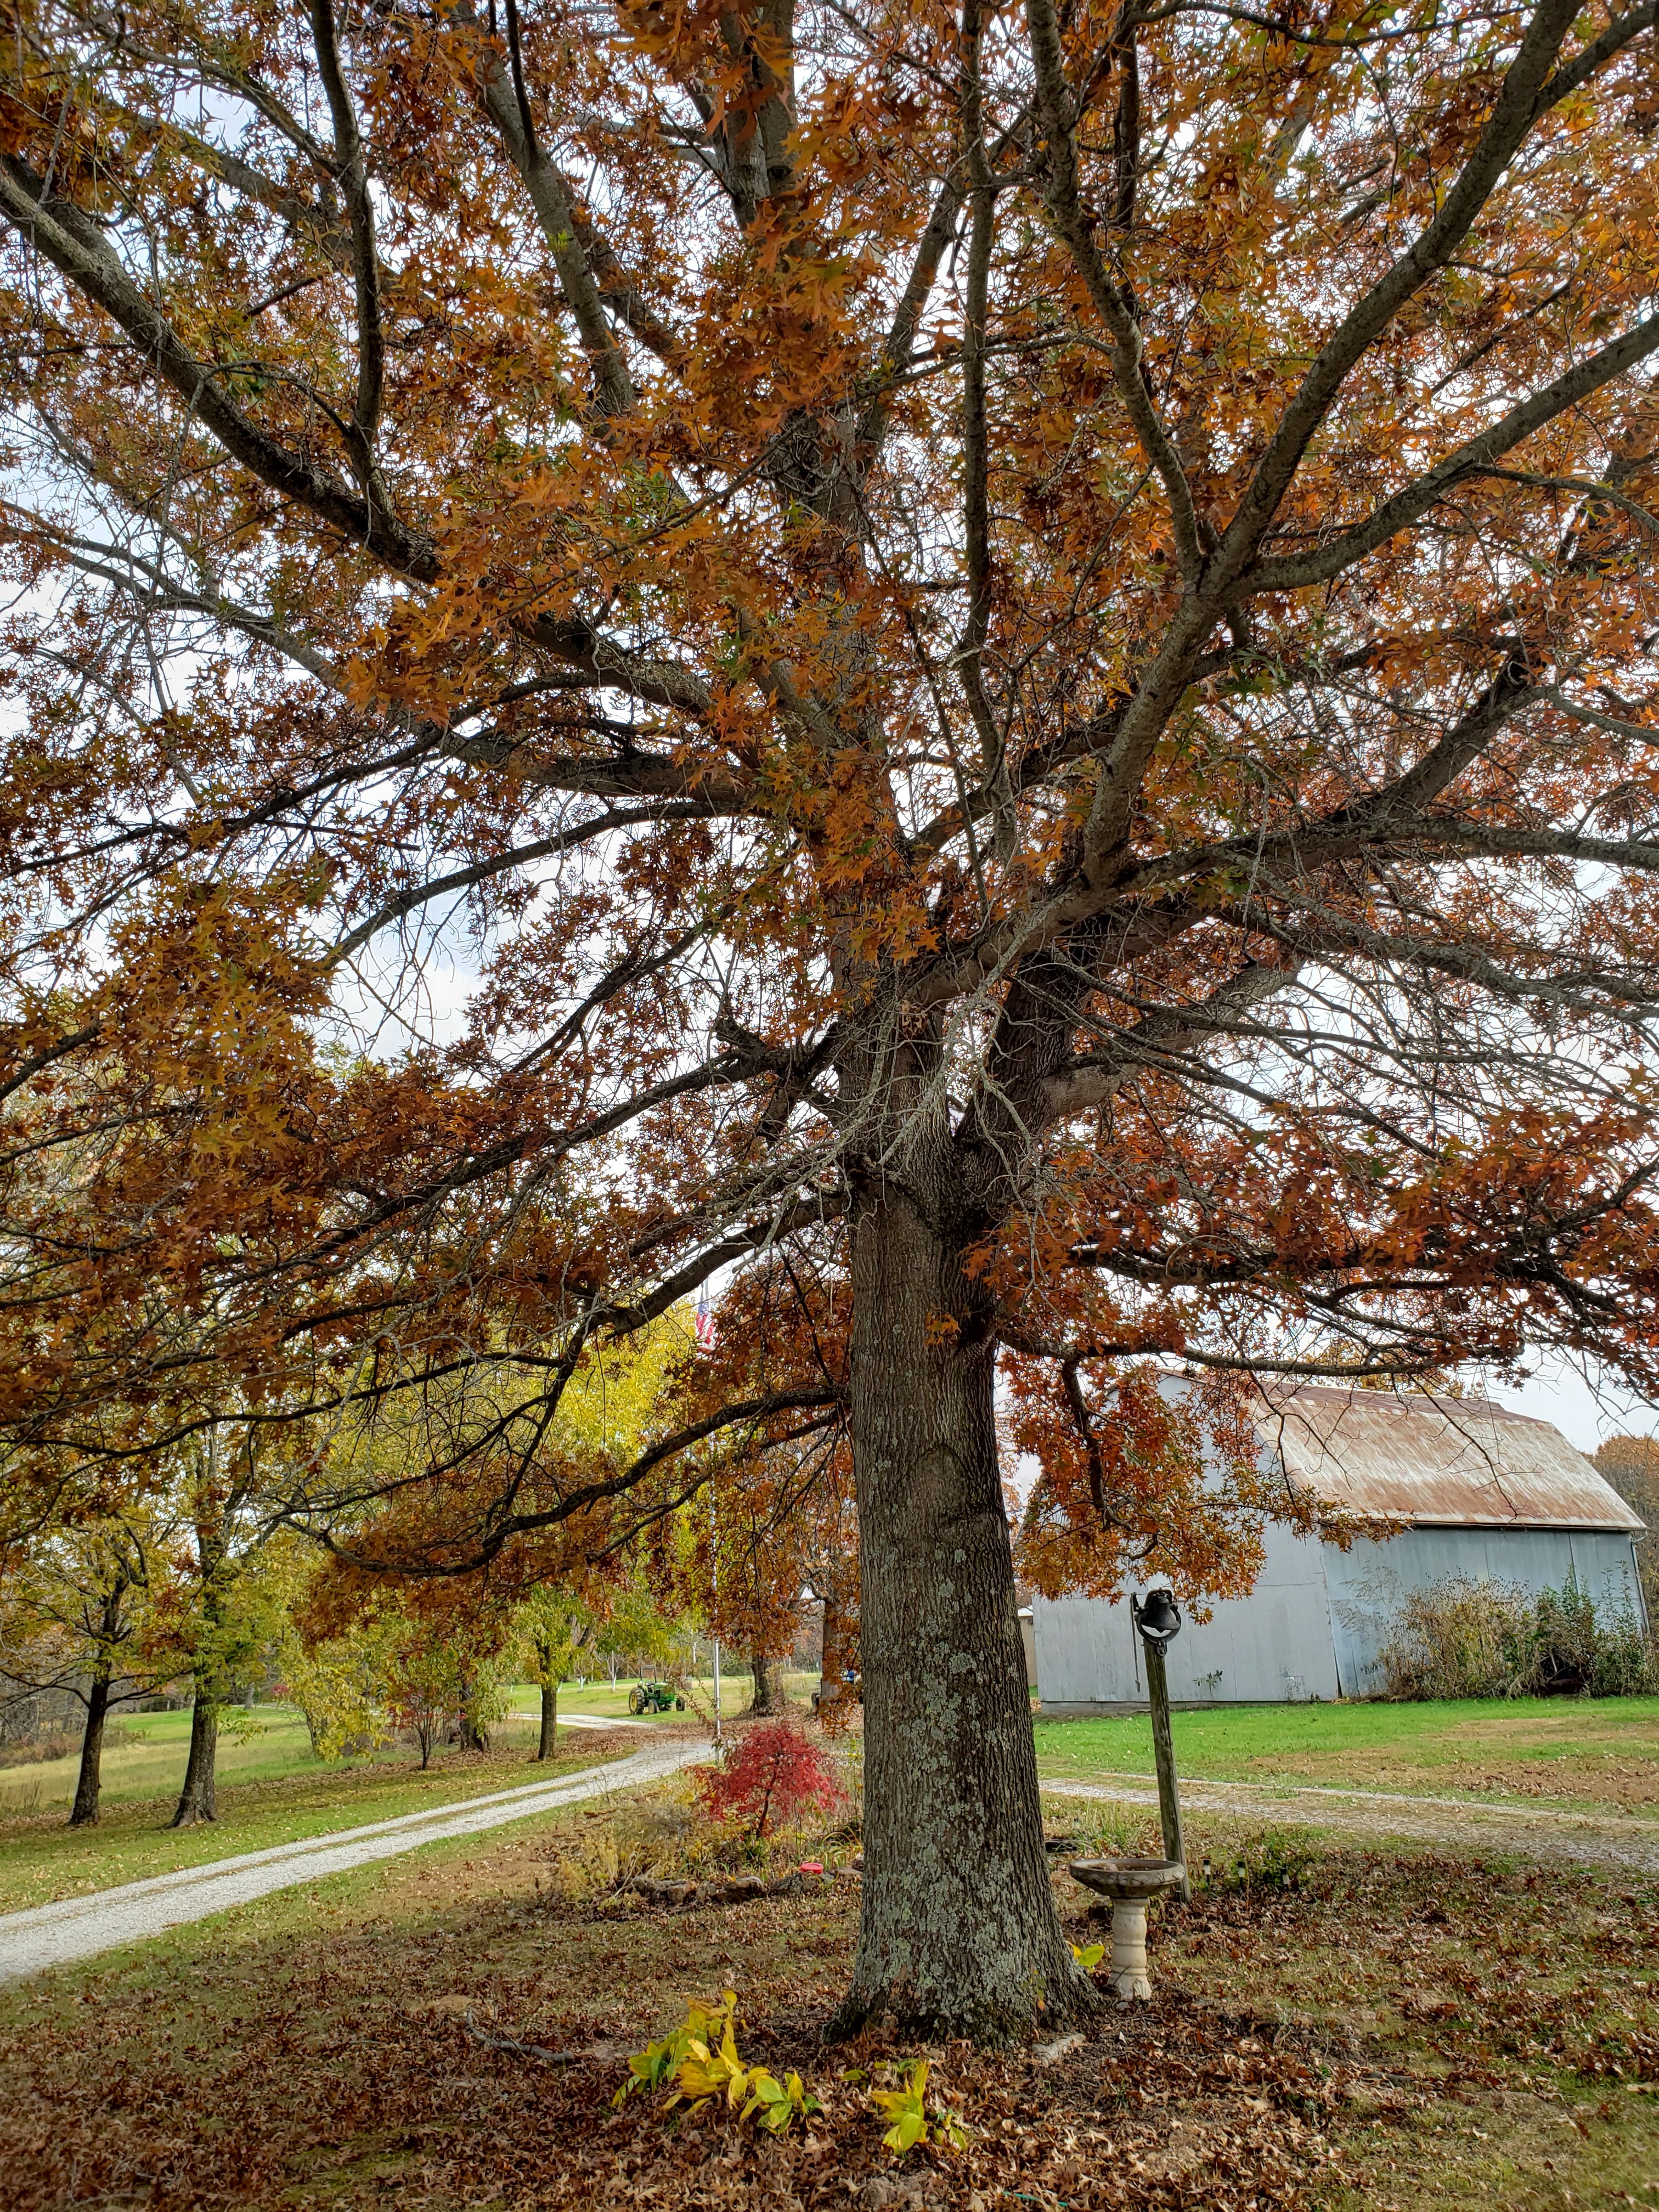
I’ve been sick for over a week with some sinus thing that managed to sneak its way into my lungs and try to give me pneumonia. No, it’s not the “C” word. After several days of antibiotics I’m starting to feel human again. Today its 74°F outside. In December. Even if I was half dead, I’d have to drag myself out on a day like today. Plus, I had trees to plant.
I’ve decided that our yard is seriously lacking in fall color. We are mostly surrounded by oaks, hickory, walnut and cedar. Even the sweetgum up by my soon to be shop don’t get that gorgeous red and orange that I see along the streets in town, they are a disappointing yellow.
I did a little research and decided I’d like to start incorporating a few maples into the landscape. Not only are they usually stand outs in fall color, they provide good shade, they don’t have a reputation for being as breakable as the Bradford pear I cut down last year (always a gorgeous red in fall, but vile and invasive, had to go). I opted for a bare root sugar maple from Arbor Day’s website; as an added bonus it came with a free red maple. 🍁
Hopefully not a deer snack
Arbor Day sends decent instructions with their bare root trees, but I’ve heard lots of folks complain their success with them is hit and miss. The maple I paid for was almost 4 ft and had a really decent mass of established root on it. We’re having a mild fall right now, so I feel pretty good about getting this in and getting it settled before it’s subjected to harsh weather.
I’ve been bad in the past about skipping the pre-planning part of tree planting, only to later curse myself for not considering how TALL, how w-i-d-e or how invasive surface roots can be in some areas. I gave it a lot of thought this time. I researched, I read up on species before deciding, I watched light conditions, stuck my shovel in the ground and looked at it from different angles and inside the house. See the shovel at the corner of the barn?
I cannot stress enough the headache it will save you later, just planting your tree in the right place. You need to picture how it will look when it’s at full height and maximum spread. Some trees can be trimmed up underneath, some look ridiculous if you do this, it can even destabilize a few. Plant in the wrong spot and you’re making a lot of work for yourself later, if it doesn’t grow too large to be moved at all. I’ve seen lots of folks have to cut out beautiful trees because the wrong tree was planted just too close to their house or foundation.
2. If you get bare root trees like these, and the roots look like this with very little root ball, you may want to hold them back a season or two. I know the little pamphlet says they’ll establish roots over fall and do better in spring, but if your fall goes from mild to Siberia a week after you plant, those little guys just may not have quite enough root to pull through. I looked two weeks out and it looks ok, but if I were worried, I’d pot them up in potting soil and they’d spend a year or two like that until they have a nice, strong root ball. I put them in ground when they’re about 4ft tall and have a pot full of roots to get them started. Potted trees frim the nursery are way more expensive, but often perform better than tiny, fragile bare root trees. Have a little patience and you can save a fortune. The same sugar maple I bought for $15 was at least $50 when purchased in a pot.
3. I don’t want to just reiterate the rest if the tree planting instructions, but I do have one more piece of advice for those of you planting in clay soil. The instructions will tell you not to amend your soil. This is good advice, because your tree may not work to push its roots past the amended area. Trees can be lazy, like people. It’s also hard on fragile roots to work themselves through heavy clay.
If you don’t want to wait on potted trees or spend 3x the price, you can help a bare root tree by digging a HUGE hole. By this, I mean dig your hole out several feet from where the actual tree stands and a couple feet down from where it’s going to sit in the ground. Backfill your hole with loosened clay and sit the tree on top if that, you don’t want to bury it below the line it was planted at in the nursery. The reason for digging, then filling is to mechanically break up the clay, so the tree roots don’t have to do all the hard work.
We have cow pasture dirt- no rocks, at least 6 inches of topsoil, it drains and holds water fairly well for clay. You can see in the photo, I still dug a hole much larger than the tree required before planting. If we still lived at the Lake of the Ozarks, where our clay was either paste or concrete, I would have dug an even wider hole.
Final advice- don’t skip the mulch. When cold, sun, wind or heat start abusing your new trees, mulch can make the difference between a tree that pulls through or dies. This is in the tree planting instructions I got from Arbor Day, but it can’t be stressed enough. Mulch for a new tree is really, really, really important.
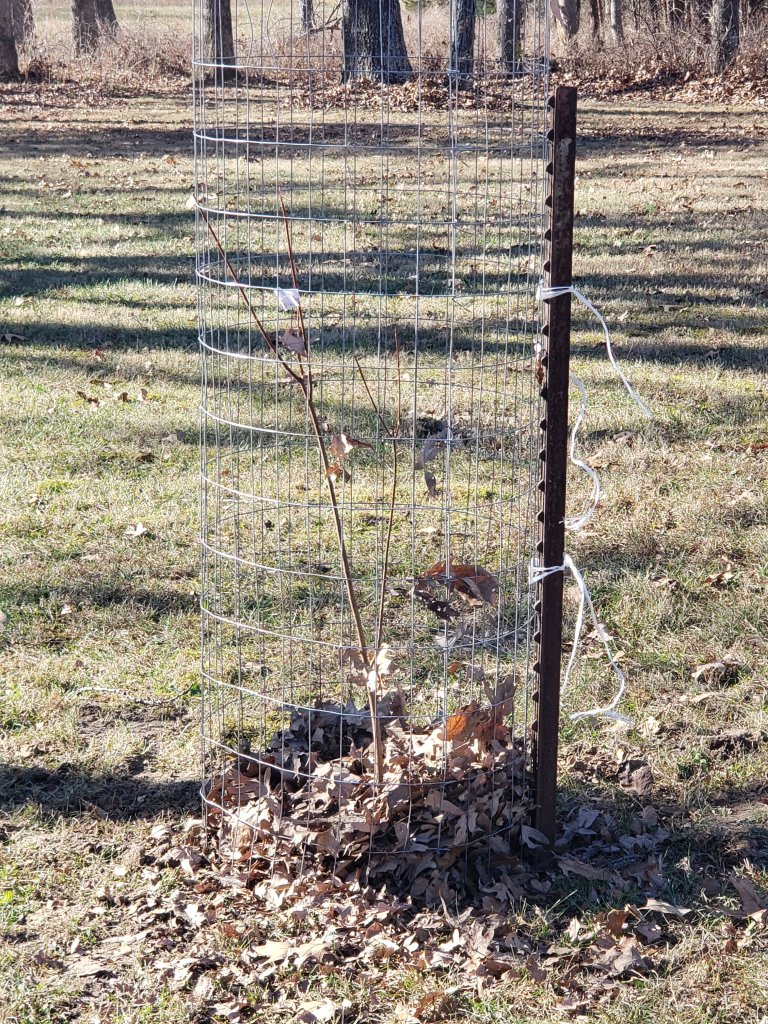
If you don’t have mulch on hand when you plant, chopped up leaves or straw work well. I’ve even used torn up cardboard. The trees I plant around our fields I throw an old tire on. It’s a good wind break and helps hold moisture around the roots. It also keeps me from running them over with the lawn tractor.
For detailed step by step instructions on planting a bare root tree, you can go to Arbor Day website. (They have video too)
Happy Holidays in case I don’t get back here until after NY.
I’m hoping I don’t get hate mail from this post, but I guess if I do, I’ll look at it as a new and interesting experience.
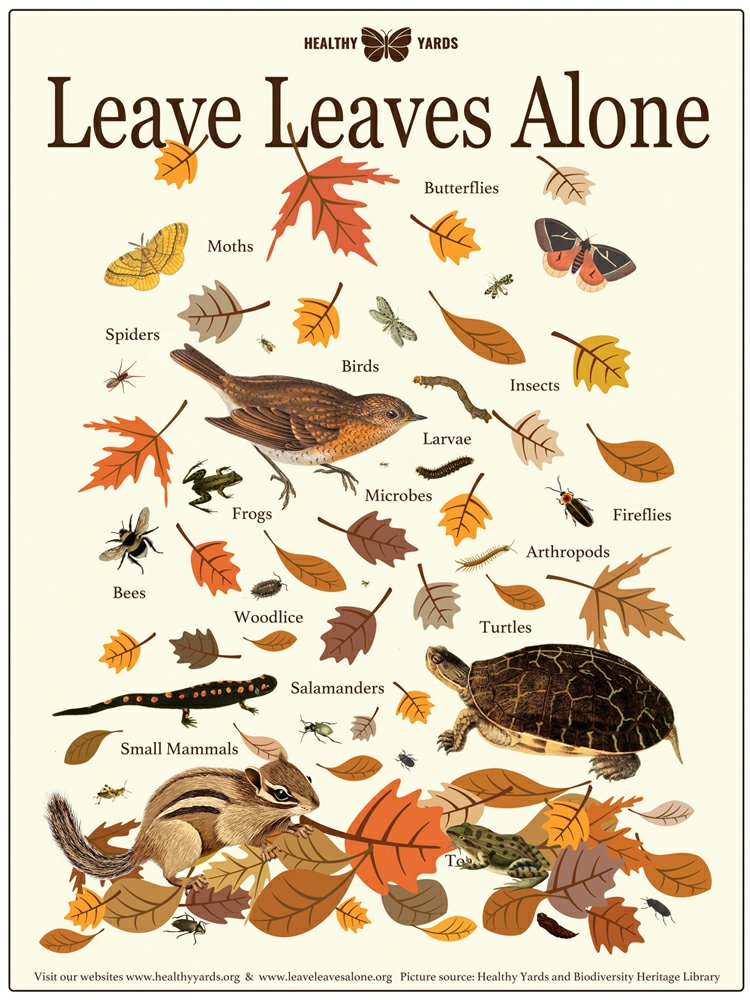
I’m not sure who started the Leave the Leaves campaign, as there are several groups out there collecting funds and trying to educate the public to their point if view. If you are in ANY sort of gardening forum on social media, I’m sure you’ve come across this discussion- sometimes even heated enough that the admins have to get involved and pry people apart.
Leave the leaves campaign
Here’s one of the posters that was being passed around just the other day. Several members commented that they were no longer removing leaves from their yards, that they were doing their part to, “Save the pollinators!” and “Grow native!” Two mantras that are VERY popular among the gardening community right now. They were taking turns contrariamente congratulating each other on their efforts and declaring their righteousness when a man commented, “I’m not leaving my leaves. I like my yard and my grass.”
You would have thought from the responses that he’d declared he eats children and fertilizes his grass with the blood of cute puppies. They flat out attacked him. They told him he was a fool for maintaining a grass lawn, a bigger fool for cleaning up his leaves and those were some of the nicer comments.
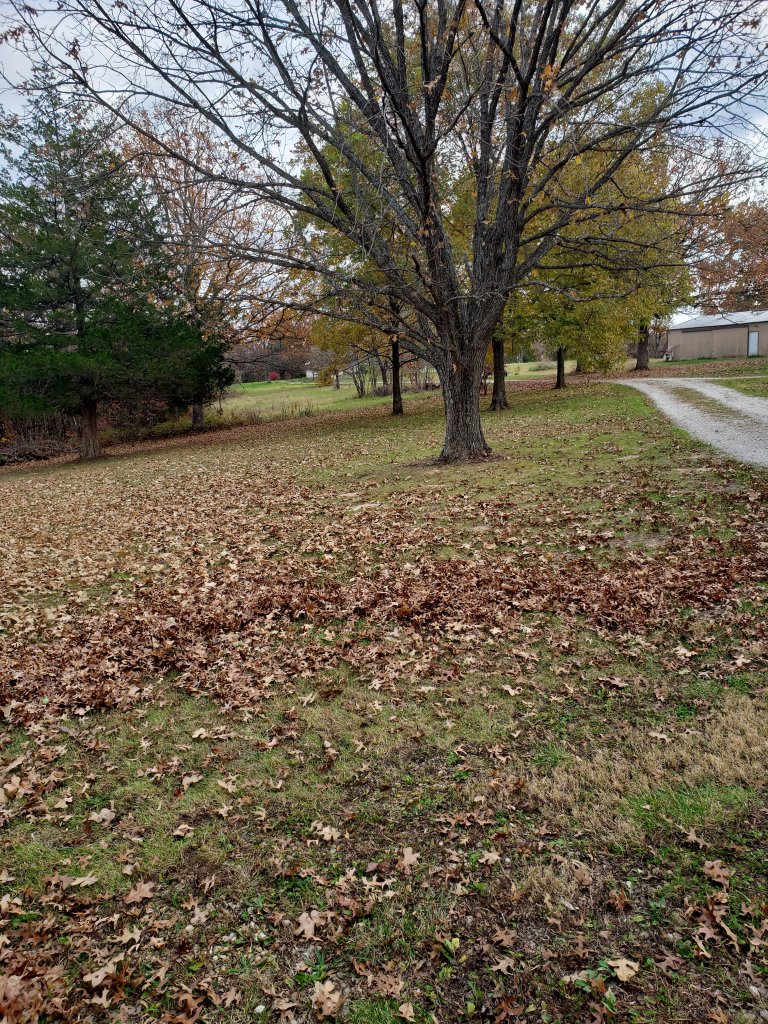
Lots of leaves
This is now the world we live in though, where those with an unpopular opinion are bullied, belittled, shamed or even downright threatened. You’d think gardeners are peaceful people, but it can be a real passion and anything people are passionate about, they are willing to fight over.
I’m not condemning the Leave the Leaves campaign entirely. It’s based in truth, it makes some really good points and leaves can prove very beneficial in gardening. BUT (you knew it was coming) a few of the ads or information I’ve seen passed around about leaving leaves has been a bit deceptive.
I’ve seen claims that it will not harm your lawn, that it actually feeds it, because the leaves break down into soil. Let the leaves pile up in an inconspicuous area if you want to test this and see what happens to the lawn underneath. My oak leaves lock together nicely, especially when wet, forming a dense, impenetrable mat that will not allow light or air to pass through. It will suffocate and destroy any vegetation growing underneath. This is a great environment for supporting slugs, salamanders and roly polys, but not such a great environment for supporting grass or plants. Too many leaves will suffocate plants and kill a lawn, not feed it. I neglected to clean the leaves from this front bed (below) last year and I lost several of my bulbs- of the purple clover I had planted, only one came back up, the crocus did not do as well and the violets absolutely took over. The roses also have fungal issues this year, which may also be because of the heavy leaves under and around them. Leaves are a great space for fungus of all sorts to thrive.
I don’t “Leave the Leaves” here. It’s damaging to my landscape plants. it causes drainage issues, I will now have to treat roses with fungicide because of it and I really dislike using chemicals in our yard or garden.
Maybe my biggest reason for not leaving the leaves around our house is it draws insects, which is exactly what the poster above is telling folks to save. We had an infestation of brown recluse on this property when we moved in. The exterminator had to come out several times and spray and put sticky powder in the attic before we stopped seeing them in the house. If I let leaf debris sit around the house, they still come inside in the fall, looking for someplace warm to spend the winter. When we first moved, I was cleaning the garage, which was also infested with recluse and got bit on my bicep. It was painful and itched like mad around the bite; a couple days later I had a hole in my arm about a quarter inch deep where the venom ate the flesh away. Recluse normally stay hidden in walls and ceilings where you don’t ever see them (hence their name) but there was a lot of clutter in the garage and a lot of paper and boxes. They love any sort of leaves, decaying wood, paper, cardboard that they can hide in. 6 months later, I was trimming dead wood out of walnut tree in the backyard, a spider fell out of the tree and into the back of my sports bra. As soon as I moved and the bra tightened against the spider, it bit. That one felt like I’d been stung by a wasp. I had my daughter hold the bra out so the “wasp” could escape and a huge recluse fell out instead.
This time the pain wasn’t just bad, it was excruciating. I ran a fever, I felt sick and dizzy for days. I treated the wound with activated charcoal and Prid drawing salve (how I wish I’d had my dead nettle salve then!) to pull as much venom from the wound as possible. I kept it very clean, even though it hurt like hell to clean it after it opened up. In spite of no infection directly in the wound, I developed cellulitis in the surrounding tissue and had to go to the doctor for antibiotics and steroids about a week in. This bit went deep, you could have put a quarter halfway into my shoulder. It also spread to an area over the size of a half dollar. I still have a nasty scar on my shoulder blade to show for it.
All spiders love leaves, not just recluse and I’ve noticed a rise in the population of wolf spiders here since we knocked the recluse population down greatly. (thank goodness! they will kill recluse.) I spotted at least 3 recluse running for cover as I was clearing the leaves around the foundation of our house this past week. That’s 3 that ran for the yard and will hopefully go find another place to inhabit besides our siding. Which brings me to my last point.
Piles of leaves, especially wet leaves built up over time can destroy wooden house siding, even hardybacker will succumb to it if left long enough. They will also permanently stain concrete porches and patios or exposed foundation walls. As the leaves break down, the leach out tannin oils that stain brown and yellow, which is nearly impossible to remove from grey stone or concrete. Imagine leaving a sopping wet blanket on your beautiful wood kitchen table for 3 months straight. You wouldn’t do that, nor should you leave piles of wet leaves against wooden siding or decks if you don’t want the wood to rot and be destroyed.
So as with all gardening advice, I would encourage you to read into the SCIENCE behind what you’re being told to do and not just jump on the latest viral post or fad (I’m looking at YOU EPSOM SALT). Also use a little common sense, if you’re gifted in that area. Leaves aren’t doing any organic good on your hardscapes or clogging up the gutters on your house. If you live in town and the city takes leaves, find out where they take them. Many cities now haul them to a composting facility where they are broken down and sent back out as beneficial compost for lawns and gardens. As for me, I have a yard that is close to 5 acres, full of huge, mature oak trees and that’s JUST the yard. In total, we have 40 acres and another 30 that is family land of fields, woods and yard. I’ve never raked or burned leaves here. I wait for the bulk of them to fall, then run the mower one last time in November, chopping them into small pieces and blowing the bulk of them into the edges of the woods and the hay fields. Fireflies lay their eggs in those areas, the mice, turtles and all those other small creatures on the poster above like to hang out there, so THAT IS WHERE I leave the leaves. They aren’t damaging my house and drawing recluse, they are in the edges of the woods where they give all those little critters a place to hide that isn’t in my front door. If you can have undisturbed areas like that, I see no issue at all with tidying up your hardscape or chopping up the leaves to mulch trees instead of letting them lie on the lawn, where you don’t have to share your space with creeping crawling things. Regardless of what the article in Woman’s Day Magazine may be telling you is the RIGHT THING to do. (Personally I can’t trust a magazine that gives diet advice and cupcake recipes on the same cover anyway)
If you don’t have woods or an “edge” to send your leaves to, maybe chop them up and use to mulch perennial garden beds. Chopped up, they don’t form those thick, dense, air blocking mats I was talking about. Once mulched, they break down in a season into compost. I’ve also used them as a layer in my Hugelkulture beds or lasagna gardening. They are a great brown layer to fill in around larger sticks and branches. Earthworms adore a layer of chopped up leaves.
Just stop the “Leave the Leaves!” shaming folks. Everyone’s yard is different, every garden is different and there isn’t a one method fits all that works for any situation. Gardening is one of those things that is as individual as the person doing it and that’s one of the really great things about it. Suggestions are helpful, education is helpful, yelling at someone that they are horrible destroyers of the environment because they didn’t want piles of leaves around their house or haven’t cut down their Bradford Pear yet is ridiculous. We want to ENCOURAGE people to love gardening and be drawn to it, not scare them away forever because we let our passion or dedication to the latest fad override our basic human decency. There is too much of that in the world today and gardening is supposed to draw people back to nature, not make them run screaming in the other direction from angry keyboard warriors.
When you’re hard gardening, you’re too busy to blog and when you aren’t, there’s not much gardening to blog about.
Again I haven’t posted anything in ages, which means I’m pretty much a fail as bloggers go. Thank the gods I don’t do this for money, all my sponsors would desert me.
My original idea for Dirt was to share projects I’m working on in the yard or garden. I was pretty good for a couple years about taking pictures and even writing down brief notes on what I was doing or how I did it so I could share later. We had 40 acres, but I only actually paid attention to about 3-5 of it, because the rest was steep wooded hills and valleys only accessible by hiking. My vegetable garden was the size of a postage stamp, our functional yard was not much bigger.
… then we moved HERE. Suddenly I have 40 acres that is almost all accessible by ATV, if not my regular vehicle. The garden is now “holy hell what do I fill all this space with sized”, there are hayfields, a pond and 5? outbuildings that all need some sort of attention. And ya’ll, I have freaking COWS. And we’re talking about getting MORE.
So in the 4 years we’ve been here, I’ve done a TON of stuff, but not much of it is all that garden blog worthy. And when there is something blog worthy, I’m often too busy doing the thing to consider blogging about it.
This is why I started adding crafting and painting projects- so my poor, neglected site isn’t just left to die.
I did take a picture of the pumpkins I grew this year and our dogs finding the only bit of shade in the garden while they waited on me to finish picking tomatoes.
Maybe when my daughter is grown, the outbuildings are finally organized and I’ve turned the front trailer into a She-shed- I’ll have time to really dedicate to blog. That’s probably a well intentioned lie though. By then, we may have decided we need to go off grid and have a full on hobby farm or something. I’ll be building windmills and not posting about how I built them.
At least you know I’m living my best life. 🙂
I’ll get something on here this fall/winter, even if it’s just remodels and painting projects. Until then. 🙂
I really, really, really hate listening to myself talk on camera. Lately, I’ve been so freaking busy getting stuff on the store and doing homeschool with Ely that I just don’t have time to make regular posts. Which sucks, because I think of stuff I’d like to say all the time, but it would take a couple hours to write it all out with pictures.
So as much as I hate listening to myself on video and as terrible as I am about not rambling when I have to talk, I may still start throwing a few vids on here. Because even rambling, I can still say in 5 minutes of video what it takes an hour to write.
Ha… maybe if I get better at them, Dirt can have its own YouTube channel.
Jim brought me several massive tractor loads of manure this year. Have I told you yet how freaking amazing our neighbors are? They invite us to stuff, they always seem happy to see us, they let my daughter come hang with their dog and collect eggs from their chickens. Jim brings me truckloads of manure, just because he knows I like to garden. Jim and his wife Sandy have been there for us more times than I can count already. They aren’t just neighbors, we consider them family. They are just amazing people.
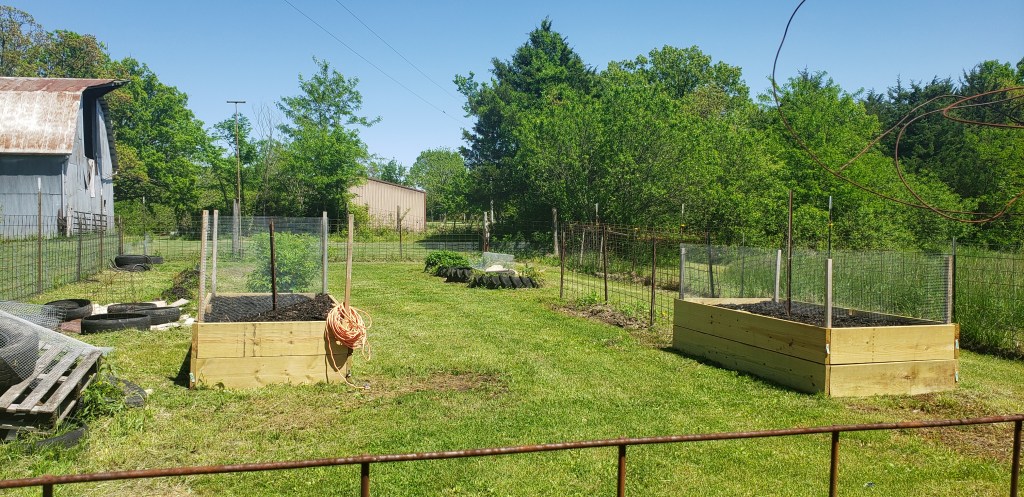
So now I had two huge piles of manure. I’d already planned to build some raised beds this year and what better way to get them started…
Last year’s garden
My plan is to have the garden built in such a way that I only have to run the mower down the walkways and not spend hours and hours weed eating around beds.
Also, there were so many holes in the fence, that the garden was basically a rabbit/ groundhog super buffet. I started replacing fence this spring. I have two sides finished, two to go. It’s a MUCH more difficult job with all the weeds growing, so I’ll probably wait for fall to do the other two.
I framed two raised beds- 8 ft long, 4 ft wide and 4 ft high. Filled the bottom of both with rotten logs, sticks, leaf mould and layered that with manure and rabbit compost. Dirt on top, plants, then mulch. Everything grew SO well, I’m going to have to rethink the trellises in them next year. They’re rather flimsy and just can’t hold 60lbs of tomato plants.
The bed I’d put my tomatoes in the two year’s previous I let rest this year. It looks a weedy mess, but will likely be getting its own raised bed next year.
All three tractor tires have strawberries now. Some June bearing, we added everbearing this year, but I’m going to have to address the birds eating them if we want any for ourselves.
My daughter helped me plant 11 blueberry mounds this spring, so far we’ve only lost 3. We’ve also added elderberry and blackberry all along the front of the garden.
I was spending hours and hours weed eating between the berry mounds though, so I put down landscape fabric over that entire area this past week. It will be getting a truckload of mulch this fall.
In planted gourds and pumpkins this year in-ground but so far I only have two gourd plants, one pumpkin plant and flowers, but no fruits yet. We’ll see… it’s getting kind of late in the season, I’m afraid if they don’t take off soon, they won’t at all.
I have in mind to get herb beds going for next year too, mostly to support my salve making and such, but maybe some to cook with too.
The pears 🍐 took a break this year, since I didn’t thin them properly last year but we got our first peaches this year, so our orchard may need lots of my attention next summer.
I need this garden as simple and low maintenence as possible, ya,’ll. A fact that will only be more true as years go by, since I’m now pushing 50. Four hours of weedeating in 90 degree heat and 70% humidity sucks when you’re 25. When you’re 47, you say to hell with it and just watch the weeds grow.
…or cover them in landscape fabric. I spend a lot more time these days planning how to garden smarter, not harder.
All caught up for now. I’ll try and get some pictures and relay my orchard dramas soon.
The third year I didn’t make many structural changes to the garden, though I did learn a bit from my plants that they desperately needed some form of compost.
The strawberries I’d planted in hugelkultur mounds were so thick with plants, I barely had to weed or water. I threw some mulch on them in spring and they did their thing.
We tried corn in the far tire, but it wound up with some kind of beetle that destroyed all but a few ears. Not really worth the trouble.
My watermelon 🍉 plants grew very well and were covered in melons, but we didn’t get a single one that summer. A raccoon discovered them and ate every one of them before they’d even fully ripen. After building elaborate cages, setting traps and dumping red pepper flakes everywhere for a month, I finally threw up my hands and let the little bastard have them.
I’m not trying melons again without electric fence…
They took some of the beetle ridden corn too, which I cared less about.
This was the year our neighbor Jim brought me a tractor scoop of cow manure, I started using it to build mounds for blueberries I planned to put in the next year. That fall I used it to amend beds that I felt were nutrient depleted, it made a huge difference in my tractor mounds the next year.
Hugelkultur mounds being built in tractor tires.
We had a HUGE crop of pears from the orchard last year, so I spent a lot more time focusing on orchard than garden. (Posts on that later)
I had to go dig these photos out of Facebook and couldn’t be bothered to crop the screen capture out. Don’t judge me. 🙃
Early spring the next year I started digging out the the big tractor tires. I emptied all the dirt out, added rotten logs, twigs, straw underneath, then replaced the dirt. I planted one entire tractor tire full of strawberry plants, to replace the ones of Paw Paw’s that died. (Only a fraction though, he had 7-8 small tires FULL.)
The second tractor tire I planted with bell peppers.
My other big project for that year was the huge hugelkultur mound I put in along that row. I removed all the tires and put in a section of cattle panel fence, then built the mound around it. I had so many tomatoes that year, we couldn’t use them fast enough.
Cardboard down to kill weeds. SO many tires!
I threw a few cucumber plants in at the end of the mound, but they didn’t do great in the tires. The soil just got too compacted, the plants kept drying out and the fruits were most bitter.
We tried planting potatoes in some of the stacked tires too. They made a few, but were small and kind of sad.
I decided two years of 6ft high weeds had seriously depleted the soil and it was going to need some building up to do well for vegetables.
The entire left side of the garden I just left covered. I wasn’t sure what I wanted to do with it yet and the cardboard meant less weedeating.
My garden helpers 🙂
Doesn’t seem like a lot of progress, but I was also very busy that year cleaning buildings, getting the house in order, working on the rest of the yard and just trying to wrap my head around what to do next with this place.
I can’t remember if I’ve ever actually posted this before I Dirt and I can’t find it anywhere, so I guess at the risk of being redundant, I’ll post it again.
I’m not a fan of using OFF! insect repellents. First of all, I didn’t like using DEET all over Ely when she was little and the other best selling commercial insect repellent was that awful smelling Avon stuff. I’ve never been a fan of flowery-scented perfumes or sprays of any kind, in fact, some of them can send me immediately into an asthma attack if they are really strong and I’m around them for too long.
I started doing some research on plant based insect repellents and came up with several that were mentioned again and again.
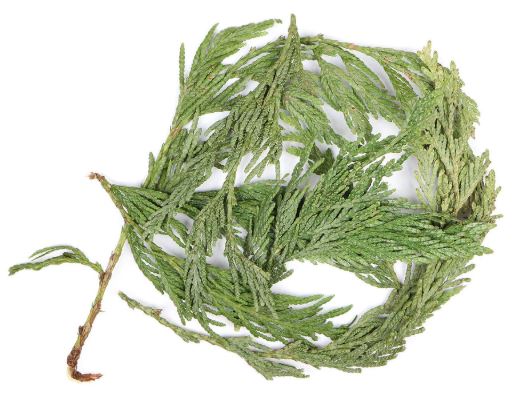
Bugs don’t like cedar. Cedar hangars or chips are often added to clothing storage options to deter moths from munching on your sweaters or wool items in summer storage. We also used cedar in our outdoor dog beds for years to keep fleas, ticks, spiders, snakes and rodents out of the dog houses. Cedar oil acts as a natural insecticide. It contains thujone, which is a terpenoid which repels, inhibits or kills insects like cockroaches, termites, some beetles, ants. etc.
cedar leaf- mountainroseherbs.com
Lemon Eucalyptus oil. I had already been using regular Eucalyptus oil in sprays here at home. We had a serious recluse problem when we moved here- I even got bit twice, so I was willing to try anything to ward off spiders that I could. Spiders don’t like Eucalyptus oil, so I sprayed it around beds and under furniture, in closets, etc. It smelled nice and gave me peace of mind.
A few years ago, the CDC (Centers for Disease Control and Prevention did a study that found a mixture of 32 percent lemon eucalyptus oil provided more than 95% protection against mosquitoes for up to three hours and approved it as an effective ingredient in mosquito repellent. So I switched to using the lemon eucalyptus, might as well repel spiders AND mosquitoes.
lemon eucalyptus rainshadowlabs.com
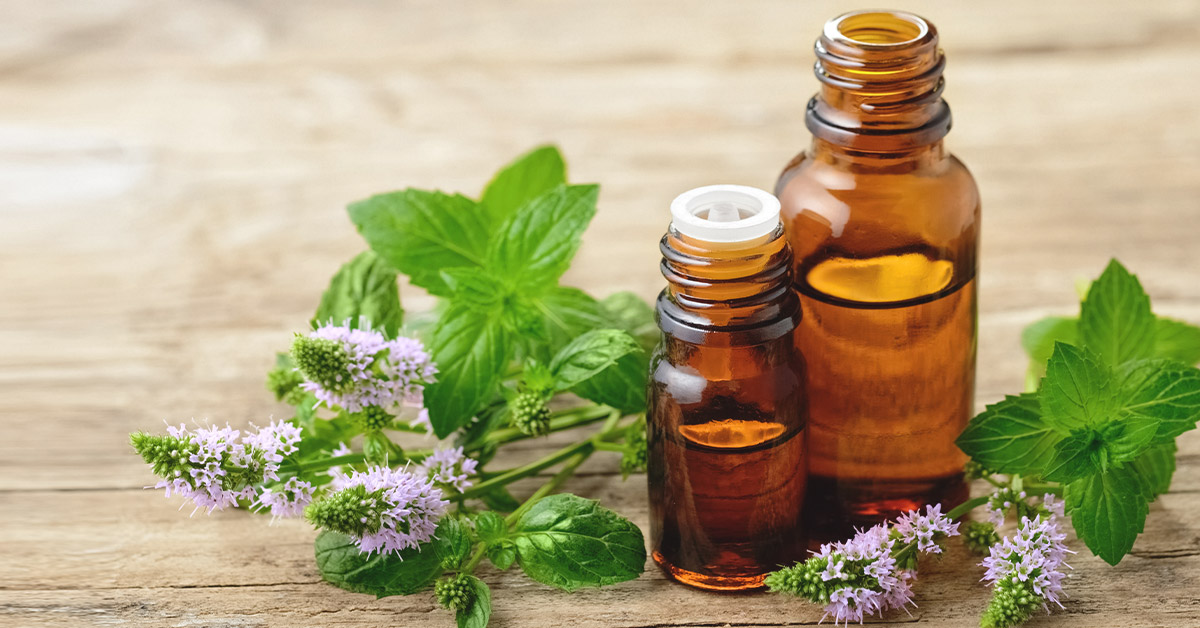
Peppermint oil smells like Christmas and I use it in my mop water to make the house smell fresh, so to me it smells “clean” as well. It also works pretty effectively at repelling flies. When I’m outside in the garden, the flies love to hang around and bite any exposed skin they can find. They will torment to death your poor livestock too, but DO NOT spray this stuff on your horses face, as peppermint will burn and sting like crazy if you get it in your eyes.
peppermint oil- healthline.com
I’ve also had friends say they used vinegar in their fly sprays, but I don’t like the vinegar smell, so I skip it. So the spray is very simple:
To a large spray bottle of water (I use an old Windex bottle), I add about 30ml of cedar oil, 10-15 drops of lemon eucalyptus oil and 10-15 drops of peppermint oil. Shake up the bottle to blend it all together.
I spray this all over my clothes before going into the woods or out into the garden. I spray it on my hat, my gloves, shoes, etc. It keeps the ticks, flies and mosquitoes at bay for several hours, it smells fresh and earthy instead of like flowery perfume or chemicals. I even put it on exposed skin- just be careful not to get it near your eyes- it WILL burn. I spritz around the picnic tables with it if we’re going to be sitting out there. I use it in the house to repel sugar ants, spiders and kill gnats. It is hands down the best natural insect spray I’ve ever used. We haven’t bought a can of Raid for years.