Garden Planting Time! (Or Ghetto Greenhouse Part III)

ready to plantOk, HERE is the planting article I started to write before I got distracted by the raised planting bed subject.
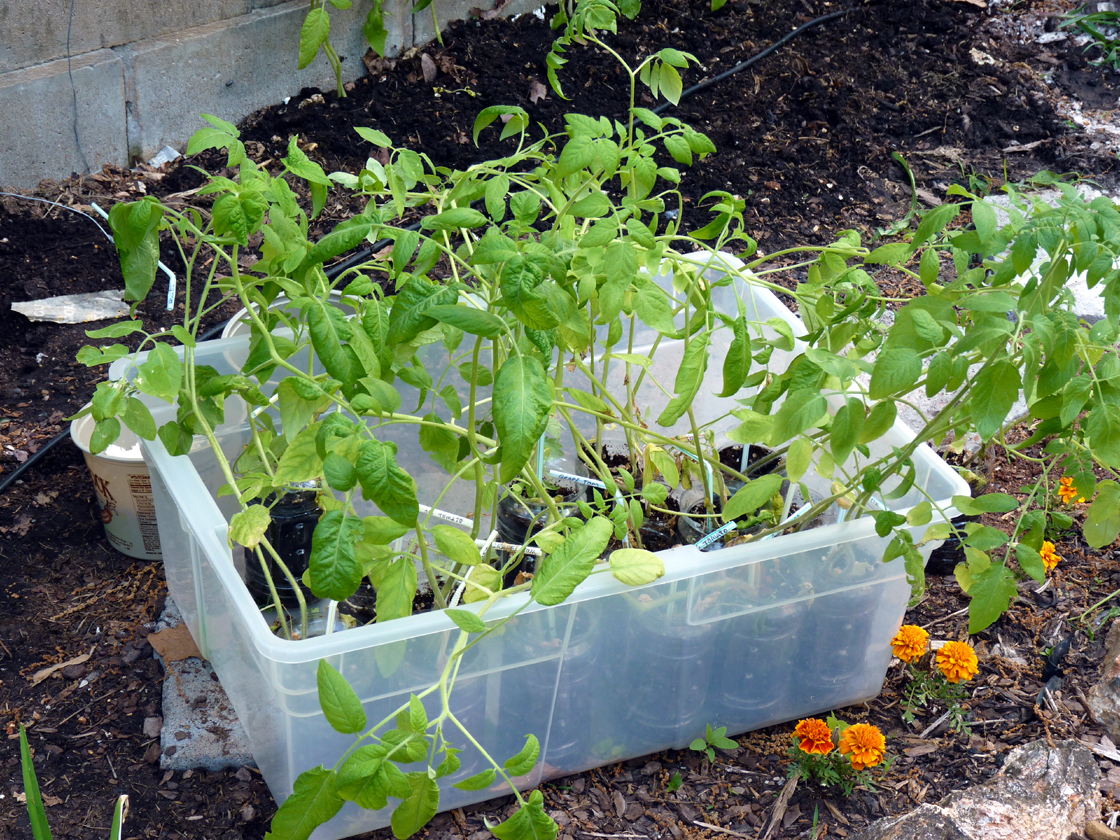
Only our peppers and tomato plants were started in the house and transplanted as seedlings, everything else I sowed directly into the garden as seed. The seed planting was fun with the kiddo, but I learned the hard way not to let her handle delicate new vegetable plants, even ones that have been well hardened off. She broke several before I found her an alternate job to do. I left the broken ones in their original plastic bottle containers. Maybe they’ll grow new leaves, maybe they won’t. As you can see from the pictures, I didn’t have any shortage of tomato plants, so I wasn’t too upset about the loss of a few.

These were the plants that I started from seed back in February or March. In the past couple weeks, when it FINALLY stopped snowing here and the night temperatures were above 50F, I began the process of hardening off the plants. Pepper plants shouldn’t be transplanted to the ground until the earth has warmed to at least 50F; to do so earlier could kill them or hinder their growth until warmer weather comes. Tomato plants are a bit more forgiving, but you have to cover or shelter them if there is any danger of frost.
EggshellsHardening seedlings off basically entails getting those house-protected seedlings acclimated to being outdoors in a less controlled environment. The absolute best time to put them out is a cloudy day with a slight breeze. The breeze helps the stems to stiffen up so they can support the plant’s top growth and the cloud cover helps keeps the sun from scorching them. They’ll love all that sun later, but when they first come out from inside, they are a bit sun-shy. If you don’t have cloud cover, just sit them in at least partial shade. I put mine out for a week before transplanting them to the garden, starting off with only a couple hours and working up to 6-8 hours a day. The day I planted was also partly cloudy, which was helpful to avoid a lot of stress during transplant.
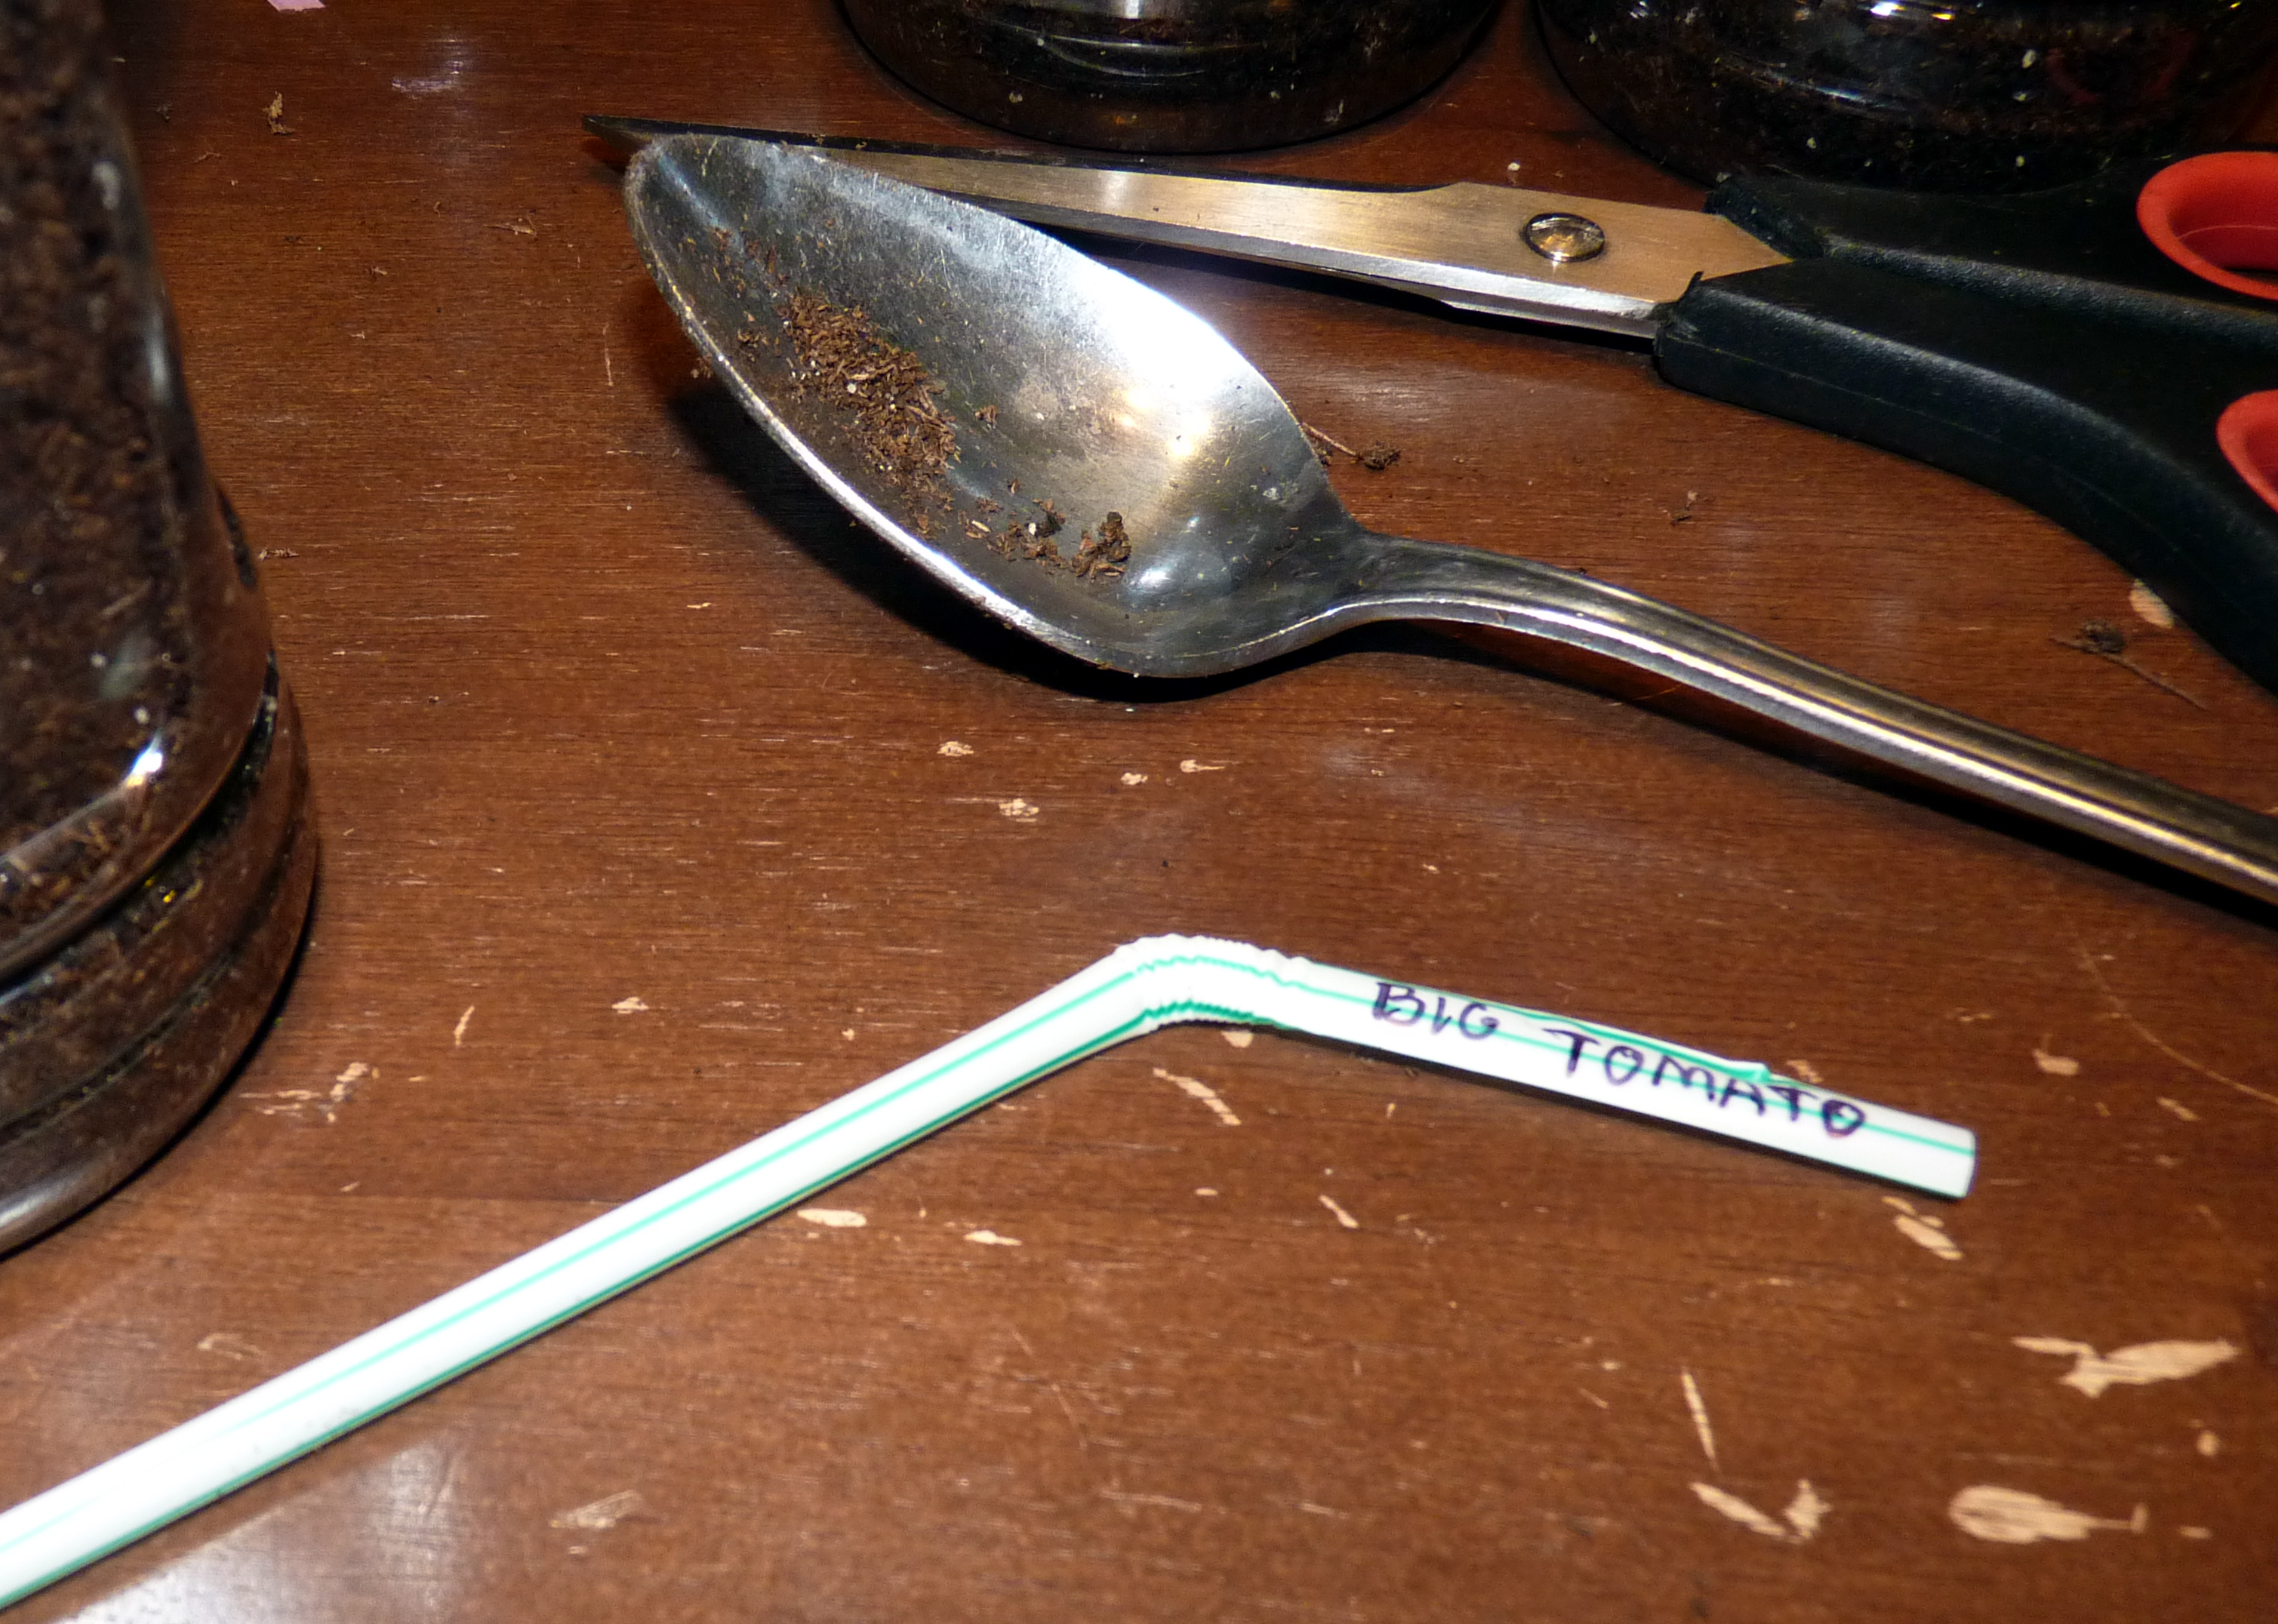
I don’t use my plastic containers more than one season. I’m not absolutely sure whether or not those water or Gatorade bottles are BPA-free and since I’ve read that the chemicals can leach into soil or be absorbed by plants when the plastics begin to break down, I just cut them off the roots and toss them when I plant. Cutting them off also means I don’t have to disturb all those tiny little roots any more than absolutely necessary.

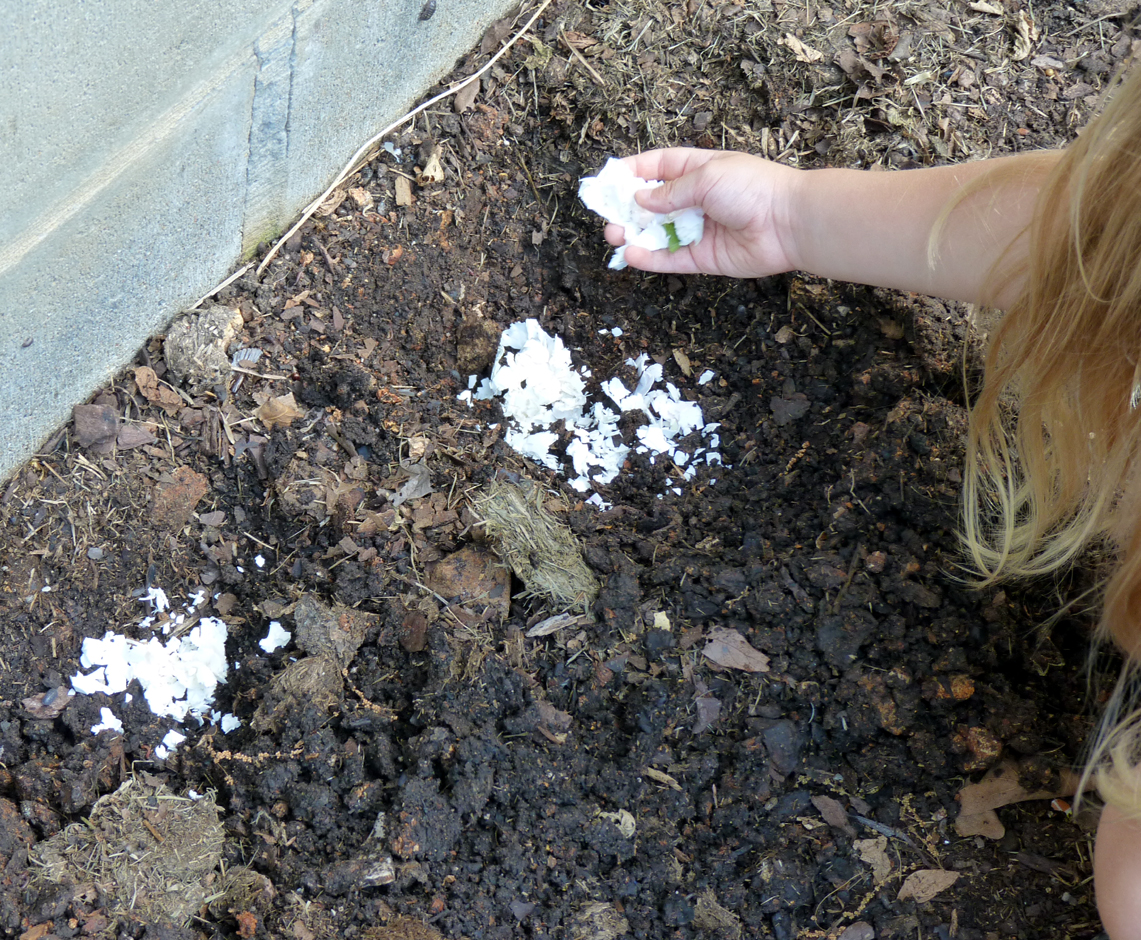
I dug the holes, making them deep enough to plant each seedling at least as deep as it had been in its container- deeper for all the tomatoes, since they will grow new roots along the buried stems. Soil additives are the perfect task for little helpers; I had a bowl full of crushed eggshells and another of used coffee grounds to add to each hole. I instructed my daughter to get a big handful of eggshells and put it in the bottom of each hole. Coffee is a good green soil additive and gives the plant a nitrogen boost; we followed the eggshells with a handful of coffee grounds.PlantTomato
I’ve planted my tomatoes with crushed eggshells since my first attempt at growing tomatoes resulted in about 25% of them getting blossom rot. Blossom rot is fairly common in tomato plants and can often be prevented with good watering practices and adding calcium to the soil. Since eggshells release their calcium slowly, I add some to the hole when planting and top-dress more around the plants throughout the season. You can also save water from boiling eggs, cool it and use it to water the plants. They are also a great slug and snail deterrent; they don’t like to drag their soft little bodies over all those sharp edges. I don’t add extra fertilizers or plant food to seedlings, since I already grow them in soil amended with Miracle Grow Garden Soil and home-made compost.
After my daughter broke several plants trying to separate them from each other, I put her on additive and seed planting duty so I could pull the delicate plants out of their containers- I told her this was a Mommy job since it required sharp scissors 😉 – once the plant was in place, I helped her scoop some dirt back into the hole and pat it down very gently (don’t break the stems) to hold them in place. If you have trellis or stakes to add, you’ll want to do it NOW while your plants are small, even though it may seem unnecessary until they actually need the support. Add it later; you may damage the roots when you jam the spikes or stakes into the ground or snap off the vines trying to weave them through your supports. I have a sort of permanent trellis attached to our house of thin, bendable wire. I originally planned these to support climbing roses, so they are quite strong and support cucumber and tomato plants well. I found I preferred them to cages, since they keep the plants spread out, the fruits are easier to get to, there are less areas for bugs to hide and plenty of air circulation to prevent fungus or mildew. Whatever you use, make sure it’s going to be strong enough to support fully mature plants with fruits on them. I was surprised at first how HEAVY they can actually get!

GardenPlants
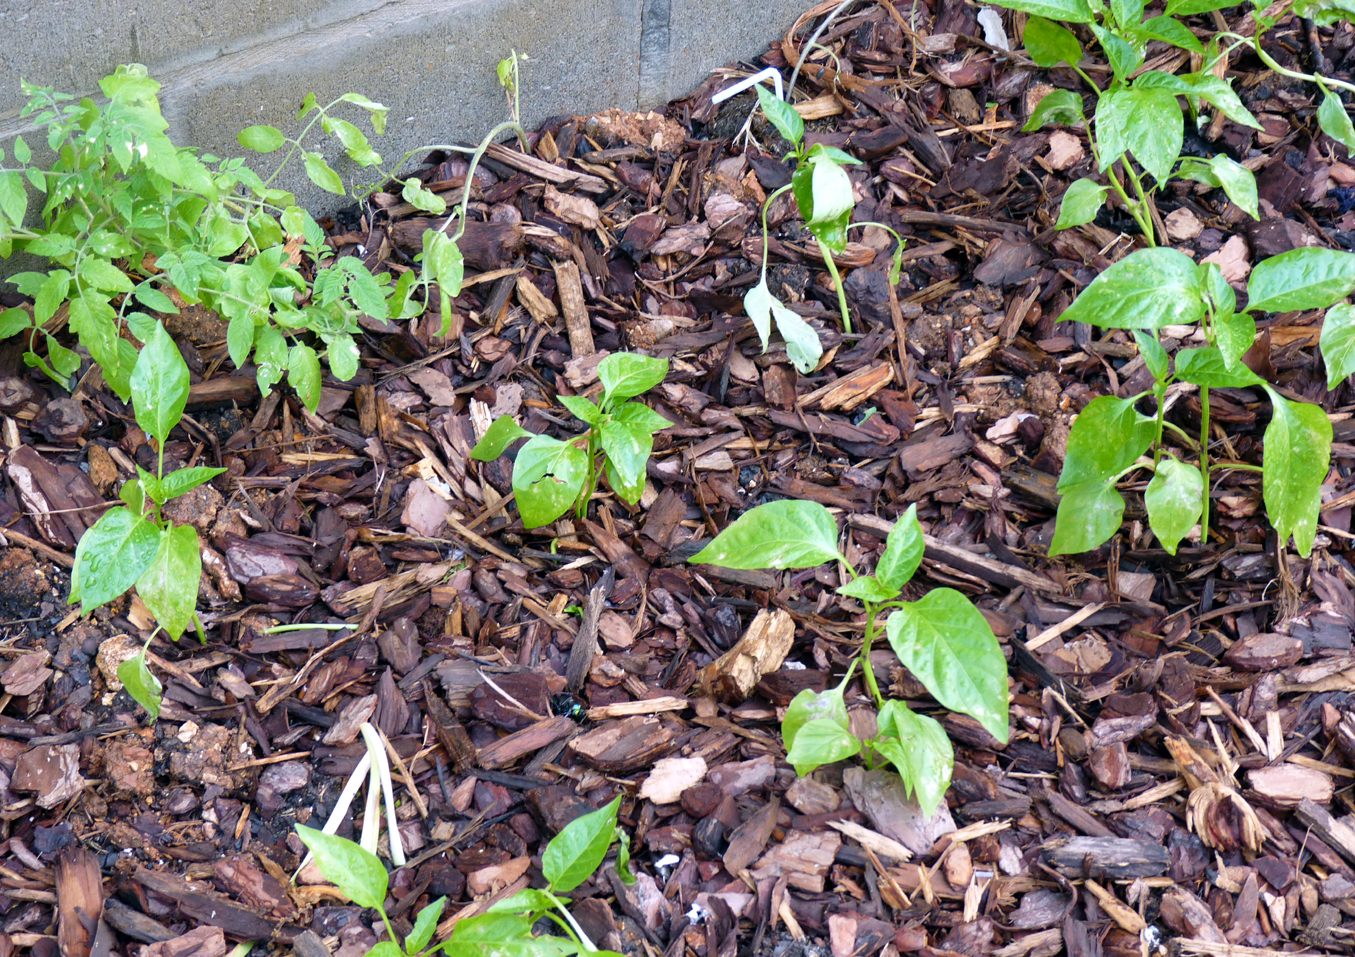
Since I was planting full size plants and not direct-sowing seeds, I went ahead and added mulch around the plants. Mulch really helps new seedlings retain moisture since they don’t have deep, established roots yet. The chunky pine mulch also helped some of my floppy plants stand up a bit straighter until their stems strengthen enough to support themselves. I skipped the mulch over the areas where we put just seed, to make sure the new seedlings are able to get enough light and heat to germinate. Once the plants are up and established, I’ll weed around them and add mulch then.

At the height of summer, it easily reaches the 100 degree mark here; I usually have to water at least every third or fourth day if there’s no rain to supplement. Too frequent watering won’t encourage your plants to develop deep roots and they will dry out quickly and have little support for bushy top growth. Soak them really well when you do water. Aside from this, there are really no hard and fast rules on watering; check your soil and watch your plants, a little common sense will tell you whether they are dry and need a drink or not. Morning and evenings have worked best from my experience; mid-day burns off quickly and seems to shock the plants that get doused with cold water when they’re really hot. I’ve read lots of advice about not getting the leaves wet because it causes fungal diseases, etc. This is fine advice if you can avoid it, but if you get the leaves wet, it’s not the end of the world. Rain doesn’t JUST water the roots of a plant when it falls.GardenPlanted
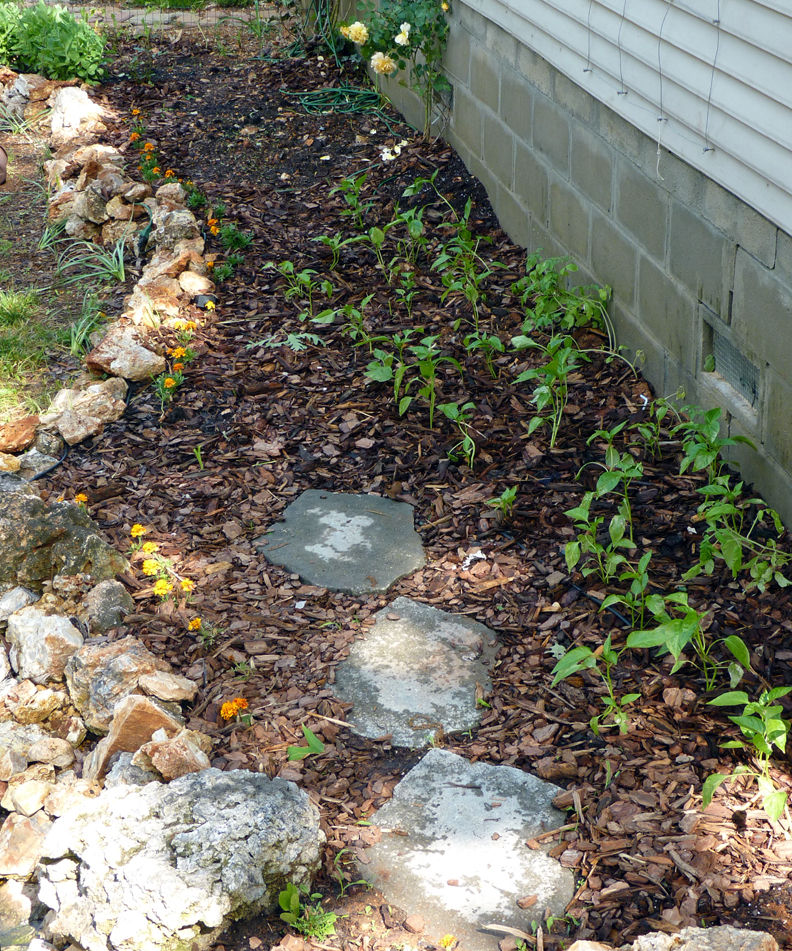
It helps to plant things like lettuce, broccoli and other plants that bolt in hot weather behind your trellised plants to provide them with some shade. Our garden area gets blasted with full sun from around noon-thirty until 4-ish in the afternoon, so the sun really beats down during that part of the day. I’ve noticed that my tomato plants will look a bit wilted during the really brutal summer days, but they always perk back up in the evening when it cools off a bit. I’ve read somewhere that this is a normal defense-mechanism of the plant and nothing to get excited about.
So I guess that’s finally it for the starting plants from seed subject; since I’ve seen them from package into the garden and it’s all maintenance from here. I’ll try to remember and post at least a few photos of our garden once it is well established and producing. I’m keeping my fingers crossed for no beetle horror stories this year in the meanwhile, but we’ll see. 😉

Ghetto Greenhouse Part II

IPlastic Bottle promised an update when I transplanted seeds… I’m a bit late since I actually did this almost 3 weeks ago. I did save the pictures though, so I can still run through that bit. My daughter is at school and I didn’t want to be covered in joint compound and drywall dust to go pick her up, so I have almost an hour to write! 🙂

So seed starting next steps…

We drink a lot of bottled water and Gatorade which comes in plastic bottles and yes, I know, it’s terrible for the environment- but, I reuse mine for all sorts of things instead of just tossing them in the trash. Seed starting time for instance, I save bottles for several months and use those for my transplants instead of buying seed starting kits at the store. It saves money and it helps recycle many of those bottles that would otherwise wind up in trash. Clear plastic bottles make excellent seedling starters for several reasons; they are thin enough to cut through with household scissors and don’t require special tools, they hold water well without disintegrating like paper pots or peat pots, they are the ideal size for individual seedlings, are easily transportable if you’d like to give some plants away (which I do every year) and best of all, you can actually SEE the root development on your plants. There’s no questioning whether the root systems are well established and ready to plant, all you have to do is take a look. It’s also fun to be able to show my daughter all parts of the plant so that she she can see how they grow, not just the leaves and stems above ground, but all those essential roots too.

1) I prefer the 20 oz. Gatorade bottles for my transplants, but I use 17 oz. water bottles as well. The Gatorade bottles have a wide mouth, so I take the tops off, cut the bottle just above the label and turn the top upside down inside the the bottom. (Like in the photo) I filled both the top and bottom with soil. I’ve seen some gardeners cut the bottle closer to the middle, put soil only in the top portion with the roots sticking out the mouth and use the bottom to fill with water- makes a sort of self watering planter.
The water bottles I just cut the tops off above the label and only use the bottom 3/4 of the bottle as a container.

teaspoon and straws2) Roots are the single most important thing to the success of seedlings. Mine were a little leggy from starting off with not quite enough light, so I buried them deep,  leaving all that extra stem below the dirt. Tomato plants will just grow roots along the extra stem and give you a better root system. I used the seed starting soil again from Miracle Grow, since it claims to support and help create  healthy roots. I used a tablespoon from the kitchen to lift the seedling’s root ball out of each egg carton cell. You have to be VERY gentle when transplanting seedlings. The stems and leaves are  soft and delicate, not like those already hardened-off, ready to plant greenhouse plants you buy at the nursery. They’ll get there, but right now they need a little extra TLC when moving them about. The spoon helped me lift out the entire root system of each seedling with minimal handling of the stems and leaves. Those seedlings that didn’t have great roots established or were smaller, weaker plants I didn’t transplant. There are SO many plants when you start from seed, you can afford to be selective and choose your strongest and best growers.  I put only one or two seedlings per bottle, depending on how large they’d grown in the egg cartons.

3) As you transplant each seedling, you want to make sure and label them. I’ve used cut up pieces of the egg carton tops in the past, I forgot to save them this year. >.<
I’ve seen quite a few gardeners use Popsicle  or craft sticks, writing on them with a permanent marker. I didn’t have any of those handy; what I did have was a huge bag of bendy straws that had only cost me about $1.48 for the entire bag. I bent the straws, wrote my tags on the bent part and stuck the rest of the straw in the dirt.
Added bonus, the straws acted as little stakes to support the floppy plants until they grew into their new homes.
Tomato SeedlingObviously, you can tell pepper plants from tomato plants by their leaves fairly early on. If you’re planting more than one variety of tomato or pepper though, as was my case, you might have a difficult time discerning which is which until they start to flower or fruit. If you’re giving plants away or want them in a very specific place in the garden, you don’t want to have to play a guessing game, so label everything. Unless you like surprises…

4) Once the seedling is planted in the bottle and labeled, you’ll want to give it a good drink. I use an old Tide liquid laundry soap bottle with a few holes poked in the cap. It works better than the huge water pitcher I use for my house plants, giving enough control to water the seedlings thoroughly without drowning them. If you’re concerned you’ll overwater, poke a couple drainage holes in the bottom of your bottles. Make sure to sit them on trays or in troughs if you do that though! I used the black garden trough that was the bottom of my greenhouse and commandeered a plastic crate from the closet; pepper plants went in one, tomatoes in the other. Segregating them keeps them out of trouble. For some reason, my tomato plants try to wrap themselves around other plants if they’re too close. They’re territorial little buggers.
The reason for the big containers is to make it easy on you when it’s time to start the hardening off process. You’ll be moving your seedlings in and out of doors (unless you have a greenhouse or cold frame) and it’s much easier to carry large tubs than move 30 or more individual plants. Even using trays last year, I had some near deaths when plants decided to base-jump off the trays while I was walking.
The tubs are also real life-savers if you need to move your plants FAST. Mid-Missouri is notorious for strong spring storms from March – May. New seedlings break in strong winds, are crushed in torrential rainfall and torn to bits in hail storms. If you live anywhere near the middle of  the country, you know storms can come on fast and be unpredictable. Being able to move your plants quickly can save you from starting over.

5) I removed the plastic cover over my ghetto greenhouse when I transplanted to bottles. They have plenty of soil around the roots now to hold water, they didn’t need the extra protection of plastic over them. Keeping the cover on will filter your light too, which can make them leggy. Even with the additional light source, my seedlings always seem to be slightly leggy plants. One thing I have found to help remedy this is to have the window open as much as possible so they get a breeze. I also put a fan on them sometimes, it makes them feel pretty when their hair blows in the breeze. Ok, in truth, I do this to make them stand up and grow a backbone- a slight breeze during the hardening off period, strengthens the plant’s stems. You don’t want wimpy plants that lie there and look pitiful when you move them out to the garden.TomsPeppers
Until the hardening off period, I keep the light on them as much as possible and just check the soil with a finger to see if they need water. The clear bottles are handy in that respect as well, you can see if the soil is dry past the surface and how far down. I’ve been adding water about every 4-5 days.

6) Pepper plants like HEAT, so I won’t be moving these little guys into the garden for a few more weeks. I’ve read that pepper plants shouldn’t be transplanted outdoors until the ground temperature has reached around 65 F. This means that it should be staying in at least the 50’s during the night. If transplanted too early in cold soil, it can stunt the pepper plant’s growth, the leaves may turn yellow and the plants look sickly. Tomato plants aren’t as particular, but you shouldn’t put them out until all danger of frost has passed.
This year has been an especially cool spring and most of my landscape plants are off to a slow start. Last year, I had my entire garden in the last couple weeks of April; I’m thinking this year it will be more like the 2nd or 3rd week of May. Even if you do make the mistake of moving your plants out too early and you aren’t great at knitting tiny sweaters, you can heavily mulch and /or cover them during especially cold nights. (Plastic shower curtain liners make great frost covers, need to change yours?)
As long as it doesn’t kill the root, the plant may recover and do well once it gets the heat and sun that it needs.

I’ll write the final bit of this series when I move my transplants outdoors. In the meantime, I’m saving up all my eggshells and coffee grounds. Tomato plants need calcium to avoid blossom drop, a common tomato plant issue (eggshells) and leftover coffee grinds are a great green material for the compost pile.

-B

Gardeners, Start Your Seedlings!

My seed packets came in the mail today that I ordered a little less than two weeks ago; soon it will be time to get some of these plants started indoors.
Most seed companies like Burpee, Gurneys or Burgess are fairly first-time-gardener friendly in that they print planting and care instructions on every seed packet that they send out. You can often find additional information on their website for specific planting information in your growing zone  ( Link is to basic explanation, map to follow below). I live in North Central Missouri, most of which is in Zone 5b; however, the Lake Area is in a micro-climate area of Zone 6. This is according to the older maps; sometimes the newer maps show all but the northernmost part of Missouri in Zone 6. What this means in layman’s terms is that in Zone 6, my garden should be safe from a hard freeze by mid-May. tomatoseedlings
I was surprised at the amount of misinformation I found about seed starting on sites like Yahoo Answers. I followed the question, “When should I start my tomato seeds indoors if I live in Zone 6?” Several people, professing to be garden centers and/or professional gardeners advised this person NOT to start tomato plants indoors, but to wait until they could be planted directly in the garden instead. One of the responses actually read, “Don’t plant them indoors because they are incredibly likely to die. What you want to do is plant them outside in mid-May to early June when lots of sunlight is available.” Another answer advised them to wait until July! Seriously folks, that’s a bit ridiculous.
Yes. Tomato plants need a lot of light. If you aren’t lucky enough to have a big bay window with sunlight for 8-10 hours a day like I am, then you may need grow lights to supplement your seedlings. Without enough light, the plants will become leggy, which means the stalks will be spindly and they’ll fall over a lot. Tomato and pepper plants need about 8 weeks to germinate. Most seed companies will recommend you start them in sterile planting medium, like those pete flats you see in garden centers this time of year. Last year, I started mine in milk jugs, then transplanted to 16 oz. plastic water bottles with the tops cut off. I used ordinary potting soil. I put them on trays in the window and watered them whenever the top was dry to touch or when I could see that the soil looked dry partway down. The nice thing about clear plastic containers is you can actually SEE whether the soil needs water or not; another advantage is that you can see the root growth on your plants. They were the perfect size for giving a couple plants away to family also.
I also saw a suggestion on Pinterest to use toilet paper tubes stuffed with soil. The pin claimed that you could plant these directly in the garden since they are biodegradable. I haven’t personally tried this out yet, my concern with it is that that the tubes would start to fall apart before you were ready to transplant them and you’d have a mess. Maybe if you stuffed them close together in a shallow plastic crate (as they were shown in the pin photo) and were careful not to overwater…

This timetable for starting indoor seedlings will allow about 8 weeks for seeds to germinate and for your plants to reach a good transplant size before being moved to the garden.

Zones 9 & 10: Start seeds indoors in early to mid January
Zone 8: Start seeds indoors in early February
Zone 7: Start seeds indoors in mid February
Zone 6: Start seeds indoors in late February
Zone 5: Start seeds indoors in early March
Zones 1-4: Start seeds indoors in mid to late March

Tomato seedlings will emerge in about 7-10 days. Most peppers take longer, about 10-21 days. Some of my peppers took so long last year, I was beginning to worry that the seeds were duds and weren’t going to do anything. Then they took off and caught up to my tomatoes in a week. Onion sets should be started indoors now through mid-late February. You let these grow to about 5-6 inches tall, repeatedly cut the tops to about 3 inches until they are ready transplant; the cutting will help strengthen the root and health of the onions.

This map shows the hardiness zones and projected last frost dates for most of the United States.

FrostZones

Not all seeds should be started indoors and transplanted like tomatoes and peppers. Some should be direct-sowed in the garden; again check the labels on your seed packets for best planting times. Crops such as broccoli, most lettuces and greens, carrots and onions can be started in early spring in your garden, so long as the soil is workable. These plants benefit from the cool nights and are harvested before the warmest part of the summer season, they are early summer and late fall crops. I’m going to start half of my seeds in mid to late February and save the other half for August/September for a fall crop. Both lettuce and broccoli plants will bolt when the sun gets hot. Bolting means the plant is getting ready to flower; this often changes the flavor of the plant when it forms the flower stalk and makes it no longer edible. Some lettuce varieties are described as “Slow to bolt,” which means they will last longer in warm weather.  Most carrot varieties can also be planted early, when danger of heavy frost has passed.

For crops like cucumber and corn that are direct-sown, Zone 6 gardeners are probably safe to plant in early to mid-May. I started my cucumbers last year before we went on vacation, which was the week of May 8th. When we got back from our trip, I had plants!  🙂
Melons and squash can also be planted in Zone 6 in mid-late May through June. Beans and peas should be started in June/July when the soil temperature is warm. This is also when you should plant your heat tolerant herbs like sage, thyme, oregano and basil. If you stagger your bean plantings every couple of weeks through August, you can have beans well up until frost. This will also help spread out the yields, so you aren’t overwhelmed with tons of beans at once.

September plantings of garlic will be ready to harvest in the coming spring. Spinach is also a great plant for September that loves the cooler weather up until hard frost. This is of course, a very generalized overview. I’ll be posting some articles on specific plants and their care soon, along with some things I’ve tried that have worked out well. Even though it’s snowing today and the wind chill is around 10F, I’m still getting the gardening bug. I’ll post photos of my flats when they are started and in their sunny window.
-B