In regards to garden and yard projects, I’ve not been especially inspired this summer. It’s been a depressing season. It seems I’ve either spent the past months watching plants wilt, wither and die in the extreme heat and drought, or dedicated hours a day to watering mulching and looking for shade. While doing the latter, I always wondered if we would become one of those news headlines: “Midwest Wells Running Dry”.
This spring, before the weather pattern shifted to Sahara Desert for most of the Midwest, I had planted 75 trees in various places around our property. New trees need mulch and regular watering for at least the first year of their life under ideal circumstances. When the weather pattern here got stuck on 7th level of Hell, I realized I was going to have a fight on my hands if any of my new trees were going to survive.
I started by reading up on water conservation and a technique called Xeriscaping.
Xeriscaping is simply this, creating a landscape that is mostly self-sustaining with little to no supplemental water. To some, this means filling the landscape with nothing but cactus and rock. In some areas of the country, I guess growing anything outside of a pot isn’t an option. Here in Missouri however, extreme hot and dry conditions are not our normal- even though this summer most of us saw nothing but.
The National Weather Service Climate Prediction Center reported that the drought covered over 60 percent of 48 states as of mid-August. In Missouri we fell under the two worst drought categories, extreme and exceptional. As of the end of August, my part of the country was down 11.78 inches of rain for the year 2012, with the current drought conditions predicted to last through the end of October.
 Crop and pasture destruction have been horrible. Many farms forced to re-drill or deepen existing wells in order to get water to their land and livestock. Many mornings while out watering my little trees, I wondered what our neighbor across the street was doing to the water table I feared we might share. They have several head of cattle that they have to provide water for, a huge pool in their backyard and one of those awful, inefficient impact sprinklers running on their yard almost constantly. I envied them their green grass, while I watched mine turn brown, then disappear altogether, leaving behind little more than dust. Since our house sits down in sort of a valley, my only hope was that it meant my well was that much deeper into the water table and that it might hold out longer under extreme conditions.
One of the tenants of Xeriscaping is that you don’t try to maintain large areas of grass lawn and that if you do have grass; it is a type that is drought resistant and tolerates heat well. Our daughter’s play yard was the only area of grass that managed to stay green all summer. It’s also the only part of our yard where my husband and I painstakingly drilled small holes every few inches to plant the entire lawn with Zoysia grass plugs a couple years ago.
I first read about Zoysia in a Birds and Blooms magazine. I did a little research and ordered 200 plugs from an online farm. Prior to the Zoysia plugs taking hold in our yard, there was little growing there besides an excellent crop of crab grass each season. I had plowed it under and planted grass seed twice. It never seemed to take off in our rocky clay soil.
The Zoysia didn’t do much the first year, but the next year our plugs had filled in most of the yard with a thick mat of fine textured grass. Some varieties of Zoysia will survive winters as far north as Chicago.
The grass originated from Southeast Asia, China and Japan. It is low growing (means less mowing), establishes roots by rhizomes (creeping), is heat resistant, drought resistant and forms a tight covering that can choke out most weeds. I watered our lawn only twice all summer.
The drought also meant that I only had to mow it once after the end of May. It is still green, still healthy and fared much better than some of the bedding plants around the edge of the lawn. Zoysia is an absolute pain in the butt to plant, but now that it’s established and I see how well it performs under the worst of conditions, every plug we planted is worth the trouble.
It does turn yellow as soon as the weather cools down and stays that way until late spring, but when everyone else has a dead, brown lawn in August, ours is still green. If you must have a lawn area for kids or dogs, but would still like to follow the principles of Xeriscaping, warm season grasses like Zoysia or Bermuda grass are a great option.
 Luckily, I had limited the size of our vegetable garden this year to a few square feet by growing the plants vertically on trellis against the side of our house. I had done this more as an experiment than anything, however it turns out that this is another principle of Xeriscaping. Limiting the spread of your plants or growing vertically means you have to water a much smaller area to maintain the health of the plants.
I used lots of mulch over cardboard or newspaper to keep down weeds and set a misting sprinkler on a timer for every 12 hours. During the stretches of really hot days (4-5 days in a row or more of temperatures over 102F), I changed the timer to every 8 hours and ran it for 10 minutes.
I also put our bird bath right in the garden area, so that it filled up when the sprinkler ran. Our garden is right next to the pond I built this spring, so that pond caught any excess spray that didn’t land in the garden. Even though I can’t take credit for planning it out that way, this turned out to be a very efficient method of maintaining several things that needed water without a lot of waste.
Another bonus during the drought was my tendency to choose native plants in my landscape whenever possible. Again, I can’t take credit for guarding against drought, since I chose most of my plants based on the fact that they grow in clay soils with a minimum of additives to alter the soil composition, but it turns out that this is a Xeriscaping technique as well.
Xeros is Greek for dry; the idea behind Xeriscaping is to use as little supplemental water as possible in your landscape. Native plants are already adapted to your area’s climate and soil conditions, so they naturally need less care and maintenance to survive.
For annuals I often plant seeds I save from wildflowers like purple coneflower, thistle, daisies and sunflowers. Sometimes I buy flats of zinnias, marigolds and dusty miller to fill planting beds in spring. I tend to focus on perennials I don’t have to plant every year.
My butterfly bush did very well with almost no watering in spite of the heat. Ditto for the tiger lilies, Chinese wisteria, crêpe myrtle, climbing roses, spiderwort, yucca and saucer magnolia trees (Most of those aren’t native of course, but I had read that they do well in my particular climate and soil type)
 The new little trees were all heavily mulched when I planted them this spring and that seemed to serve them well the first month of the drought. After a month of drought and triple digit temperatures, I started losing some of the spruce trees I’d planted.
To still regulate my watering and assure that when I did water it went to the roots of the trees and not all over the surrounding landscape, I started saving gallon milk jugs. These I poked a few holes in the bottom, filled the jug partway with rocks, then sat them right next to the baby trees. I still had to water as frequently as every other day, but the water waste was greatly minimized by this method and it was a lot less time consuming too! I cut my time spent watering down from a couple hours to less than half an hour.
I also saved the large 3 gallon jugs from cat litter and 3-5 gallon paint buckets. The buckets work especially well for larger trees. I have a single mimosa I planted when we first moved here that I couldn’t stand to lose, I used one of the larger buckets to water it this summer. My daughter found a bucket that had a huge crack across the bottom; I was about to throw this away when I decided to try adding some dirt in with the gravel to make mud in the bottom. It worked like a charm for slowing the water down as it trickled out.
If you try the jug method, you may need to play with the amount of holes, whether or not you add mud or leave the cap on or off the jug- this will alter the speed which the water runs out. Slow is often better if you have clay soil, since it takes much longer to penetrate deep enough to reach a tree’s roots.
I also noted that my new trees planted under a canopy of shade tolerated the heat better than those in full sun exposure most of the day. Of course, this is because the larger trees shield their roots from drying out as fast. It also means the tree doesn’t have to consume as much water to maintain its top half if it’s not in sun.
Xeriscaping experts advise planting your garden or flower beds in the rainy season (for us this would have been any time before Mid-May, when Mother Nature turned any and all precipitation to “OFF”); this way the plants can get themselves established in your landscape before they have to start conserving water. The deeper and more widespread their root system, the more likely they will be to survive drought. Ever tried to dig up an established Yucca? Never put one in your yard unless you’re absolutely positive that’s where you want it. My small trees planted at least 2 years ago weathered the drought fine, even with minimal to no supplemental watering.
In areas where you have lots of gravel, concrete or pavement, it may help to place large potted plants around the perimeter for both shade and to cut down on the heat to the surrounding yard.
I have no love for our vinyl siding and grow my roses, tomatoes, cucumbers and ivy right up the side of our house. It keeps the heat down on the house, especially between 2pm and 5pm when the sun is blasting the southwest corner. I would plant trees on that side, but we have the unfortunate circumstance of living in an area where satellite and wireless are the only decent options for internet and TV.
Large trees on that side of my house would block the signals, hence the vining plants instead. The sprinkler for the garden does double duty here as well; while the garden, birdbath and pond are being watered, the hottest part of the house is being sprayed down in the early evening.
Xeriscapes don’t have to be labor intensive, but they do require some careful planning and initial set-up. You can save costs by harvesting seed from each year’s annuals to use the following year and with a little patience- perennial plants don’t offer the instant gratification of annual blooms, but they return year after year and often multiply over time. Xeriscapes and native plants have better disease resistance than large grass lawns, are less prone to being destroyed by pests or fungus and attract butterflies, bees and birds.
With a little careful planning of my own and a willingness to let go of some of my higher maintenance plantings; I’m hoping next to year to implement more Xeriscaping techniques and have a little less stress when a big, fat high pressure area blocks our rain for months at a time.
And please share if you have other tips and tricks about water conservation or native plantings!
-Belle
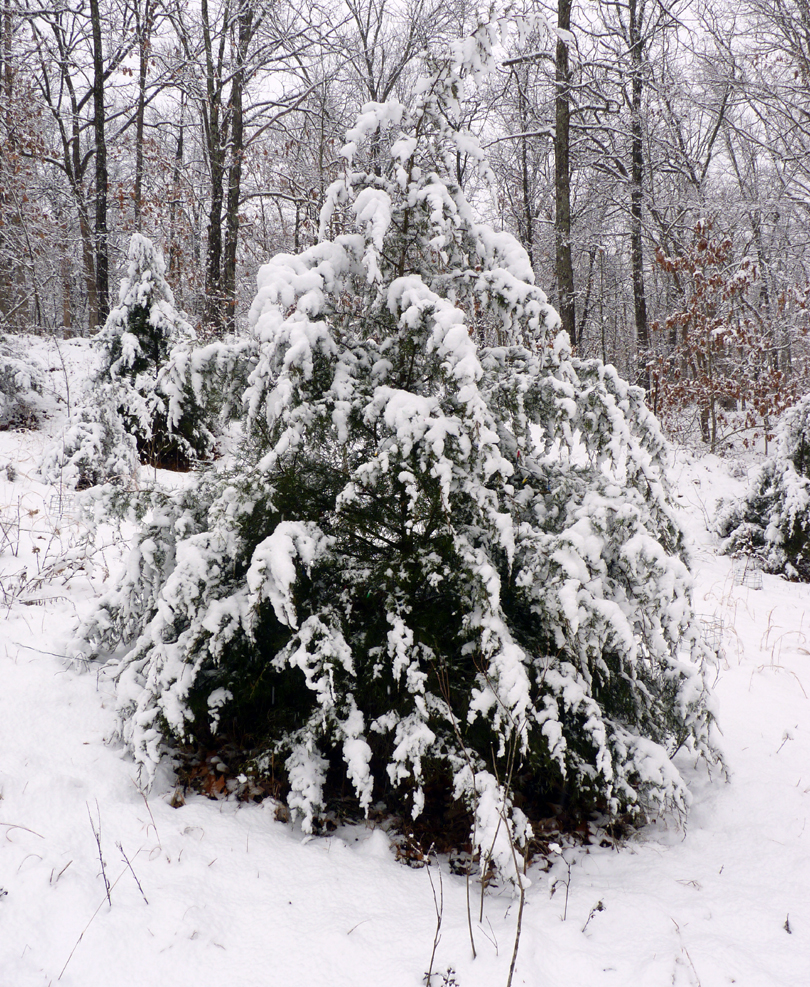
 Wait a minute… winter gardening? What is there to do besides read gardening books and wait for spring to arrive? Unless you’re hibernating with the bears, there’s plenty you can do during the winter months to get you ready for spring planting.
 support?
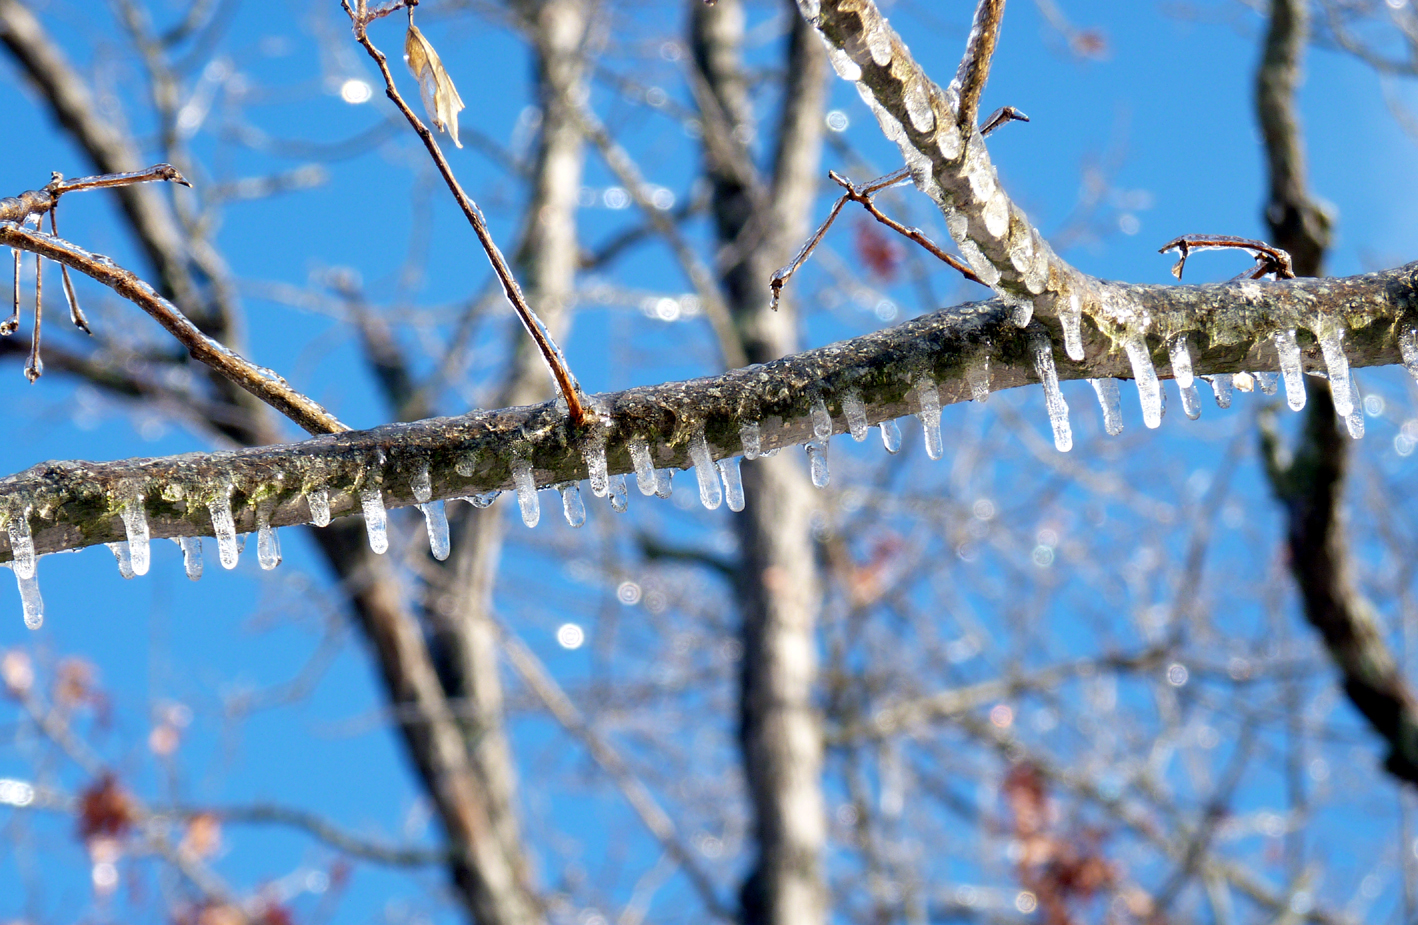
 If the plant flowers in spring, wait until after it finishes blooming to prune. Vigorous winter pruning of a spring blooming plant means it won’t bloom again until next spring; already, there are small, tight buds forming on several of my blooming shrubs and trees. The early bloomers, like forsythia, burning bush, saucer magnolia (a cold-hearty cousin to the trees in the South) and wisteria shouldn’t be pruned or cut back until they finish flowering in mid to late spring. Pruning may be especially necessary to trees following ice storms or heavy snows, due to broken branches.