Winter landscapes Door

In my last post I talked about maker culture and how I’ve embraced the term maker and decided to start posting some of my projects on dirt that aren’t yard or nature related. This is a step by step of a door for a holiday decorating competition at my daughter’s school.

Her teacher sent me these two ideas from Pinterest, I came up with a blend of the two for our door design.

These are the original pins with links to their makers:
Bear looking through window
Ice blocks and snow


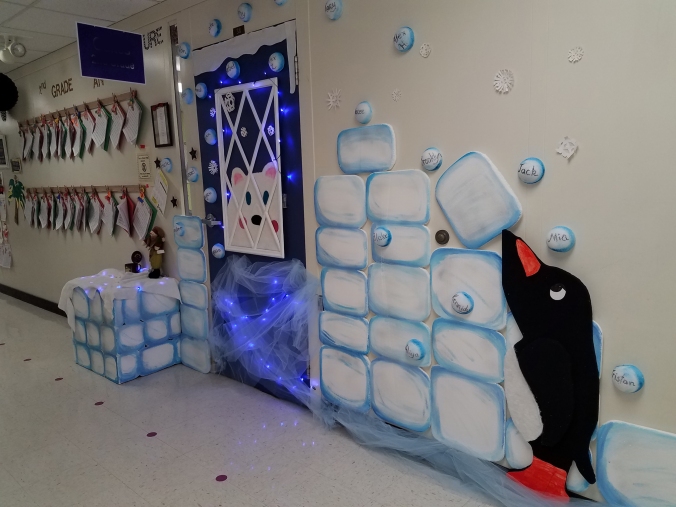
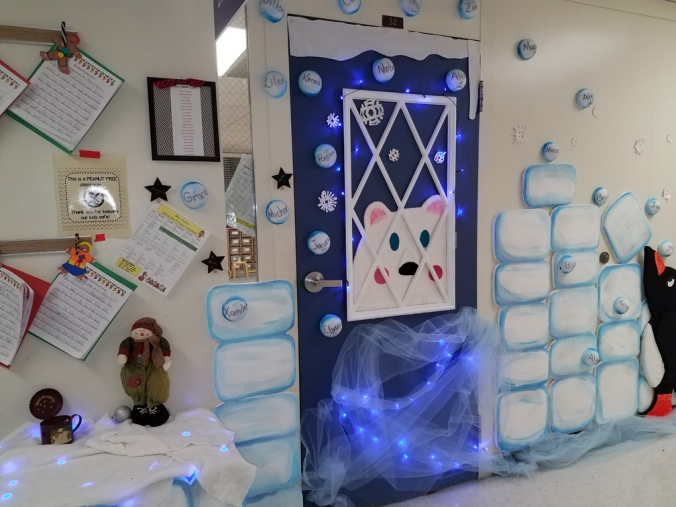
And this is our finished door:
door

My first step was covering the door in dark blue paper as a backdrop. I then brought in foam insulation sheets that I’d picked up at Lowes ($7 for a pack of 5 I think) and dry-fit them to the wall to figure out where my blocks were going to go. The foam is only about 3/4 of an inch thick, so it scores and breaks fairly easily and is super light to work with.

I took pictures using my phone with the foam cut to size and taped to the wall. My phone has an edit mode where you can draw right on the photo, so I marked the foam with numbers in place, then drew those numbers right onto the photo on my phone. This way, after all the pieces were painted and ready to go back on the wall, I had an easy diagram to remember where to put them. The penguin idea came later when my daughter suggested I have a penguin in the ice blocks. We toyed with the idea of doing a tree also, but ran out of time, which is why there is a tree in the planning photos, but not the finished door.

I took the foam home and drew rough ice-block shapes on it.

I used an X-acto knife to cut around the edges of my drawing, carefully pulling away the leftover pieces as I went. The rough shape shed foam EVERYWHERE, so I decided to sand the edges a bit. I used a 60 grit sandpaper and a very light touch, until the edges were all smooth, rounded and didn’t shed foam anymore.
paintingice

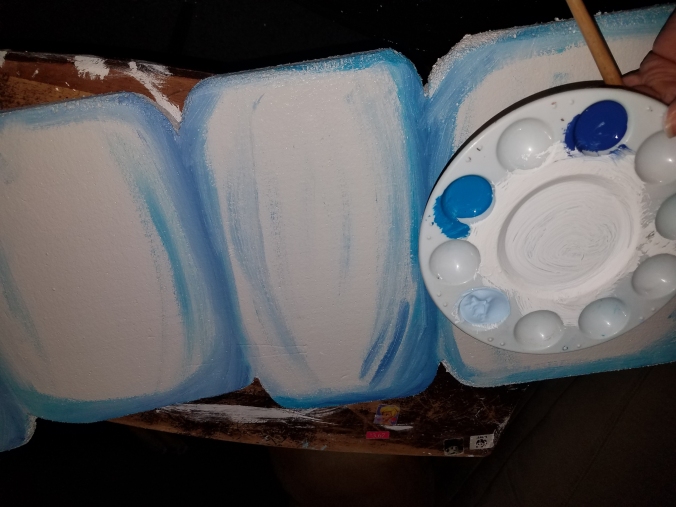
I painted the foam blocks with white and three colors of blue acrylic. A pale sky blue around the entire edge, a turquoise shade for mid-tone highlights and a bit of navy for the shadows. Acrylic dries fairly fast, so I worked only one block at a time so that the white was still wet when I started adding color. I let the acrylic dry and used a very fine spray glitter in silver to add a bit of sparkle to each foam board.

The blocks were by far the most time consuming part of the project.

bear

I drew the bear shape onto double-thick poster board, which is still very flat (important for fitting under the frame), but strong enough it didn’t bend when I covered it in cloth. I mod-podged the entire face and let the whole thing sit under a heavy crate overnight. The edges I folded over the back side of the face and hot-glued in place. His eyes, nose and cheeks were all cut from the same poster board, covered in cloth scraps from my scrap drawer and hot glued in place. I drew his face on the back, so that I could get an idea of placement before sticking anything in place with the hot glue! I cheated on the ears and just used a red laundry marker. (I was out of pink scrap)

The penguin was done exactly the same way, except I used a foam panel and cut him out with the X-acto knife and then covered him in cloth. His eye, beak and feet are just acrylic painted poster board, hot glued to the material.
doorframe

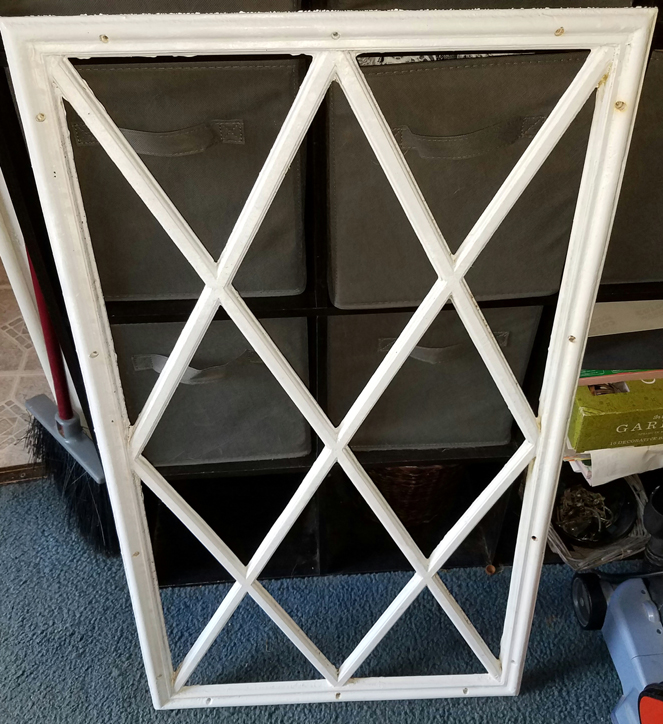
We thought we were going to have to build a window frame, but I remembered that when we replaced out back door last summer, I hadn’t thrown the old door away. I took the window casing off, it was only light plastic, filled the screw holes with some hot glue and gave it a fresh coat of white paint. We stuck it to the door with command strips and gave it a little extra support with hot glue, since the teacher intends to leave this door up through February and not just over the holidays.
sy457_web

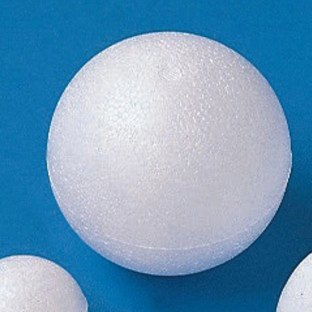
The kid’s name snowballs are just these craft foam balls. I cut them in half with a big knife and painted them with the same four-color style I used on the ice blocks, then wrote each student’s name on it with a sharpie. If I had this to do over, I would have painted them first. Because the foam is so porous, the sharpie bled a bit and the lines weren’t as crisp as I’d have liked.

We put magnets on the back so that the kids can take them home after the display comes down. Those on the foam are hot-glued of course, but have a magnet as well.

The snowflakes are just shapes cut from poster board scraps. I bought mini-led lights at Wal-Mart that are battery powered with 2AA’s, they don’t get hot, are incredibly light and have an on/off switch. One of the packs we hid with the snowman on the table, one is hidden in the light blue tulle we used for snow and the other fit perfectly behind the window frame.

For the table, I pre-measured foam and built a three sided cover for the entire bottom. I then drew blocks on it, painted and carved the edges as I did the big foam blocks. The “snow” on the table is leftover white fur from the polar bear. We added a string of blue lights underneath the snow to give it some glow. The bit of snow over the top of the door is white fur also.
doorview

So that’s it! Step by step, top to bottom. Our Pinterest project mash-up… and my first maker post. 🙂

-B

Maker culture

I’ve officially started calling myself a “Maker,” since others have already bestowed the title on me. I guess I knew, but didn’t realize that there is an entire subculture called Maker Culture which centers around people creating stuff. It’s always been there, it’s just that technology and social media have now turned it into a sort of cult.

Makers are those people that generate ORIGINAL content and posts for Pinterest. Yeah, all those great little ideas you just pinned for your kid’s room… those were put there first by people like myself. Although I have to admit, many of my own project ideas come from Pinterest, it’s just that they wind up evolving to the point they’re often unrecognizable as the original post they came from. My biggest gripe about Pinterest is that there are SO MANY amazing, talented creative minds out there sharing SO much stuff and I don’t have nearly time to try even a 1/10 of what I see. I want to do all the things. I’m lucky if I get to pick a couple of the things.
Maker culture also includes software, electronics, robotics, 3-D printing, engineering, metalworking, woodworking, traditional arts and crafts, sewing, food art and any other hobbyist activity you can think up.

In short, makers make stuff.

In between renovating our house, volunteering at school and taking care of husband, child, dogs and other four-legged creatures that currently live here- I am pretty much a professional hobbyist. I’ve painted murals, decorated classroom doors, made my own clothes, created elaborate scrapbooks, sewn costumes and built furniture. My focus used to be almost exclusively our yard and anything to do with planting, landscaping and creating ‘outdoor spaces.’ Now that we’re making moving plans and my yard projects are in a maintenance only state, I’ve had to find new creative outlets. (See PS on the Dirt on Dirt page re- the moving bit)

My most recent project was a classroom door for a holiday decorating contest at school. My daughter’s teacher send a couple of ideas (from Pinterest of course!), I mashed the ideas together, added a penguin and poof! A door. This is one of those cases where I didn’t go too much outside the original post I was given from Pinterest.

These are the original pins with links to their makers:
Bear looking through window
Ice blocks and snow

This is the door I came up with from these two ideas:

door

The thing that I find incredibly frustrating about Pinterest is this: If this were a Pinterest post, you’d likely get a 10-15 word blurb about how it was done and then it’s up to you to figure out the rest on your own. This is fine if you’re a crafty person or maybe you’re just looking for ideas and don’t really need to know how it was done.

However, if you’re trying to get into doing metal or woodworking and you’ve never so much as picked up a woodworking kit (or in this case an X-acto knife and a paintbrush), a bit more instruction would be helpful. This particular blog entry did not start out as a post about this door, however. The door is only an example. So here’s what I’ll do… I’ll show you this fabulous door and if you want to go, “Oh, that’s cute,” then move on to the next thing, feel free. However, if you REALLY are interested in HOW I put put it together, I’ll be making another post soon with all the details and pictures.

Since I’ve decided that the Maker thing is official now, other crafty posts are likely to follow.

Right this minute though, the puppy needs to pee and I have to pick up my kid in an hour, so my Dirt time is up.

-Belle


Hiking Pictures

We recently acquired a new puppy from a friend. She’s a gorgeous little thing, part Malinois, part Border Collie- a mixed breed that they’ve termed online to be a Malincollie. We decided a Malincollie dog must have a Melancholy name, so we called her Lenore. She doesn’t live up to her name at all though; with two very high energy breeds for parents, she’s a very lively, very curious, very bouncing off the walls if you don’t walk her EVERY SINGLE DAY kind of puppy. My friend gave her to us because we were supposed to be moving to a place where there’d be lots of running room. That may or may not happen eventually… in the meantime I have to keep this puppy entertained so that she doesn’t eat my house or drive our older, EXTREMELY MELLOW by comparison, dogs insane.

I started taking her on walks every morning to the city parks last week. This week, I decided that I actually liked walking every morning. I haven’t been outdoors nearly as much as I would like this year due to house remodeling (again! sigh) and holding off on new yard plans due to possible move. It’s not given me much to write about on Dirt, as you can imagine. No yard, no garden, no posts. 😦

I was already bored with walking circles at the city park, looking at the same scenery and the same people that also go there to walk every morning. My husband would probably make friends. I’m not very social in that way though. I prefer a small circle of close friends to small talk with strangers, ALWAYS. I started driving out to one of the state parks instead this week. Ha Ha Tonka has a been a favorite haunt of mine for as long as I can remember. I was going there as a child to swim in the springs and walk the dirt paths long before it was taken over as a state park. Lenore needs exercise and I need something interesting to look at while she’s exercising, so I decided we would pick a trail each day until we’ve gone down all of them. I’ve explored 90% of the trails in the park and even some that aren’t trails anymore, but I haven’t’ visited every single one of them.

I went down Turkey Pen Hollow the first day and the views were spectacular, in spite of little rain this fall and the colors not being as vivid as usual. I took pictures along the way. It occurred to me today that I should be posting all these wonderful photos on here and share them with everyone, not just my friends on Facebook. These I’m posting today are of the Spring Trail, that main paved/board walked trail that leads from the parking lot down to the mouth of the spring.

Hope you enjoy the views as much as Lenore and I did.

-B

Patio visitors

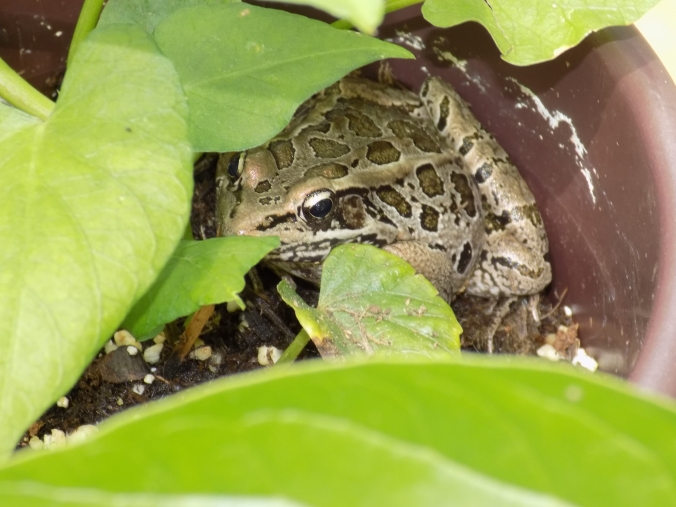
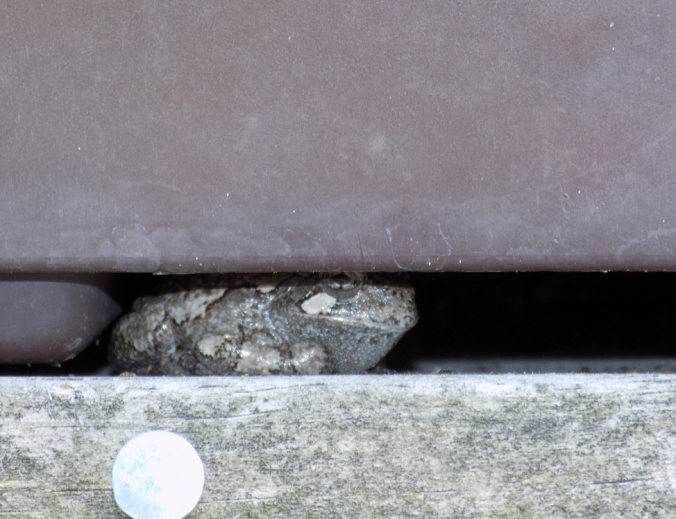
We try to keep our yard as toad and frog friendly as possible. My daughter loves them. She loves to catch them and take them to a “safe place;” she loves to watch them swim in our little pond. Every summer we wait for our annual visitor under the Amaryllis pot on our front walk.

Creating habitat for toads and frogs in your landscape is pretty easy. Toads and frogs need a water source near their home. This can be anything from a small garden pond to a birdbath saucer placed on the ground near their habitat. Keep the water changed fairly frequently if it isn’t running or moving- you don’t want to create a breeding ground for mosquitoes. 003.JPG
If you have pets, keep them away from the area your toad house is in. Don’t put the house somewhere that outdoor pets frequent. One of our cats was an adept toad and frog hunter, when we brought her inside the population of toads and frogs in our yard tripled!

Broken flower pots, crockery, old dishes, buckets, etc. make excellent toad houses. You can put a wet rag or some wet moss inside the house, under some leaves to keep the house cool and wet for toad friends. They LOVE those self-watering pots with the bottom taken off. There is just enough room for them to squeeze under, it stays moist and cool from watering the plant above and it’s fairly safe from most predators- ours especially, it’s sitting up high on a trellis rail. Since I’ve been putting this pot out on the porch, we have had a toad living under it all summer without fail.
It gets sun in the early morning, but is in shade during the hottest part of the afternoon.

002.JPG

If you have kids, get creative! Toad houses are even better than those fairy houses kids love to build, since they can watch the actual animal living in the house. I Googled “Building a toad house” and pulled up TONS of great photos and ideas. Clay pots are often featured because they stay cooler and hold moisture better than plastic. If you can half bury the pot in the ground, it also gives your toads and frogs a place to dig in a bit and stay cool and safe.

Toads are great little insect eaters and I encourage as many as possible to hang about the garden. The more predators on plant eating insects, the better!
Share your toad house pictures! I love to see other people’s creative ideas and projects.

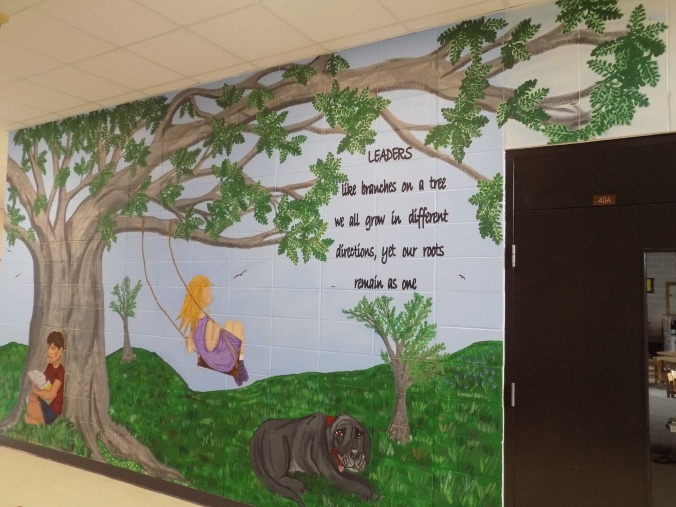
PS. Forgive my long hiatus from Dirt. I was busy all the month of June painting this mural for my daughter’s school. The posts will probably still be spare for a while. There is a possible move for us in the works, so I’m not doing many new projects here right now, mostly maintaining what’s already here. I’ll share some pictures and things though, because I still HAVE to be outside! 🙂
-B

006.JPG


Shiny New Toys

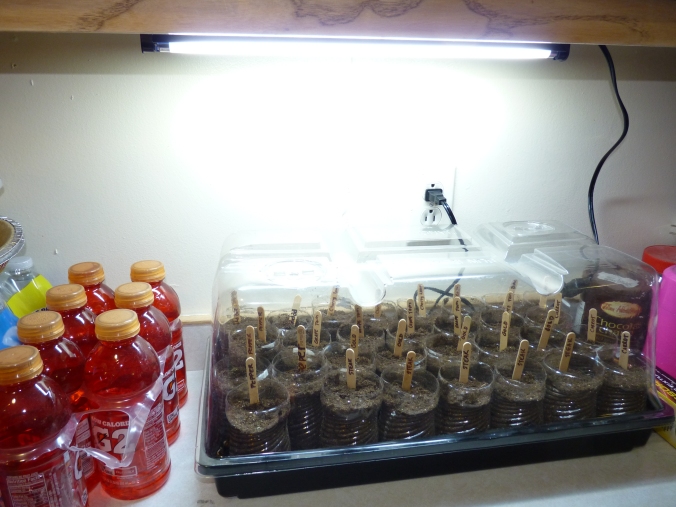
It’s seedling time!

I spent a good part of today getting seeds started in the table top greenhouse Mister bought me for Christmas. Together with the HUGE greenhouse he gave me for Valentines’ Day, I’m SET for the season. A man who truly knows where my heart lies… in the dirt. LOL

We’ve been saving up our plastic water bottles for a couple of weeks. Had a whole box full under the kitchen sink- they were starting to overflow the box and roll out on the floor. I’d have to punt water bottles at random while doing dishes or making dinner. I cut the tops off about half-way down and use the bottom portion for planting seeds.

If anyone has any brilliant ideas for a use for these cut-off tops, I’d love to hear it. You can only keep so many about for funnels.

005

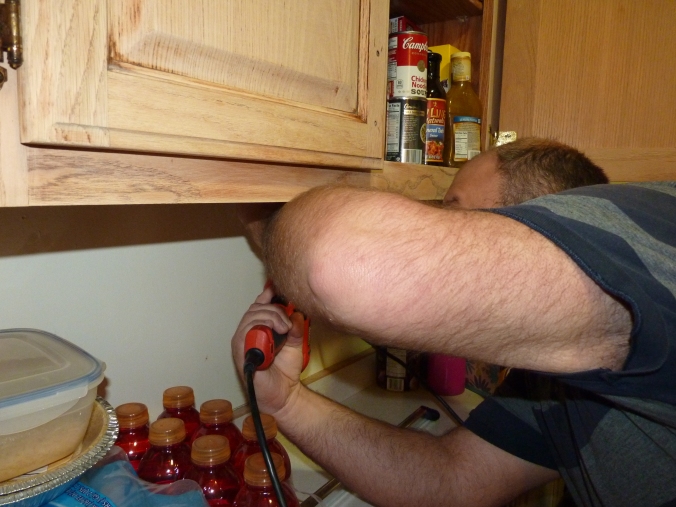
Mister was kind enough to mount a bracket under the cabinet where my table-top greenhouse sits, to hold the grow light in place. It wasn’t a have-to thing with this set up, the photo on the box shows the light sitting directly on top of the greenhouse itself. I feared that it would wind up melting the plastic when left on for a long time or get knocked off and wind up broken. Those grow lights can be expensive! It gives TONS of light, even mounted a couple inches above the box. Much more than the light through the window or the grow bulb I had rigged up the previous year. This was a nice kit- the lid sits up almost a foot high, so the seedlings have plenty of room to grow, there are vents in the top that can be opened and closed. I’m not sure exactly where he got it, but I found one on Amazon that looks very much like this one for around $50, light included: Table Top Seed Starter Kit

There are some really pretty Victorian style ones if you’d rather have something elegant that isn’t plastic. I’m happy with this, it gets the job done, it’s washable and it will do a fabulous job growing strong seedlings. I’ve always had issues with not enough light in the past. Our only window with southern exposure is in our office. It’s tiny, the cats love to knock off the few plants that are in there, it’s not the most optimal place to start seeds. No cats here, it fits on the counter and did I mention… I really love the light. There’s something really inviting about it, like with real sunlight.


I’m doing several different sorts of tomato this year, as I couldn’t decide which I liked best. I have a yellow cherry, a roma, a beefsteak and a roma grape that we’re going to try. I’ve been saving up bell pepper seeds from the peppers we get from the grocery store, they worked fine last year. They aren’t quite true to the original, but actually had a stronger (but still sweet) flavor. Peppers LOVE heat, so I may keep some of those plants in the greenhouse this year and see how they do. We also have a package of carrot seeds that Burpee sent as a free gift. We’ll be starting cucumber and snow peas, but I direct sow those into the garden at planting time instead of starting them in the house. Peas don’t mind a little chill and cucumbers grow extremely fast and produce long before other plants that are direct-sowed.

I use a basic seed starting mix (which is mostly made of peat) to fill the bottles. The reason you use this instead of potting soil is that it’s sterile- meaning there shouldn’t be weed or grass seeds sprouting in it and competing with your plants. Also, it’s very light, fluffy and holds water well, so those frail little starter roots don’t have to fight through heavy dirt to get moving. I filled  over thirty bottles with a single bag.

The Popsicle sticks I saved from ice cream bars. I love these things, they are great for stirring paint, apply glue or plaster, scraping sticky things and work great as plant markers. I just write on the ends with a permanent waterproof marker. The last time I started seeds, I used bendy straws. Whatever you have handy is fine, so long as it’s waterproof and you can write on it. I’ve used bits of foam egg carton, plastic bottle, straws, peeled tree branch, you name it.

010

This is the final set-up, all planted and sunning on my counter. I noticed that the the light spreads quite a bit past the sides of the greenhouse. I think I may add a couple more bottles on one side with a  pear and cherry tree seeds I want to play with. If I don’t cut the tops all the way off, they’re like single mini-greenhouses. Might as well take advantage of that light! 🙂

I’ll post more progression pictures as things start to sprout. One note on water- don’t drown your seeds! They only need a bit of a drink to start with, then check them every day to make sure they don’t dry out, but don’t let them just sit in water. It can rot delicate roots very quickly if they get too wet. I don’t have a heat mat under mine, so they don’t get quite very warm and dry out quickly. The clear bottles aren’t organic like peat pots, toilet paper rolls or as convenient maybe as plastic cell flats- but they are really nice for checking on whether the plant needs water at a glance (the peat is darker when it’s wet) and how the roots are coming along. If there are seeds near the side, you can even see them break through the seed coat and sprout. My daughter loves to watch this happen, she thinks it’s amazing.

She helped plant and water all the seeds. She even tagged a couple of the sticks for me. 🙂
She’s a wonderful little garden helper.

I was serious about those water bottle tops. I would love to hear your ideas or suggestions. I hate putting useful stuff in the trash!

-B


What to get girls that play in dirt

For years I’ve told my husband that I don’t want a vase full of dead flowers for Valentine’s Day, or jewelry that will likely gather dust in a box somewhere. Instead, he has always bought me plants with the roots attached or some other garden-related gift. One year it was a little pond, one year a bunch of hyacinths, daffodils, etc. in a bowl. Those I still have and they are over 10 years old.

This Valentines he didn’t get me plants with roots. So what’s better than plants to get a Belle of Dirt? A place to PUT plants into DIRT, that’s what! He spent this weekend putting together a new greenhouse, just in time for seed starting and spring planting.

It’s freaking huge! He added a couple of fold up tables for me to use as potting benches. I have a place to keep my tools now, and store bags of mulch or dirt until I use them and pot plants. Plant potting has been one of those thing that I’ve always done on the back porch, balancing things on the railing and dropping my trowel in the yard AT LEAST 3-4 times.
I’m hoping this greenhouse will give me a great place to rehab a couple things that need a little extra help, I may even try growing my peppers in it this year instead of in the garden. (Peppers LOVE heat)

Thank you Mister Man. You made her entire spring! 🙂

Loves him,

Girl who plays in dirt

Spring Fever

It’s in the upper 60’s today in JANUARY. I have spring fever already! There are seed catalogs pouring in by mail and my husband bought me a table top seed starter for Christmas, so I’m ready to go.
This year we’re starting a couple of new fruit trees, a grape vine, some strawberries and several different types of blueberry. I’ll write more about each of those as I start the projects and get them in the ground.
Today I ordered most of my seed from the three websites that I frequent most. I’ve had good luck with plants from all three of these. Burpee is my favorite and usually sends me the best coupons. The other two tend to carry unusual things that Burpee doesn’t, like special hybrids and a larger selection of fruit trees. I like to browse the paper catalogs and then order online. You can get to their websites at BurpeeGurneys and Jung Seed.

I garden in Zone 6, in Mid-Missouri. Our last frost date is about the end of April. I usually begin seeds indoors sometime in mid-late February for plants that I’ll be starting inside. Last year, we went on vacation in early May, which is when I usually start putting in my garden, so I waited until we got back to start things. Direct sowing in Mid-May was fine, I didn’t hit frost or lose any plants, but some things we planted took SO LONG to produce that the season was almost over before we saw anything from the plants. The watermelon we planted didn’t produce watermelons until almost September. It was late July before we saw tomatoes.
I have a lot of patience, but I have to admit, direct sowing really tested it last year. So it’s back to seed starting inside for me. I usually start at least peppers and tomatoes inside, so that the plants are almost a foot tall before being transplanted outside in late April or the first of May. The cucumbers and peas I’ll direct sow; they grow SUPER fast, so they don’t really need that extra couple months to get a jump on the season.
While I wait for the ground to warm up, I’ll spend nice days finishing my fence and starting some new hugelkultur mounds for the fruit trees and grapes. I’m also going to be doing some landscaping around our picnic table/firepit.
I’m off to enjoy this weather while it lasts, looks like we’re back to snow next week!

Enjoy shopping and planning those spring gardens! That groundhog had better not see his shadow Tuesday, or I’ll be gunning for the little sucker. 😉

-Belle

Baby it’s COLD outside  

BRRRR! I got spoiled with our mild October weather. Today really FEELS like winter is on its way. It feels like it for my garden too. Everything that wasn’t covered last night is wilted and frost-nipped today, but the REAL cold hasn’t even truly hit us… yet. It’s supposed to get down in the 20’s this weekend, followed by several nights of at or below freezing temps. The garden is taking a true dirt-nap, any annuals that have struggled along are now down for the count. 010
I have a few things around the yard that are perennial, but they need a bit of help surviving a Missouri winter. Mostly I buy plants that will be suitable for zone five or below, even though the Lake area is in a tiny hot spot of zone 6b. Sometimes though, even plants that are properly zoned can use a little extra help for a year or two until they get deep root systems established. Also, I don’t like digging up my elephant ears every fall, (it’s a pain to pot and store all of them) so I’m going to try caging them year and see if the bulb can survive in the ground till spring.

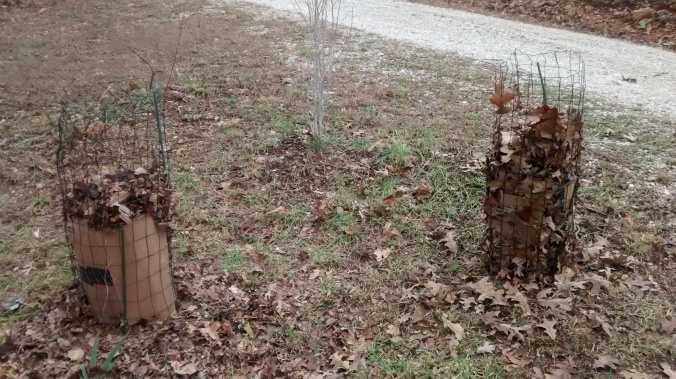
It doesn’t take too much work or cash to see a tender plant through the winter. I’ve caged a very small rose bush, two little crepe myrtles (a new type, supposed to be cold hearty to zone 4, but until they’re bigger, I’m 009not risking it!), my Japanese Maple that Tom and E bought me (it’s the graft site on this that concerns me) and the elephant ear. I save my cages from year to year and use them as compost towers in the garden during the spring/summer/fall. They made some great compost this year to toss on top of the garden mounds and served as an convenient place to toss organic waste while I worked in the garden.

These cages are nothing more than a bit of that plastic coated garden fence (3 to 4ft), formed into a cylinder and held in place with yard stakes. I use the leftovers I have lying around from where we fenced the yard years ago, but they do sell it in smallish rolls at the garden center if you don’t have any scrap handy. My cages are only about a foot or so across, so a 3 foot long section will make a single cage. For the elephant ear, I made a new one that was about 3 feet across. This took a section of fence about 5 feet long. I snipped off one end with wire snips, leaving the long horizontals, these can be used to wrap around the fence after you roll it into a cylinder- no extra wire needed.


I carefully place the towers over the plants I want to protect. The bigger the plant, the bigger your cage is going to have to be. I used cardboard this year to line the cages before stuffing them with leaves. Last year I lost almost 50% of my leaves to breakdown and wind before spring. By the time it started warming up; the tips of my plants were showing through the top. The crepe myrtle and rose are no more than a foot tall. The graft on the maple is about 2 feet up and the elephant ear, I’m really only protecting what’s in the ground. I use about 3 garden stakes per tower, kind of weaving them through the fence a couple times before shoving them in the ground. You want to do this BEFORE the ground freezes!

Towers in place, I raked the sidewalk. This filled about a tower and a half, so I had to mow the back yard and use that to finish off the rest. Mowing has the added benefit of chopping up the leaves and adding other coarse yard material. Leaves are excellent insulators. Just ask any kid that has climbed into a giant pile of leaves, raked up in the fall. They are nice and warm under all those little layers of air. The cardboard adds another layer. I stuff the towers from the bottom up, packing them firmly, but not ramming the leaves down so hard that it snaps branches or crushes the plant. You want to protect it from freezing, not ram it into the earth.

Mowing the yard to get leaves gave the added benefit of my not having to rake massive piles and then figure out what to do with them after. Burning leaves sets off my asthma in a big way, so I hate having to burn those huge piles every fall. I spent all of 20 minutes raking this year and we have a BIG yard. The only intensive raking necessary with the mulching mower is to get the leaves away from the fence so they can be chopped up. (Mulching mower isn’t some highly specialized machine BTW- it’s simply a push mower with a grass bag attached)
I did rake the yard lightly after mowing, to get up any remaining leaf bits, thatch (common with Zoysia grasses) and little rocks that have surfaced. 20 minutes of raking and my yard looks like this.
After I’d filled up my leaf towers, I used the rest to put mulch rings around our trees.

If I remember this summer, I’ll try to re-post here about whether or not the leaf tower worked for the elephant ears. They are zoned for 8-10, but I’ve had them survive winters in the past by keeping them right up next to the foundation of our house. This one is on the foundation, but it’s on the North side not the South- which means it doesn’t benefit from the warmth of the sun- EVER. One more note on the towers… I can imagine some people find these cardboard and leaf towers standing in the yard to be an eyesore. Wrap them in burlap or black weed barrier fabric if you like. It will add an extra layer of protection and hide the ugly. I put Christmas lights on mine last year. 🙂

019

My daughter put in Frozen for us to watch today, built a tiny 3 inch snowman from last night’s flurries in our yard and made snow cones out of collected snow and Gatorade. The radio is playing Christmas songs, every other commercial on TV is about holiday shopping. I have to concede that my growing season is over and the chill is here.

Stay warm folks.

B

Quick raised bed

004My daughter threw a few zinnia seeds at the end of our driveway this spring, which resulted in a slightly haphazard patch of gorgeousness by midsummer. I mulched her spontaneous flower garden in August to help protect them from drying out too quickly in the horrible dirt they’d been planted in. When we cut away the last remaining stragglers last week, (zinnias bloom forever!) I promised her a much nicer medium for next year’s seeds.
This is my basic recipe for any raised bed I do in our yard now. It’s part hugelkulture mound, part lasagna gardening. Both are just fancy terms meaning I layer a bunch of organic material and then plop some plants in at some point and watch them grow.
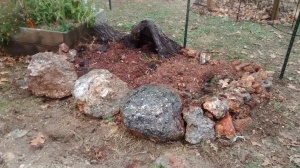
I was breaking down a previous very large bed I built nearly 12 years ago, so I pulled rock and small boulders from that to use as a border. Some of my beds are made with scrap lumber, some with purchased landscape blocks. Most of them are rocks from various places on our property- because they are a) free and b) look organic instead of overly formal and contrived.
Build your border out of whatever you like. Just remember you’ll want it high enough to accommodate several layers of material, unless you mound the bed (tall center, near ground-level edges.)
First layer, if you are concerned with underground lovelies, such as moles, should be hardware cloth. Our “soil” here is clay and rock, rock and more rock. I seldom bother with hardware cloth. If you are lucky enough to have wonderful, silty soil, you probably have critters to go with it. Put down hardware cloth, save yourself grief later. (Hardware cloth is not actually cloth. It is a metal grid with holes small enough to put your finger through, but not small enough for rodents to climb through. I’m not sure why they call it “cloth” at all.)
FernWalk 006
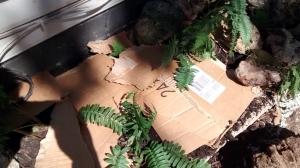
MY first layer is cardboard and/or newspaper. I receive a ridiculous number of catalogs and papers stuffed with ads from every grocery and hardware store within a 30 mile radius… And the occasional phone book. I use them for weed barrier. Worms like this stuff, MUCH better than they like that black weed barrier on a roll crap you get at the garden center. Put a nice thick layer on the bottom of your new beds in the fall, water well, you’ll have 99% fewer weeds to deal with later. I’ve also used cardboard boxes ripped up like in the photo with the ferns at right. Cardboard lasts longer, but it’s harder to place around delicate plants.
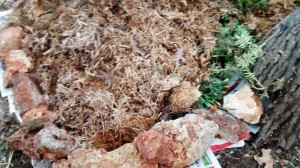
107To the newspaper, I add a course layer of twigs, leftover mulch, chopped leaves yard clippings, whatever I have around for drainage. I avoid grass cuttings though, because we have a lot of crabgrass that sprouts everywhere and that stuff is vicious if it gets a foothold.
Over the roughage, I’ll add the actual soil or planting medium. How amended this is depends a lot on what I’m planting. For annual flowers like zinnias or marigolds, native clay with a bit of last year’s compost is usually fine. If I’m planting veggies, I use a lot more nutrient dense mix. I may add blood meal, peat moss, mushroom compost.

By now you’ve probably built things up enough it’s time for the second course of border (if you used rocks). Some people mortar these together or use landscape adhesive. I used it when building the pond and can vouch that it holds pretty well. I just use clay to hold together most of my rock borders. Since our native soil is 70% clay and 30% rock or clay that has turned to rock, it makes great glue when it’s wet. Start the base of your border with newspaper or cardboard to keep weeds from growing up between. Add the first course of rock. Fill your raised bed to the tops of the first level of rock, covering the tops with a bit of earth. The lay the top course over the bottom. If you’re doing this with landscaping blocks, bricks or concrete that you purchased, you’ll need to level each course and use sand/mortar to secure them in place. Rocks are a bit more forgiving. Kids can even sit/climb on the big boulders without damaging the bed.

On top of leftover straw, I added a couple wheelbarrows of burned  up trash from our burn pile. Over this I added 3 wheelbarrows full of native soil. This spring, I’ll add the plants, maybe a little blood meal to give it a nitrogen boost and mulch on top of that. Water each layer well to settle the bed and prevent air pockets.

In seriously weed prone areas, I sometimes newspaper between the plants again, on top of the soil, to keep weeds from taking over between my plants.


The mulch I start as a light layer, then build to about 3-4 inches deep as my plants mature. The idea is to retain moisture and soil nutrient content without smothering your plants. If your mulching material is fine (like shredded leaves) you may need to add to it a couple times a season as it breaks down.
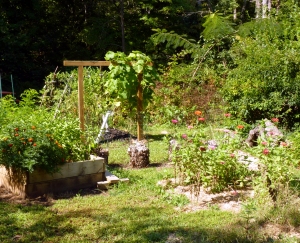
117That’s it. Follow that recipe for your raised planting beds and they will be low maintenance and grow very healthy plants for several seasons. As the organic materials break down, you may need to re-layer every 4-5 years or so. On this bed, I’ll eventually have to replace that big stump with rock as it rots… but it looks kind of cool for now. 🙂
Raised garden beds are MUCH easier than raking, tilling and hoeing all season. Healthier for the micro-organisms in your soil and for your plants too!
B